Page 2 - A Close Look - Outside
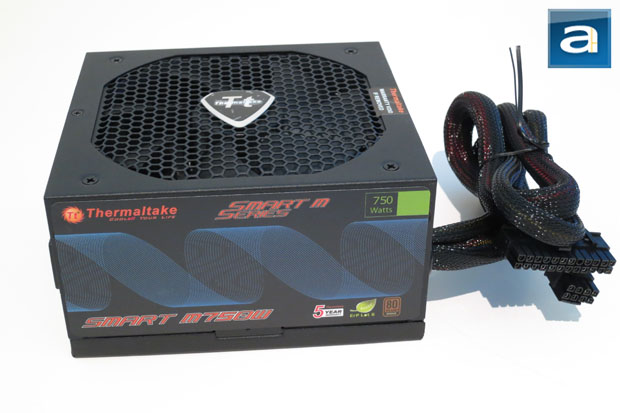
Looking at the design of the Thermaltake SMART M750W, I must say I am quite impressed for a budget power supply unit. A slightly rough textured black metal finish is used, instead of the standard black matte finish found on the previously reviewed Thermaltake SMART series PSUs like the Thermaltake SMART 730W and Thermaltake SMART 630W. The new design looks pretty well done, and the build quality itself is solid. My only gripe is there are too many stickers on the PSU; both sides have a giant sticker glued to the metal, which would definitely have looked better without. Easily seen from this angle is the included 140mm fan used for cooling the whole unit down. The fan can be found behind the familiar honeycomb mesh fan grille. Four screws can be found at the top, which is used to remove the fan from the unit, but there is no way to change the fan without opening the unit. Opening the unit will void the warranty. Two additional smaller screws can also be found at the top; one of them has the warranty seal, so removing these screws gives access to the internal components but also voids the warranty as well. Four additional smaller screws can also be found behind the stickers on the side, which also needs to be removed to open up the power supply.
Sizing in at 86mm x 150mm x 160mm, the Thermaltake SMART M750W is definitely one of the smaller power supplies we have seen that has an included 140mm fan. It is especially refreshing to see a 140mm fan in a compact sized power supply at this price point. This package will fit well in most standard ATX and eATX cases. Compared to the previous generation, the SMART M750W is slightly larger, but this comes at the added benefit of sporting a 140mm fan compared to the 120mm fan used in the non-modular variants. Generally speaking, there will only be one size that needs to be checked before purchasing the power supply. This will most likely be true for mATX cases, which has limited space in comparison to its bigger brothers.
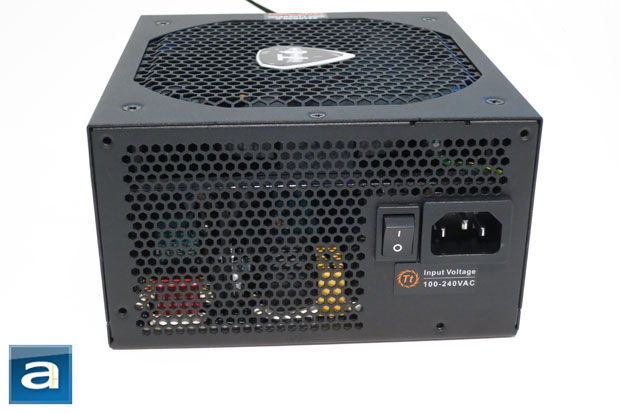
The back of the PSU has quite a standard design, as with most modern day power supplies on the market today. There is honeycomb mesh grille surrounding a power socket, which can be found on the right side. Unlike some designs, however, there is a power switch to the left of the power socket. There may be times when using the power switch could be useful, but in my past experience, I can't say I have exactly always used the feature. One thing is for sure, pressing a switch is much easier than removing the power cable and inserting it again later. Like most modern power supplies, the Thermaltake SMART M750W features an automatic full range (100V-240V) AC line voltage selection, so users do not have to adjust the input voltage for their current country, making it simple to just plug in the power supply, and start using it right away.
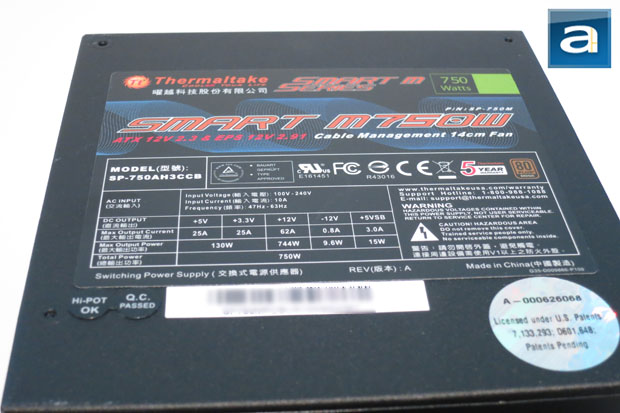
Found on the top of the Thermaltake SMART M750W is the standard power output/rail configuration information label. Information found here includes warnings, various certifications, and most importantly, wattage information. Combined together, the +3.3V rail and +5V rail gets 130W combined -- while independently, they can theoretically get up to 82.5W and 125W, respectively. In practice, we cannot go over the maximum combined output of 130W as mentioned. The above calculations were done using the formula P=IV. The +12V rail has a sustained current of 62A, which means it can deliver up to 744W. This is 99.2% of the power supply's maximum combined rated output. In terms of the -12V rail, it is given 0.8A of current for 9.6W output overall. Finally, the +5Vsb gets 3.0A for a total of 15W. All of this together cannot be higher than the maximum combined wattage of 750W, except at peak with is rated at 900W; useful for starting up your computer when some components require significantly more power to start up than to run such as hard disks. Overall, the numbers are quite impressive, and are well distributed for a budget oriented 750W power supply.
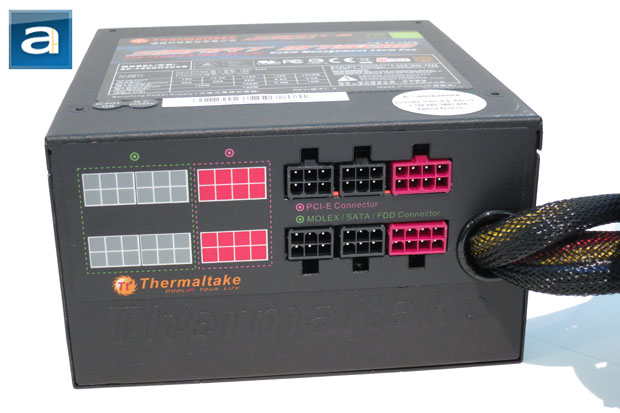
Like some power supplies we have seen in the past, the 20+4 pin motherboard connector and ATX 4+4 pin connector are perpetually attached to the PSU, both of which are 600mm long. Every other cable is modular, which has some pros and cons. The good thing about this would be the ease of use factor initially, but it could also cost negligibly higher efficiency loss. This is due to the fact energy loss can occur at the connector contacts, as opposed to things that are soldered down directly on the printed circuit board's output. Although I do for the most part enjoy having modular cables, I do not believe that every single one needs to be, such as the one for the motherboard. I can't be sure about this, but I hear most computer builders will have this installed all the time, haha. On a more serious note, it is a good thing two of the cables that are always used are soldered on. The only downside is if you ever have to replace the PSU, you can't just change the box itself, and not replace all of the cables, since two of them are hardwired. Either way, all of the modular cables are color coded to make sure the cables are plugged into the right slots on this portion of the Thermaltake SMART M750W. All of the included wires are 18 AWG, including the permanent wires.
The following non-modular cables are permanently attached to the power supply:
- 1x ATX 24-pin, 600mm
- 1x ATX 4+4-pin, 600mm
The following modular cables, with the quantity of total connectors, are included out of the box:
- 2x PCIe 6+2 pin, 2 connectors each, 500mm to first connector, 150mm spacing thereafter
- 3x SATA, 3 connectors each, 500mm to first connector, 150mm spacing thereafter
- 2x Molex, 3 connectors each, 500mm to first connector, 150mm spacing thereafter
A 150mm Molex to Floppy converter is included as well.
Page Index
1. Introduction, Packaging, Specifications
2. Physical Look - Outside
3. Physical Look - Inside
4. Minor Tests and Conclusion