Page 2 - Physical Look - Hardware; Installation
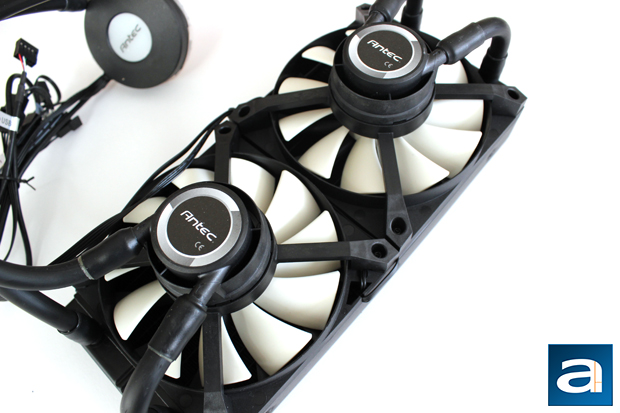
An overall look at the Antec Kuhler H2O 1250 will make you realize a few things. First, everything is already pre-assembled in a closed loop design, so you will not have to worry about any assembly. As mentioned before, this is an Asetek all in one cooler, but it is very much an Antec design. The fins on the fans are a cream white in color with eleven fins in total on each fan. These fans are best optimized for use in a push configuration. On top of each fan is a cylindrical turret, marked with an Antec logo. Instead of using the same typical OEM Asetek design, this turret is actually both the fan motor and pump. This allows Antec to increase pump performance without increasing noise levels. Generally, on most AIO coolers, a louder single pump is located at the cold plate, and is used to control liquid flow rates. With this design, Antec has pulled a Coldplay, and tried to fix this by giving the ability to increase the pumps.
There are some negative side effects to this design change. For one, the fans are stuck in place. If there are any issues with the fan or the cooler, you would have to replace the entire system, rather than replacing just the fans. You also cannot change the fans to some other third-party offerings from other manufacturers. Secondly, this means the fans and pumps run in tandem, so if fan speeds are reduced for lower noise levels, the pumps will move less liquid to and from the cold plate. Just to note, the fans are rated up to 2400RPM, with a 50000 hours MTBF (Mean time before failure).
Another big drawback from this design comes with the size of the unit. The Kuhler H2O 1250 radiator measures in at 280mm in length, 120mm in width, and 27mm in thickness. While this does not seem very thick, if you include the fan and pumps that are all fixed on the radiator, the actual thickness of the entire unit is closer to 95mm. This can cause some installation issues, as the fans or pumps may be obstructed by the motherboard headers. However, if you get a large enough case, this will mitigate your problem. On the flip side, the radiator is quite large in terms of surface area, which should lead to better heat dissipation.
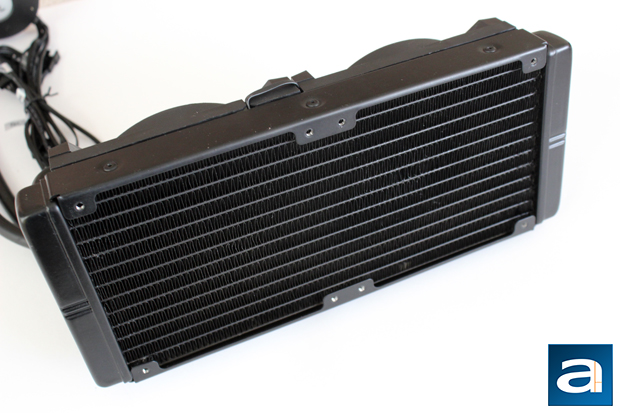
Taking a look at the radiator, you can see the standard S-shaped pattern with the aluminum fins. This design is very optimized for airflow and good aerodynamics. Two rubber tubing pipes lead out from both of the aforementioned turrets, and these are the inlet and outlet pipes for the liquid. One of the set of pipes connect to the cold plate and measure approximately 300mm in length, while the other set of pipes connect to the radiator. The tubing is quite flexible to work around with in different configurations. There are also eight mounting screws on the radiator to connect the unit to your chassis.
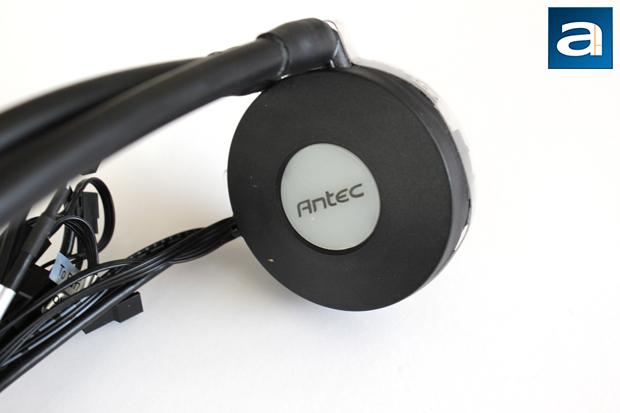
At the end of the pipes is the cold plate. Once again, because the pump is not located here, the actual block is quite a bit thinner. In the middle is a translucent area with Antec's logo. This area lights up during operation, and can be used to detect the temperatures using the included Antec GRID software. This goes from a bright white to a deep red, which corresponds with cold to hot. This is a pretty neat feature, since it allows users to check their relative temperature with a quick glance. Otherwise, you might also notice there is a huge bevvy of wires coming out of the water block. One set of the wires are to power the two fans attached to the radiator. Another wire is to connect to the motherboard's 3-pin header. The last wire is used to connect to the USB pins, which allows the GRID software to control the fan speeds.
On the flip side of this small puck is the cold plate. Antec has already pre-applied their own thermal paste onto the plate, so you will not have to worry about applying or buying your own paste. As for the cold plate contact material, Antec has chosen copper, which offers a thermal conductivity of 401W/mK. This is probably one of the better materials to choose for transferring heat. Nickel is another common choice, but it offers a lower thermal conductivity of 90.9W/mK. However, nickel can withstand corrosive environments better, and thus will not oxidize. Either way, both will do the job. One last thing I should cover is the pump itself. Following the formula P = IV, the entire unit is rated at 12V, which is equivalent to 2.9W. The pumps are powered by the motherboard's 3-pin header. Overall. the external build quality of the Antec Kuhler H2O 1250 is quite impressive, and everything feels solidly built. The rubber pipes are the only thing offering some give, which is a good thing when considering flexibility.
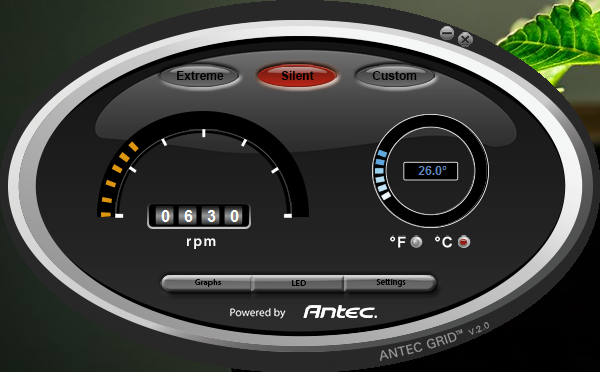
Above is a screenshot of the GRID software included with the Antec Kuhler H2O 1250. As I have mentioned before, with this you can alter the LED colors produced from the water block, or you can make it temperature dependent. There are also three profiles for fan speeds: Extreme, Silent and Custom. Extreme sets the fans at around 2200 RPM and increases upwards from there, depending on the load. Silent sets the fans closer to 600 RPM, and again, increases depending on load. Custom allows users to adjust the fan speed to their liking. There are no custom fan curves however, which allow users to change the fan speeds at specific temperature levels. Otherwise the software is simple and easy to use, and I never had any issues running GRID.
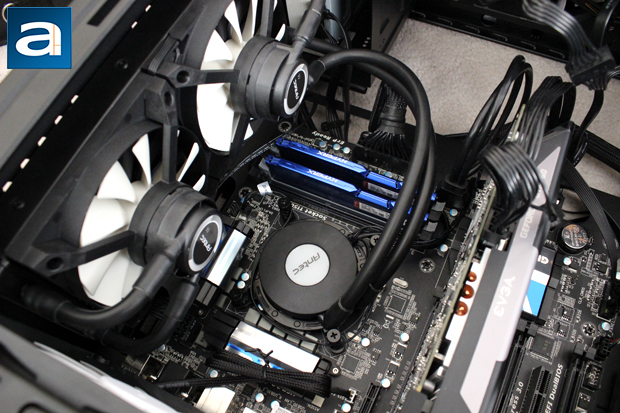
Before we actually use the software, we have to actually install the closed loop cooler first. I will be demonstrating this on an Intel LGA1150 socket, as this is the only option I have. The process itself is quite similar for other Intel sockets or for AMD builds, except you will be using different holes for the screws and bolts. Going by the instruction manual, I attached the plastic backplate with the provided 3M foam tape to the back of the motherboard. Afterwards, I inserted the bolts for the cooler to screw into. Next I adjusted the cold plate mount with the provided spacers for Intel boards, and I twisted it onto the cold plate. Before continuing, I should mention if you have removed the thermal paste from the cold plate, be sure to you apply some to the processor. While there are several ideas as to the amount of paste to apply, it is widely accepted to apply an amount no larger than frozen pea, but there are different schools of thought for this.
The tricky part came when applying the cold plate screws to the motherboard mount. Since the bolts are not stuck in place, you need a hand on both sides to keep the bolts in while twisting the screws. It would have been nice for the bolts and the backplate to come as one piece, with it being adjustable in terms of position and still attached to the plastic plate. This would mean you do not have to worry about the bolts falling underneath the chassis. With some time, and some extra hands, I was finally able to screw the water block on top of the processor. Luckily, the mount holds the cold plate quite well, and does not allow for much shifting.
I could have installed the radiator either at the front of the case or at the top, since the Fractal Design Core 3300 has the accommodation for both. Again, be sure your cooler does not interfere with any parts of the motherboard, or else I cannot say it will be an easy install. Since I did not want to move my current front fan away from where it was situated, I decided to throw the radiator facing upwards to the top of the case. With the panel, I simply aligned the holes to the top and mounted it in place. The radiator is the larger, more inflexible part of the cooler, so I would follow Antec's recommendations to mount the water block first before the radiator and pumps. Even with the flexible tubing, it would be much more difficult to do so in the reverse order. Overall, installation was tricky and there were places Antec could have improved on, especially when mounting the cold plate to the processor.
Page Index
1. Introduction, Packaging, Specifications
2. Physical Look - Hardware; Installation
3. Test Results
4. Conclusion


