Page 4 - Installation and Conclusion
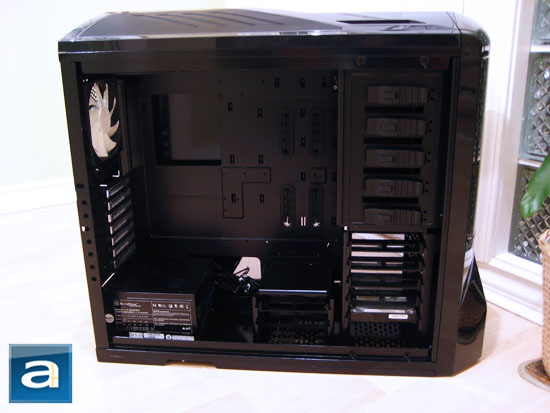
Installing the motherboard was quite straightforward with the included standoffs, so let me get that out of the way first. To move in chronological order, the first thing I installed was a 3.5" hard drive, which proved to be very easy. This was due to the four rubber grommets and pins on each tray, making for an easy tool-free installation procedure. On top of that, the grommets also provide vibration dampening, reducing overall noise emission. After placing the tray in, and voila, it is ready to go. Next up, I installed the power supply using four thumbscrews that were included with the NZXT Phantom -- again, this was easy. It was nice of NZXT to include a multitude of screws, including extra thumbscrews, for those pesky jobs that normally require a screwdriver. 5.25" drives were easy to install, but as I have mentioned earlier, the locking mechanism was a bit insecure, so I ended up using two additional screws to make sure it was fastened correctly.
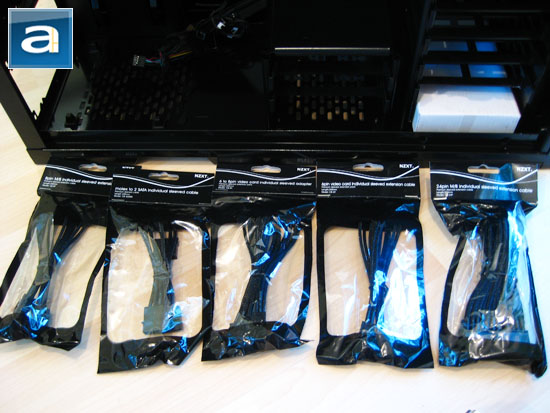
Cabling is also a piece of cake, thanks to the NZXT Phantom's excellent cabling system. Four cabling cutouts on the motherboard tray allow cables reach most regions of the chassis, in conjunction with the included extension cables proves to be a great combination for excellent end results. The benefits of having a full tower case really shine here for lots of room to work with, even if you don't own an eATX motherboard.
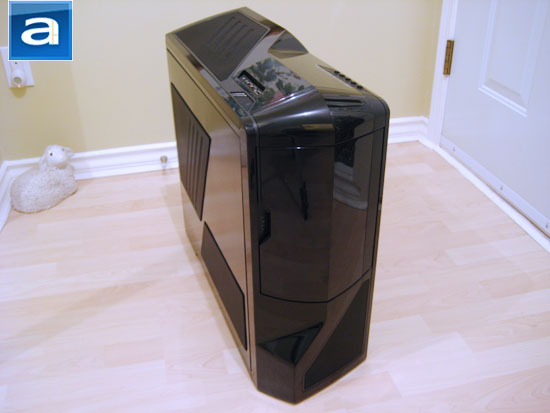
When it is all said and done, the case looks the same as it was before being built. The clean black panels with the front door closed looks very appealing in my opinion. Build quality is top notch, with no sharp corners or visible defects anywhere to be seen. The only problem I have to reiterate is the possibility of fingerprints on the glossy panels, especially when opening the front panel to access optical disc drives. Luckily, the power and reset buttons, as well as the slew of standard inputs and outputs, are located up top, so the front door would not be opened and closed too often.
Powering up the system to test the fan controller, I am pleased at how well it works in real life. It effectively allows the user to set the speed of connected fans as intended. I have also isolated the NZXT Phantom components, and configured it to do our subjective sound tests at the loudest setting, in order to give a good approximation of the maximum noise generated from the stock fans alone.
On a scale from 0.0 to 10.0 where 0.0 is silent and 10.0 is the loudest, the fans at the highest setting would come in at around a 4.0. It produces a slightly audible buzzing noise when you are very close to the case, but in normal work times, toning down the fan speeds will do wonders in keeping the noise level down. The stock fans are quiet enough, unless one is all about silent optimizations based on standards of our Editor-in-Chief Jonathan Kwan haha.
-----------------------------------------
With all the fierce competition in the computer case market, the sector has continues to heat up, and manufacturers have come up with more choices to cater to the end user like never before. With so many choices to choose from, it makes us virtually impossible to claim that there is one perfect computer chassis in all areas. However, in my opinion, when it comes to the Phantom, one thing I am sure is that it challenges all the other makers to step up their game as well. NZXT has been well known here on APH Networks to score consistently well in our reviews, and with the NZXT Phantom, they have done it once again. I thought the NZXT Panzerbox I reviewed last year was one of the best cases I have owned. However, after taking a quick spin of the Phantom, I realized just how much more could come from a case. I really like the way it looks, solid build quality, awesome cabling system, a plethora of accessories, and more. And who could ignore the excellent five channel integrated fan controller -- considering how a third party unit easily takes up a whole 5.25" bay, and run you at least $30. If you don't like air cooling, the NZXT Phantom already has four pre-drilled holes for all your tubes. On the other hand, it is practically impossible to come by a perfect product, and of course this is no exception. The implementation of the tool-free drive bays are a mixed bag, while 3.5" drive bays were easy to use and works perfectly, I found the 5.25" drive bays to be not quite secure enough. Another problem is the possibility of dust piling up with all the mesh panels. If the user chooses to take out a case fan or decides a ventilation opening is not needed, a way to close it off would be highly preferable. Overall, the NZXT Phantom is one of the most fully featured cases we have reviewed on APH Networks. Coming in at just $139.99 retail at press time, the NZXT Phantom offers tremendous value for your money.
Special thanks to Matt representing NZXT for making this review possible.

APH:Renewal Award | APH Review Focus Summary:
7/10 means Great product with many advantages and certain insignificant drawbacks; but should be considered before purchasing.
8/10 means Definitely a very good product with drawbacks that aren't likely going to matter to the end user.
-- Final APH Numeric Rating is 7.9/10
Please note that the APH Numeric Rating system is based off our proprietary guidelines in the Review Focus, and should not be compared to other sites.
The NZXT Phantom is an excellent chassis that provides high end features without a high end price.
Do you have any comments or questions about the NZXT Phantom? Drop by our Forums. Registration is free, and it only takes a minute!
Page Index
1. Introduction, Packaging, Specifications
2. Physical Look - Outside
3. Physical Look - Inside
4. Installation and Conclusion


