Page 2 - Physical Look - Hardware; Installation

The Reeven Brontes RC-1001b is very small in all its dimensions, and it should fit into any build, but is intended for smaller sized systems. The overall dimensions are 105mm in width, 59mm in height, and 114mm in depth, making it theoretically perfect for a mini-ITX sized system. As expected, with a small sized cooler, the weight comes in at 325g. This is by far the smallest and lightest cooler I have reviewed, but hopefully its performance is still strong, even for its small size. The design of the Reeven Brontes is simple, with the bulk of the heatsink sitting almost on top of the base plate. The two parts are connected by four heatpipes leading out of it. The fan sits on top, and leads air through the cooler. Whether you push or pull is dependent on the orientation of the fan. This works well, since it also cools the surrounding motherboard components slightly. However, when the system is under load, hot air can potentially be recirculated around the motherboard, unless you have adequate case cooling. When the Reeven Brontes is installed, the only part really showing is the yellow and black fan, which could either look really good with your case, or clash with the rest of the aesthetics of your computer system. However, because the base plate is completely covered and all the screws were screwed in from behind, it made the installation process relatively easy, but I will talk about that more later in the review.
To complement the small sized cooler, included is a small fan as well. The fan's dimensions come in at 100mm in width, 100mm in height, and 12mm in depth. The fan sits nicely on top of the heatsink. With a range from 650 to 2200 RPM, this fan should be able to really ramp up its cooling capabilities as your system heats up. For anyone who appreciates more technical specifications for a fan, here are a few more. The CFM, or cubic feet per minute, measures the airflow, and this fan is rated at is 11.89 to 30.39 CFM. The static pressure comes in at 0.008 - 0.58inchH2O. In regards to airflow, the fan is not a top performer, but what also needs to be taken into consideration is the fan is not for intake, but merely to keep air moving through and around the cooler. For these purposes, the technical specifications are good enough, but we will have to see how it performs on the next page.

The Reeven Brontes RC-1001b has forty-five aluminum fins, with four heat pipes leading out the one end. The fin stack sits really close to the base plate, and is mostly just supported by the heatpipes leading out of the base plate, and into the rest of the cooler. Overall, I found the cooler to be aesthetically pleasing, and the silver look everywhere, including the base plate, creates for a high quality looking product. The base plate is copper, but nickel plated to prevent corrosion or any other damage that copper is susceptible to. Copper has a thermal conductivity of 401 W/mK. The nickel plating will not affect heat transfer to any significant degree. Nickel has a much lower thermal conductivity than both aluminum and copper, but the nickel plating is a very thin layer ensuring its impact on the heat transferring capabilities of copper is minimal. The reason for the nickel plating is to ensure the copper does not corrode over time. Nickel is better at handling the harsh environment of your computer, while at the same time preventing performance loss over time. The same goes for the heatpipes, as they are nickel plated as well. The fins are made out of aluminum, which has a much lower thermal conductivity at 237W/mK, but aluminum is much lighter than copper to reduce the mechanical stress put on the motherboard.
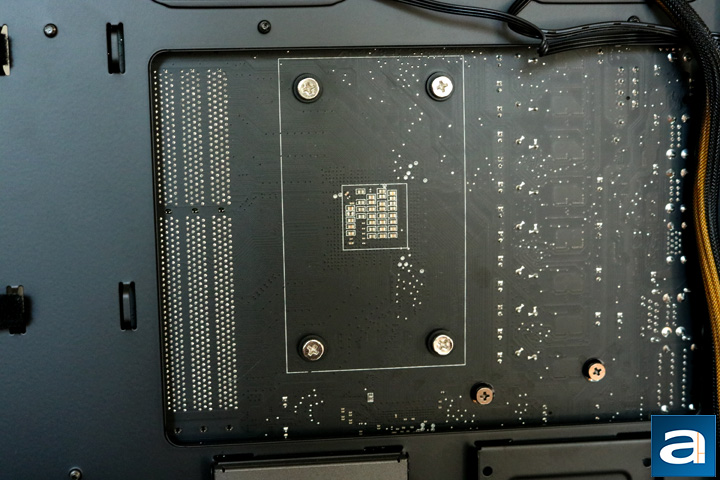
Installation was a bit of a struggle, even though installing a new heatsink should be an easy task. I tried to install it from the perspective of someone who has never done it before, and thus I used the included instructions for the installation. The instructions could be clearer as they are just pictures, and I got quite confused, especially when it came to wondering whether or not to use the standard AM3+ backplate. I opted for no backplate at all, because I had padding between the screws and the motherboard, and the Reeven Brontes RC-1001b was very light to not put much strain on your motherboard. There were few steps to the entire process.

After ensuring the processor was clean from previous thermal grease, I continued to the rest of the installation. Included with the Reeven Brontes RC-1001b is a small plastic sachet of thermal grease, which makes applying the right amount rather challenging. Because there is no way to access the screws from the CPU side of the motherboard, they have to be screwed in from behind. Trying to hold the cooler in place, while at the same time screwing in the screws in the right position, is fairly tricky. I positioned the cooler with the heatpipes on the opposite side of the RAM area, and because of this, there was barely a centimeter of room between the cooler and the already installed RAM. I found this troubling, because the RAM I have installed have no heat spreaders, and are already low profile. The heatpipes also stand out enough to touch the first memory slot. With an installation on an AMD board, it is really hard to orientate the cooler in multiple different ways; effectively there are only two ways to orientate it, and hopefully that will be enough for your build. However, with an Intel board, there are different ways to orientate the cooler as to not interfere with your RAM. Apart from everything mentioned, the overall installation could still be improved. Let us move on to the next page to see how it performs.
It should be noted we originally intended to install the Reeven Brontes RC-1001b onto our Gigabyte GA-Z170N Gaming 5 mini-ITX board for testing, but there was interference from the board in all orientations. More annoyingly, it was not only the RAM running interference, but even the PCI Express slot and the motherboard power connection. It is quite unfortunate as this cooler is intended to be used with smaller builds, yet cannot fit on our small motherboard. Even still, your mileage may vary.
Page Index
1. Introduction, Packaging, Specifications
2. Physical Look - Hardware; Installation
3. Test Results
4. Conclusion


