Page 4 - Installation and Conclusion
Considering the size of the Sentey Arvina GS-6400B, it is to be expected there is quite a bit of room inside to play around with. Installation of all the components was fairly straightforward. Hard disk drives were very easy to install thanks to the tool-free design. The optical drive, on the other hand, was a bit more work, since the entire front panel needed to be removed in order for it to be installed. However, once the front panel is removed, then the rest is easy. Next, I went to install my Corsair HX1000W modular power supply. Again, this area here was very easy to access, and once put into place it was very snug. The rubber padding around the power supply made it clear there would be no vibrations after installation.
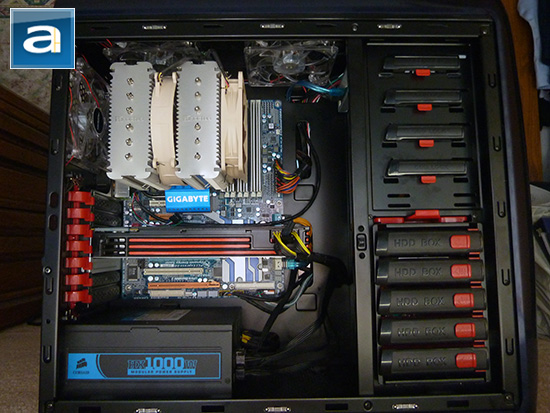
During my installation process, I popped off the side panel fans. This was a very quick process, as it comes off easily with only a little bit of force. The joint is designed so that under normal usage, it would stay in place, but if you ever need to take it off, it won't stand in your way. I particularly like this design here, as it a cleaner approach in providing additional airflow over the graphics card area. I have the tendency to install the motherboard last; in this case my Gigabyte GA-EX58-UD5 with my Intel Core i7-920. This is due to the fact I like to get everything lined up prior to putting it into the case. With my Noctua NH-D14 CPU heatsink, there isn't very much room to play around with cables once it has been put into the case. After routing the CPU power cable, two PCI-E power cables, and the 24-pin motherboard power cable through the back side of the case, I then put the CPU power cable through a conveniently located opening at the top back corner. Once this was plugged into the motherboard, it was time to line it up and screw it in.
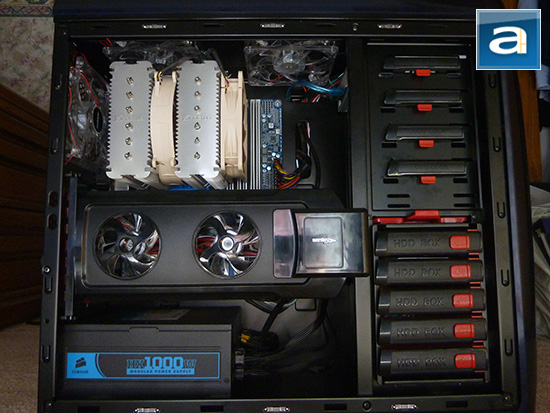
The screws that came with the Sentey Arvina GS-6400B fit in very cleanly to the attachment points. My next task was hooking up all of the components; you may have noticed I didn't install my graphics card just yet. Wiring up the I/O and power was fairly simple -- the openings along the front side of the case made cables easy to put through. Of course, I can always say they should have been a little bit larger just to make my life easier, but it really all depends on how many wires you are trying to route. Mostly for the fun of it, I decided to route every cable I could possibly use (some not even attached to any components) and it turns out the chassis is still pretty spacious. So if you do plan to have two optical drives, 5 hard drives, 2 large graphics cards and a large CPU cooler, well, you are in luck because this case can easily accommodate you. One thing that bothered me was the fan slot at the bottom. If you have a modular power supply (Such as myself), the fan will most likely block out some of the cable slots. You will then also need to make sure the wires are securely held into place, since you will now have a rotating blade beside your power cables (Scary thought). Once all the cabling was in, I slipped in my ASUS Radeon HD 6950, attached the power cables, and was good to go.
After everything plugged in, it was time to fire it up and see what happens; of course after quickly double checking my cables, haha. Once the case was on, there was very little sound, it was then that I realized that all the case fans were off. I went ahead and turned them all on. Surprisingly, the sound of the computer didn't change very much. The noise wasn't too big of a big deal to me since I generally don't mind a louder computer. I have noise cancelling headphones, so the computer fans generally do not bother me. This is where I noticed the top two fans were not working -- a sight of disappointment. Putting my engineering knowledge to use, it was time to crack open the case once again to figure out the issue. Playing around with the fan wire connections, I discovered the yellow/black wiring for the top two fans were not working as it should have been. Thankfully, the problem was not with the fans itself, but rather the wiring with the fan switch at the top of the chassis. Grabbing some copper wire, I manually attached my own power connection to the fans and viola, everything was working. This means the top two fans will always be on for me. This isn't a big concern, since I like to keep things cool versus reducing noise. I am not going to pretend this is not disappointing that I had to do some of my own personal wiring for the fans though. This is probably an isolated issue, but some better quality control is probably a good idea.
After everything is set and plugged in, our Sentey Arvina GS-6400B is ready to rumble as I hit the power button, bringing the system to life. Your finished system should look something like the photo above. There are not many changes you can make to your system now, other than where you want to position and situate it.
Of course, sound is a very important aspect to many people, and having owned and worked on many computer chassis in my past, I've had my fair amount of experience. On a numeric scale from 0.0 to 10.0, where 0.0 is dead silent and 10.0 would be the loudest, I would rate the stock fan noise to be approximately 3.5 with all of them turned on. This value is a standardized APH value, as verified by my colleagues here at APH Networks Calgary. This means my colleagues Jonathan, Preston, or Jeremy would have given the same rating. With everything turned off, well I guess it is hard to give it anything more than a 0.0. The fans were acceptably quiet when turned on, and over the normal sound of my graphics card and CPU coolers it made a noticeable but small difference between on and off.
Now normally here at APH Networks, we don't talk about system temperatures, because it is largely irrelevant nowadays. But for the sake of interest, I noticed my hard drives were slightly warmer than my old Antec Nine Hundred, even with the large 140mm fan blowing on them. My ASUS Radeon HD 6950 jumped up a few degrees on average, even with two 80mm fans blowing outside air directly on them. Oddly enough, with the fans on and off, it made no noticeable difference to the temperature of the graphics card. The CPU temperature hardly changed, but I wasn't expecting any significant difference with the Noctua NH-D14 anyway. Sadly, I saw a minor increase in temperatures across the board. I can't argue with it too much, considering it is significantly quieter in comparison to my Antec Nine Hundred.
-----------------------------------------
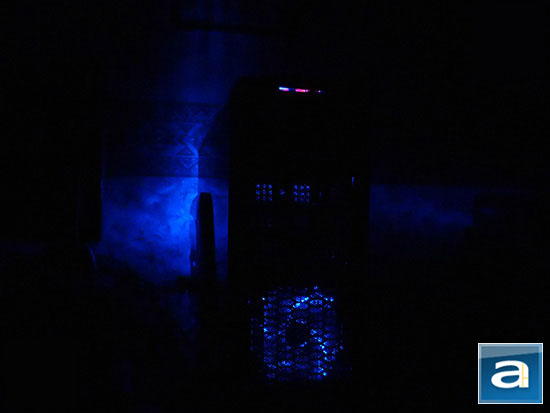
For about $100 at press time, it looks great for all the features you get on paper. The design of the case is clean and smooth with vibrantly accented blue LED fans. The power button has a crisp deep blue color, and the four fan controls have simple red LED lighting. For the most part, the Sentey Arvina GS-6400B is well designed in theory, but there are some major design flaws along with several minor design flaws. The first major flaw is it advertises eATX support, when in fact it is missing mounting holes specific to eATX motherboards. The second major flaw is the hard plastic at the front panel feels a bit flimsy and cheap. As far as minor flaws are concerned, the first minor flaw is the large unfiltered opening on the front of the case. The fact that there is a large exposed opening does take away from the whole point of using dust filters everywhere else. The second one is the top acrylic cover. A good idea; but more of an annoyance and not very worthwhile if you like to keep some USB devices plugged into the front all the time.
On the other hand, the side panels are very well designed; being rigid and easy to remove is definitely a strong point of this case. The top of the case has two fans beneath a mesh with dust filters which allows for good air flow from the top, but this just means you might want to think twice before putting anything on top of this case. The PCI expansion slot covers are non-replaceable, once removed they stay removed, this is a huge disadvantage if you switch out parts for your expansion slots. I don't suspect this is a big deal to the average user, but nonetheless it is something that should also be noted. On the inside of the case I particularly like the side fan design for the graphic cards. However, tests show that these two fans do not actually provide a significant benefit to the cooling of the graphics cards. The front fan for the hard drives looks very promising, but with the design of the hard drive bay, it doesn't keep it as cool as I'd hope. Not a huge deal, as it was only a two degree increase from my other chassis. Cable management was well thought out for this case; my only issue here is that the size of the holes is a bit small and because of that it reduces the ability for clever cable management. The ability to turn fans on and off as you choose is a nice feature; however, it would have been a much better idea to instead have fan control for each section instead of just a on/off switch. The tool-free design of the case is a definite added bonus to the overall package. I will admit that I might have been a bit harsh with some of these minor issues. Regardless of the minor issues, I do strongly feel this case will be worth its price tag if the flaws discussed in this review are addressed in a positive manner.
Sentey provided this product to APH Networks for the purpose of evaluation.
APH Review Focus Summary:
7/10 means Great product with many advantages and certain insignificant drawbacks; but should be considered before purchasing.
6/10 means A product with its advantages, but drawbacks should not be ignored before purchasing.
-- Final APH Numeric Rating is 6.5/10
Please note that the APH Numeric Rating system is based off our proprietary guidelines in the Review Focus, and should not be compared to other sites.
The Sentey Arvina GS-6400B is a combination of many great features and design innovation, but real life execution has room for improvement.
Do you have any comments or questions about the Sentey Arvina GS-6400B? Drop by our Forums. Registration is free, and it only takes a minute!
Page Index
1. Introduction, Packaging, Specifications
2. Physical Look - Outside
3. Physical Look - Inside
4. Installation and Conclusion