Page 3 - Physical Look - Inside

From obvious external features on the SilverStone Raven RV04, many would consider it an enthusiast chassis, and the internal build makes the same bold statement. Measuring 219mm in width, 581mm in height, and 497mm in depth as aforementioned, this makes the Raven RV04 quite a large case and in turn, an interior that feels quite spacious for most setups. The RV04 is a full tower case, so it can accommodate anything up to eATX sized motherboards. Once opened, you will notice the layout is much like any other chassis layout, except for the fact that the motherboard tray is rotated one hundred and eighty degrees. This is to provide the most optimal airflow without using a good handful of fans that make your computer sound like a jet. It is also fully painted matte black, as opposed to the raw metal color. Cable management openings around the motherboard tray are fairly large in order to encourage tidy work and a nice interior display, especially if you have the windowed version of the Raven RV04. On top of that, fan, case I/O, and other miscellaneous cables are sleeved in black nylon and bundled together, which further encourages tidy cabling. There is no sound proofing material on the panels of this case.
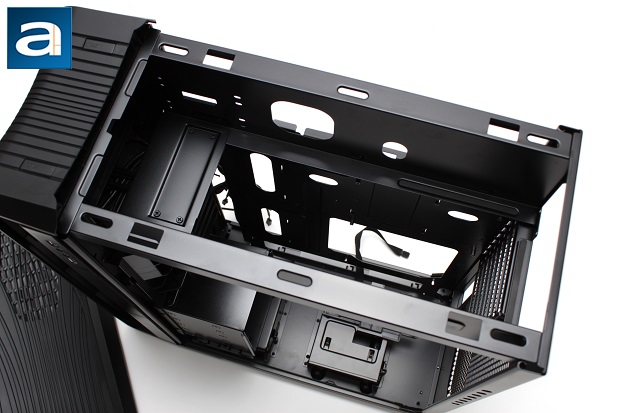
After removing both side panels, removing the top panel is fairly easy after removing a few more screws, as aforementioned. This will reveal the dedicated bay for the power supply and 5.25" drives. This reminds me of a similar design, implemented in the Tagan A+ Black Pearl WCR reviewed by my colleague Jonathan Kwan back in 2008, where the interior of the case was divided into various sections with an upside down motherboard. While SilverStone recommends a power supply no longer than 180mm, I found after installing my Cooler Master Silent Pro Gold 1000W -- a 180mm long power supply with modular cables -- there was still enough room between it and the 5.25" drives, so there is little to worry about here in terms of space.
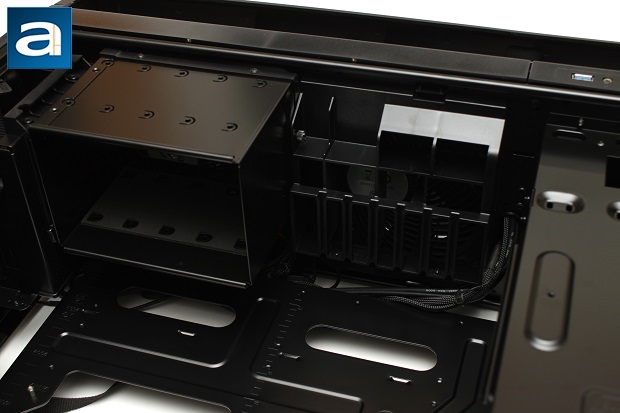
Turning our attention to the front of the interior, we find ourselves two removable hard drive bays, which supports up to seven 3.5" drives, two of which are supposedly hot-swappable. To further enhance your experience, the bays feature soft padding to ease the vibration caused by the spinning parts inside your hard disks. One thing I did notice, however, but didn't find it much of a complaint is you will need to remove the hard drive rack to screw in your hard drives. It seems like a slight inconvenience, and it would have been better off with hard drive trays, but on the flip side, how often do you remove your hard drives anyway? For those that have multiple hard drives, it may also cause a slight impedance in airflow, but personally, if you had that many hard drives anyway, why not have a NAS instead? In the accessory box provided, there are parts that are dedicated to such function to prevent stress on the motherboard. Moving on, you will see another rack above the drive bays, which is designed for extra cable management.
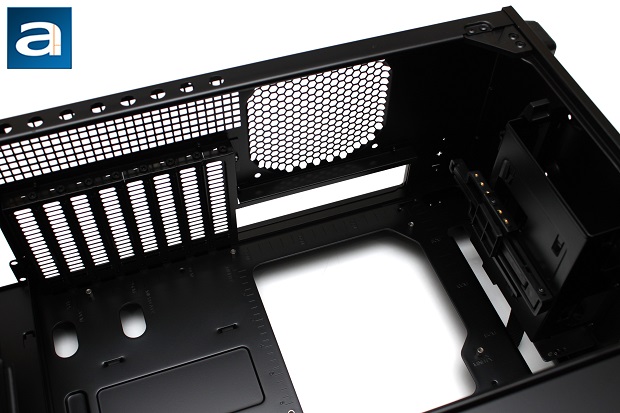
For those that have larger backplates for your aftermarket CPU cooler, the Raven RV04 features a very large opening on the motherboard tray to allow you to install them without removing anything. In addition, you are entitled to a plethora of expansion slots; eight to be exact, good ventilation space, and an optional 120mm fan slot. Be warned you will need a long Philips-head screwdriver to be able to properly unscrew and remove the expansion slot plates. From this angle, you can also see the CPU support to additionally relieve stress from the motherboard. This can easily be adjusted by unscrewing and screwing the respective screw to their respective hole after being adjusted. This is possibly one of the neatest and most creative ideas I have seen in a chassis, which shows that SilverStone is taking the enthusiast case to the next level.
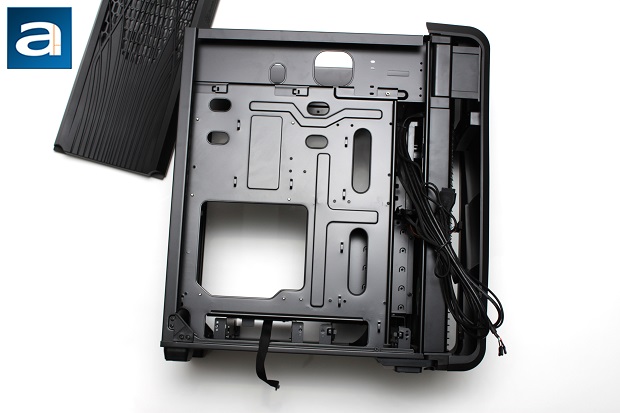
Turing your attention to the back side, you will notice that there is plenty of space here for many cables to be tucked away. Even the thick 24-pin power cable tied with other cables will have no problems fitting back here. By removing just a few screws, you will be able to remove the entire motherboard tray for easy installation of the motherboard, and in the long run, I believe many users will appreciate this for easy hardware swapping capabilities. One thing I noticed here was that while running my power cable from the top to the bottom where I had installed my SSD, it was starting to become a stretch. In other words, you better hope your power cables will reach that far, while keeping everything else neat and tidy.
Page Index
1. Introduction, Packaging, Specifications
2. Physical Look - Outside
3. Physical Look - Inside
4. Installation and Conclusion


