Page 3 - Physical Look - Inside

Finally, we are able to take a look at the I/O panel along with the other miscellaneous features. There are four pressure clips -- two on each side -- for keeping the plastic top panel in place. Keep in mind these clips are somewhat flimsy due to its plastic nature. Prying off the top panel at too much of an angle or in the wrong way may very well break the clips. Since the entire chassis is mainly made out of steel and is already quite heavy, personally, I would have preferred that this top panel be made of steel as well just to improve the durability factor. In reference to the photo above, there is also a plethora of ventilation holes on the left side, as well as on the bottom right. The ones on the left leads to the back side of the motherboard tray, whereas the ones on the bottom right lets heat escape from the expansion slot area. Speaking of which, the SilverStone Raven RV03 comes with eight expansion slots to accommodate all the components that you may have in this area. On the right side, we can see the exhaust fan with the fan grille to give the rising heat an extra boot out of the system. In between the exhaust fan and the ventilation holes on the left, you will find the I/O opening for your motherboard with the pre-drilled water cooling holes. There is also an extra plastic arc for the convenience of carrying your case around if you ever decide to move it. However, one complaint about this arc is that it is only held down on each end with two screws on each side. This may pose a danger, because considering the weight of your case with all its components installed, this arc can easily break off. By then, you should have said your prayers and hope that nothing else has been broken in the process.
If you have noticed by now, the plastic top panel must be taken off in order to slide off the side panels, as the thumbscrews are situated on the edges on top. Once removed, you will be greeted with the clockwise-rotated motherboard tray, as well as other standard features common to most modern cases. The purpose of having a 90 degree motherboard rotation is to improve the airflow characteristics of the case. Whereas traditional cases takes in air from the front and send heat out the back, the Raven takes air in from the bottom, and send it out the top. Since hot air rises, by working with nature, SilverStone has created a case that has one of the best cooling capabilities in the market today. This is all done without dumping half a dozen fans that not only makes your computer sound like a jet, but also at decreased efficiency due to confused airflow patterns.
Moving on, one thing I expected from such a case, and was the first feature I have noticed was that the interior was nicely painted black. The second thing I have noticed was the cable management openings implemented around the motherboard tray. Then something hit me right at that moment: Where do you install your PSU? On the bottom right corner, you will see the PSU bay; however, you won't be able to stick your PSU in from this side. Of course, if you can't go through the front, there is always a back door. So without further adieu, let's continue on to find out how to properly work the SilverStone Raven RV03 out.
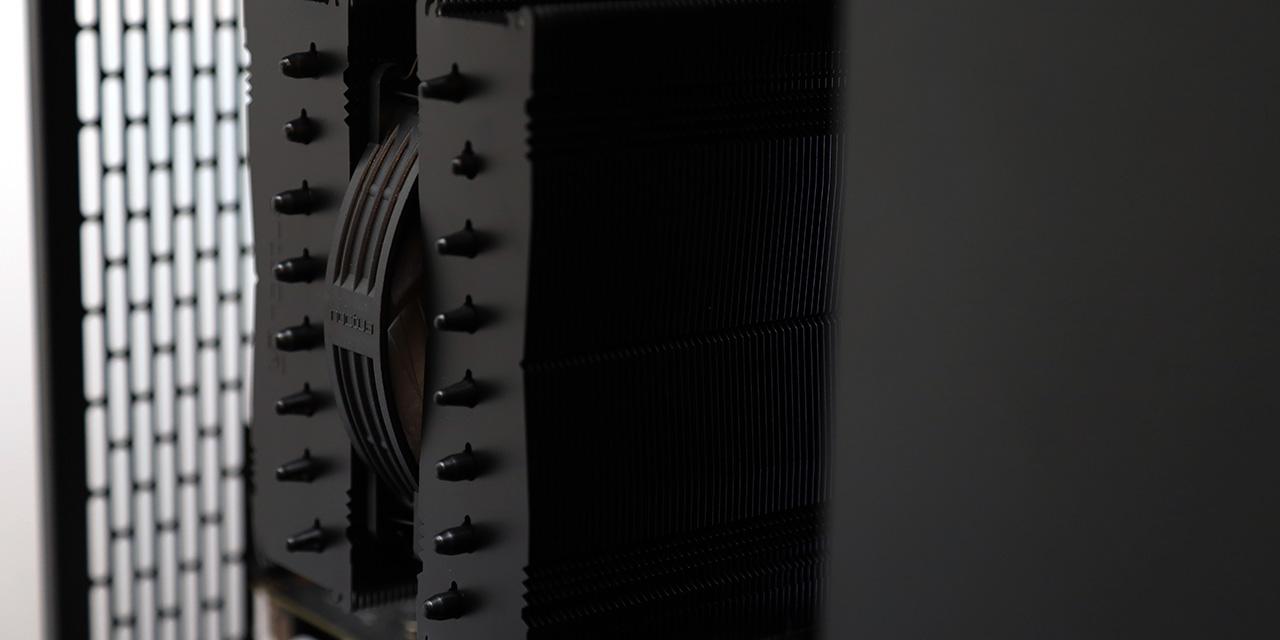
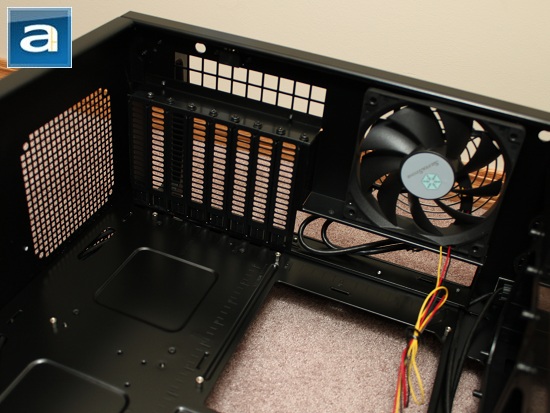
Clearly, from this angled shot, we can see the PSU bay, one of the two 180mm fans to its left, and the tool-free 5.25"/3.5" installation mechanisms. First off, in regards to the PSU bay, the SilverStone Raven RV03 comes with the standard four holes to securely lock your PSU in place. Remember how I was talking about the small opening where you can stick your power cable in? The power cable here is merely an extension to wrap around on the inside to reach the male connector found on your PSU. Two 180mm fans found at the bottom of the case are SilverStone Air Penetrator AP181 models that can either be switched between 700rpm or 1200rpm by an integrated fan controller, and are connected to the motherboard via their 3-pin headers. If you ever decide to uninstall these fans, you can easily swap it out for as many as three 120mm fans instead. However, I don't see why you would do that, as the Air Penetrator series fans are some of the best fans in the market today -- as reviewed by my colleague Kenneth a few months ago. As for the 5.25"/3.5" bays, you can very well see the tool-free installation clips. These are used to either mount the 5.25" drives themselves, or the 3.5" converters. Simply press the middle of the bottom side and pull, and it will come loose. Please take note if you do pull it too far out, the hinges will easily snap off, since these clips are made of plastic, too.
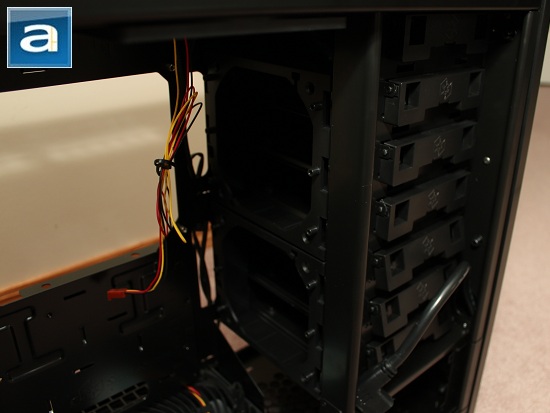
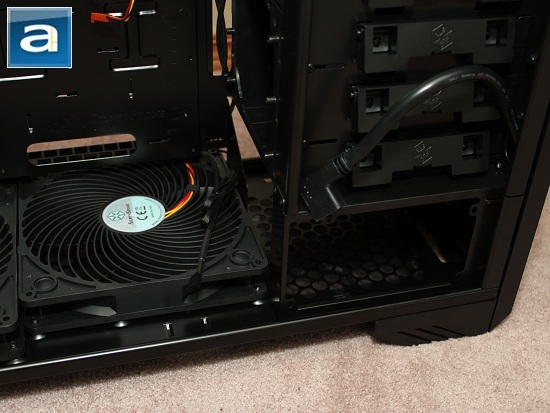
With another shot at this angle, we can now see the two 3.5" adapters taking up the lower six of the seven drive slots, with the top one being free to slot in to your 5.25" drive. In order to remove these adapters, there are two sets of four screws for each adapter on each side that you must remove in addition to the tool-free clips. One thing to note here is although the SilverStone Raven RV03 gives you the option of installing four 120mm fans in front, if you have both adapters filled with HDDs, you are only limited to two fans. Down the right side of the tool-free clips are small plastic hooks that keeps the front panel covers in place when no externally accessible drives are installed. Of course, the hooks featured on the opposing side are also to be secured. Evidently, next to this section, we can see a large opening on the motherboard tray. This is more than plenty of space for you to work with if you ever decide to install aftermarket heatsinks with backplates.
Here is a clear view of top and back corner of the Raven RV03, with the expansion slots, motherboard I/O opening, exhaust fan, and ventilation holes, in conjunction with a mesh at the back to support an additional fan. Regarding the expansion slots, it's not as tool-free as you would expect it to be. You will need to pull out your screwdriver to remove the screws on the cover plates before installing anything here. Personally, I have no complaints in this regard, unless you plan on playing around with multiple video cards and other components in your computer. Also, if you want to stick in that additional fan here, you will not be able to use that eighth expansion slot, simply due to the fact that the fan takes up the space.
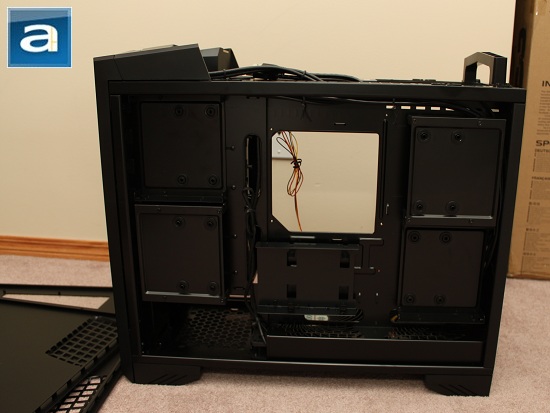
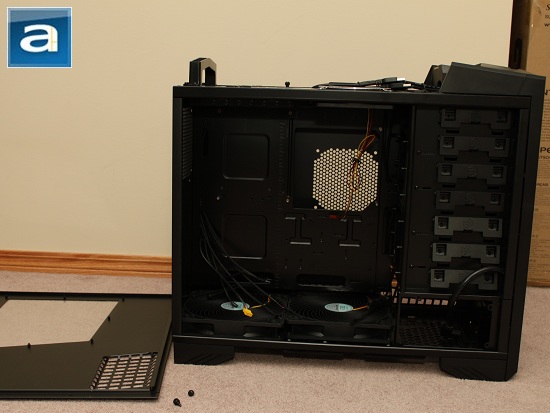
If you are really concerned about clean cable management and good looks from the front, this is where you could really have some fun. Once you remove the panel at the back, you will have access to easy installation of HDDs and SSDs, but with the help of the good ol' screwdriver. The way I see it is this side is divided into four main sections: left, middle, and right; with a strip at the bottom. Both left and right sides house two HDD trays flipped alternatively to show the top side of the drive, or is covered by the tray itself. All the trays feature four rubber vibration dampeners, each in alignment with the screwholes at the bottom of the hard drive. One question that immediately arose in my mind is whether or not I would find standard screws long enough to mount the HDDs. Thankfully, SilverStone has provided a set of screws to do just that. As far as the I/O connectors are concerned, they are conspicuously concealed along the top edge of this side, and gives you quite a bit of length to work with, in which I greatly appreciate, because I am a quite the cable enthusiast myself. At the bottom, this is where the PSU installation fun begins. If you have a PSU that is longer than their suggested 180mm, tough luck. You will need a different PSU here. The good news is most power supplies are shorter than 180mm anyways; however, do keep in mind if you have modular cables, you will need to fit then in as well. Fortunately, SilverStone provides plenty of space behind the motherboard tray to work with. That's not to mention that there is enough space for even the power supply's main 24-pin connector to your motherboard.
Page Index
1. Introduction, Packaging, Specifications
2. Physical Look - Outside
3. Physical Look - Inside
4. Installation and Conclusion