By: Hai Wang
July 28, 2017
For those of you who know, our Editor-in-Chief Jonathan Kwan and I work in the same research lab at the University of Calgary. What you probably do not know is our research topics are extremely different. My research is about the traditional wireless communication systems, while Jonathan’s research is about the radio frequency energy harvesting. Even though we are in the same industry -- electrical engineering -- we have totally different perspectives toward the signal received by the antenna. In my case, among the countless signals picked up by an antenna, only the signal destined to the receiver is useful. All other signal is interference. However, in Jonathan’s research, all signals with energy are useful. There is actually no reason to reject or filter out a signal simply because the signal is not intended to be received by the antenna. In other words, all signals are welcome to the RF energy harvester, since they all have energy. One thing could be treated differently from different perspectives. In the world of computer users, there is an equally interesting phenomenon: Some people like to hide the computer hardware away, while some other people are eager to show off their gear. For the first group of people, a Google Chromebook could be a good choice, since a big portion of their computers' processing power is hidden behind the cloud. As for the second group of people, a computer case with a big window or tempered glass is a necessity. Apparently, RGB devices are designed for the second group of people. If you happen to be a big fan of RGB stuffs, but somehow your computer does not have enough ports for all your RGB devices, today's review unit, the SilverStone LSB01, is here to help. Can it really help people to show off their computer? Let us find out.
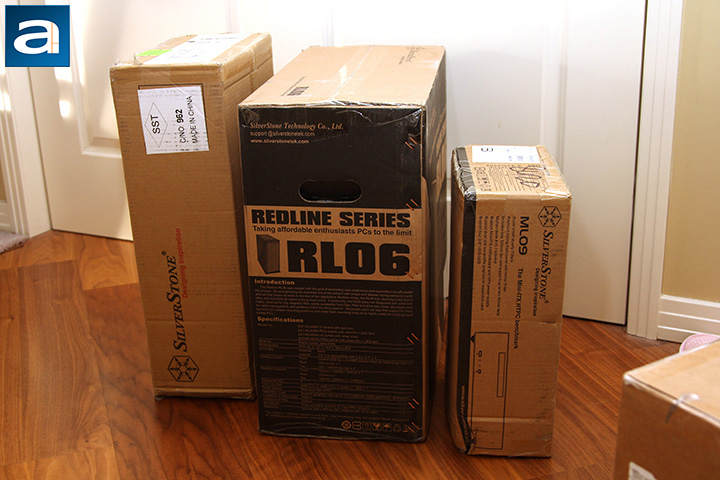
The SilverStone LSB01 arrived via UPS Standard to us here in Calgary, Alberta, Canada. The package was sent from Chino, California. This time, SilverStone sent us several products to review, therefore you can see three shipping boxes in the picture. The LSB01 was contained in the box on the left. The parcel is clean and in good shape. Very few dents and scratches are found on the box. There was nothing I needed to worry about, since I believed the retail package would be much smaller than the shipping box it came in.
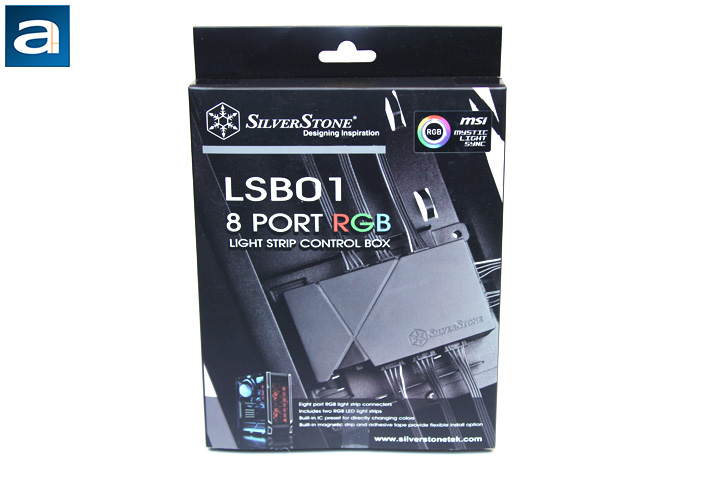
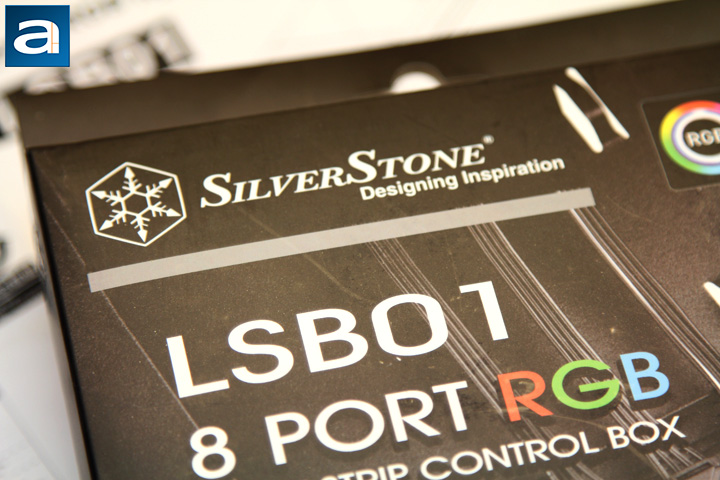
After pulling the review unit out of the shipping box, we can get a closer looker at the retail package. The overall design of the package has nothing to do with low key or stealth. The product picture was taken in a working scenario; where it was already mounted in a computer case. Comparing with just showing the product itself, the picture on the retail package is better, since it shows how capable of the LSB01 in terms of connecting RGB strips. In the picture, we can see eight RGB strips are connected by the LSB01 controller box. If you have not noticed how many RGB strips are connected, that is fine, because "8 port RGB" was clearly printed on the package right below the product's name. The company name, SilverStone, and the logo are located on top of the front cover. At the bottom, a SilverStone computer case is shown. I assume the computer case is illuminated by the SilverStone's own RGB strips connected by the LSB01. Frankly speaking, I cannot see if there is an LSB01 in there just by looking at the picture, haha. On the right side of the photo of the PC, features such as the eight port connectors, two included RGB LED strips, built-in IC, and built-in magnetic strip and adhesive tape of this product are listed. Generally speaking, the retail package design does its job. By just glancing at the package shortly, customers can easily find the most important information about this product, the number of ports available for the RGB LED strips.
Before digging into details, let us take a look at the specifications of the SilverStone LSB01, as obtained from the manufacturer's website:
Specifications
Model No.: SST-LSB01
Material: Plastic outer shell
Included Parts: SST-LS02 RGB LED strip x 2
Extend Y cable: x 2****
RGB 4pin signal cable: x 1
4pin peripheral cable: x 1
Signal input: *Via RGB 4pin host (+12V, G, R, B**) or built-in IC control
Signal output: SilverStone custom RGB 4pin x 8***
Net weight: 30g
Dimension: 46mm (W) x 19mm (H) x 85mm (D); 1.81" (W) x 0.75" (H) x 3.35" (D)
Remark:
* Be sure to turn off power before switching signal input switch or install / remove LED strip
** Please check the signal source’s pin header that you want to connect is the same as LSB01’s pin definition.
*** Control box’s connectors are proprietary SilverStone custom connectors and are not compatible with other RGB strip’s 4pin connectors.
**** One to two Y cable can support SilverStone custom connectors and others RGB 4pin connectors.
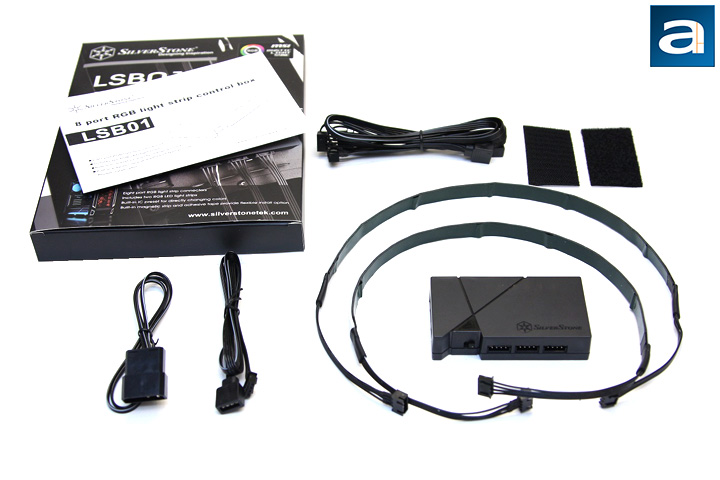
Unboxing the LSB01 is really easy. You just need to slide out the plastic container and everything in the retail packet should pop out. In order to keep the internal flexible circuit of the RGB strips from breaking down, the two SilverStone LS02 RGB strips are rolled into a loop instead of being folded. The controller box is surrounded by the strips, and is restrained by the plastic container. A power cable is provided to allow the connection between the Molex connector and the controller box. If your motherboard has RGB 4-pin connector, the provided signal cable can be used to connect the motherboard and the SilverStone's proprietary 4-pin RGB connector. An extension Y cable is also packed in the box to allow longer reach of an RGB device. As for the installation of the control box, a set of adhesive Velcro tape is provided. Basically, everything you need to illuminate your computer case are provided in the package.
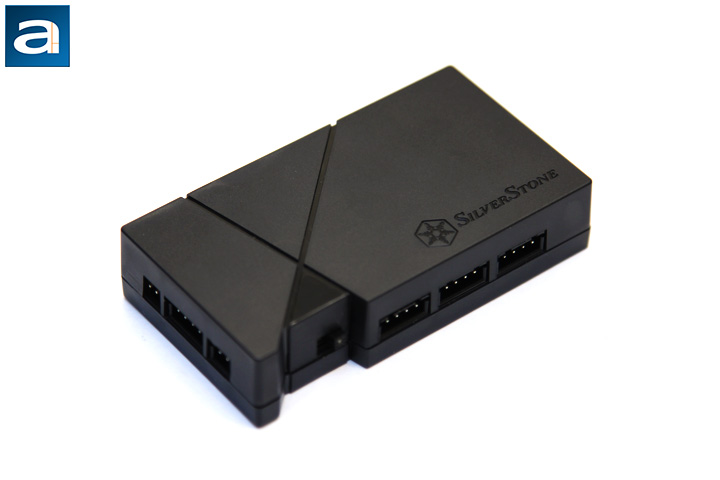
Let us get a closer look at the controller box itself. The LSB01 features matte black finish. Not surprisingly, the whole thing is made out of pure plastic. The plastic feels pretty thick, and the controller box itself is sturdily built. In terms of size, the LSB01 is rather small. There is no hassle to find a place to put the controller box in my computer. SilverStone's company name and its logo is printed on the top of the box, and there are two crossing lines going through the top surface, which add some extra style to the overall design. In the above picture, you can see a notch on the left side of the box. A switch is located in the notch. Two identification labels are printed near the switch; one is "MB", and the other one is "IC". "MB" means the RGB signal is sent from the motherboard through the signal cable, while "IC" indicates the RGB signal is generated by the controller box.
If your motherboard has an RGB 4-pin connector, the LSB01 is only a connector with eight more ports, and the signal is broadcasted to all of eight ports such that all the connected RGB devices are synchronized. However, if your motherboard does not have an RGB signal output, you will need to use the reset button on your computer case to change RGB settings. In my case, I need to use the "Reset" button on my computer to realize the RGB color control. From the above picture, we can see there are two 2-pin ports on the front surface. The left port is for the reset button connection, and the right port is for the power cable. I will need to leave the port in the middle empty, since I do not have any sort of RGB signal output from my motherboard.

The photo above shows the details of the bottom surface of the LSB01 and the SilverStone proprietary RGB connectors. The included adhesive Velcro tape can be attached to the control box on the bottom surface. That is why the bottom surface is flat instead of having stylish design. By using the adhesive Velcro tape, the LSB01 is basically permanently mounted to a certain place, since the adhesive Velcro tape will be glued in. If you want the control box to be movable, it can be mounted on a steel surface through the embedded magnets. However, the magnets will not work on aluminum surfaces. For those users who have all aluminum case, mounting the control box will be challenging, since there is only one set of adhesive Velcro tape in the package. All eight RGB ports are distributed on the left, right, and back of the controller box. In the picture, we can see there are three ports on the right side and two on the back. The other three ports are located at the opposite side of the three ports shown in the picture. All of those ports are output ports, and the signals are synchronized. Unless you have broken RGB signal lines or some issues with connections, all RGB devices, for example the RGB strips and RGB fan grills, should have same color and lighting patterns.
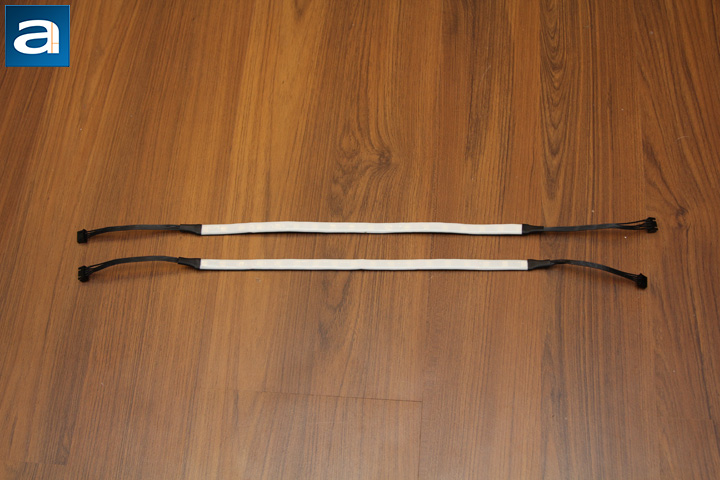
Two LS02 RGB strips are included out of the box. Both male and female connectors are available at the two front ends of the strip, which allows the strips or other RGB devices to be daisy chained together. The RGB section of the strip measures in thirty centimeters long with eighteen RGB LED lights on it. The most important part of the RGB strip is a thin layer of flexible circuitry. The LED lights are soldered, and they are protected by a layer of semi-transparent white rubber coating. Underneath the flexible circuitry, a layer of thick adhesive tape with a built-in magnetic strip is applied. The glue side of the adhesive tape is protected by a removable layer. On both sides of the RGB section of the strip, two individual magnets are equipped for extra magnetic force. This feature allows the RGB strips to be mounted on both steel surfaces and non-steel surfaces. However, if you decide to peel off the cover and to use the adhesive tape, it may be hard to remove the RGB strip without leaving any residue. Combining all three layers together, I can safely say the RGB strips are sturdily built.
All three layers strikes a great balance between flexibility and endurance. It is pretty hard to make a sharp ninety-degree bent on the LS02 RGB strips, which can be considered as a protective feature for the circuits. It seems to me the magnetic strip cannot provide enough magnetic force to hold the RGB strip in position, but thankfully, we have two extra magnets on both front ends of the RGB LED lights section on the strip. Therefore, I think it would be better to just use several magnets and apply both sides of the RGB strip's surfaces with a soft rubber coating for protection. Meanwhile, some 3M double sided tape can be provided for non-steel surface mounting. In this way, a sturdier attachment can be achieved by using more magnets.
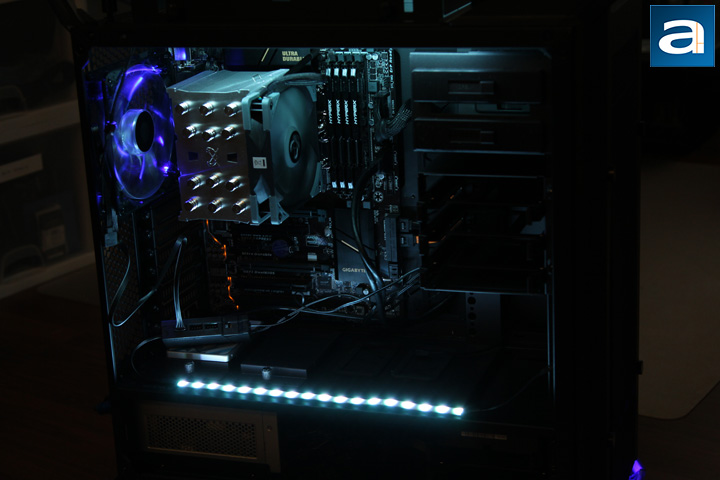
Installation of the LSB01 and LS02 RGB strips were very straightforward. In my case, I did not use RGB controls from motherboard. Instead, I just connected my case's reset button to the controller box. The power cable was routed to the back of the motherboard tray with a little bit cable management involved. I did not use the Velcro tape either. After several tries in my Cooler Master MasterCase Pro 6, the controller could be mounted on top of the PSU. The magnets inside of the controller could firmly attach the box to the all-steel surface of the PSU. I put both of the RGB strips in my computer. One strip was mounted on top of the lower chamber, and the other strip was attached to the computer case top panel with the help of the extension Y cable. Both strips were magnetically attached to the computer case, which made the future position changes possible. In fact, I spent several days to adjust the positions of the controller box and the RGB strips to make everything look perfect.
Computer "Pro6" with LSB01 RGB Strips (White).
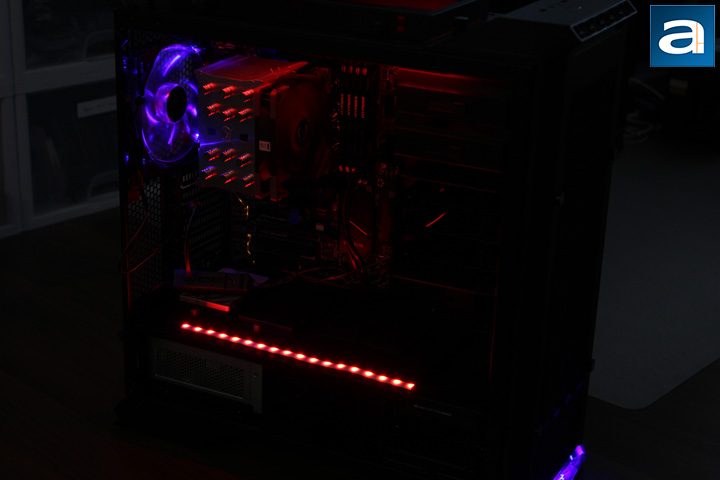
Computer "Pro6" with LSB01 RGB Strips (Red).
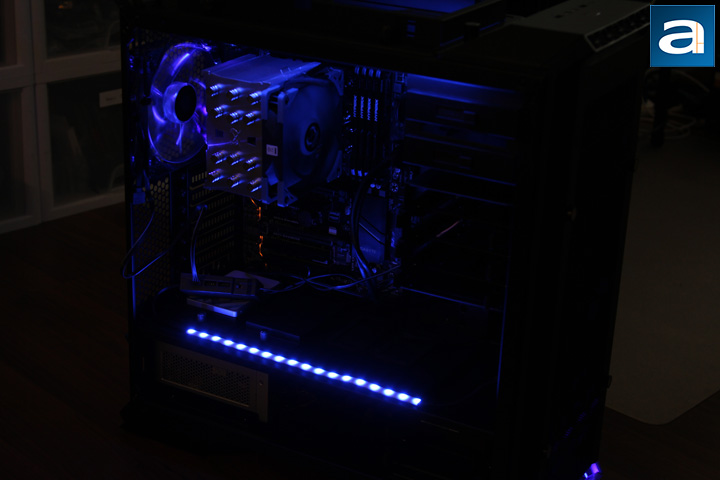
Computer "Pro6" with LSB01 RGB Strips (Blue).
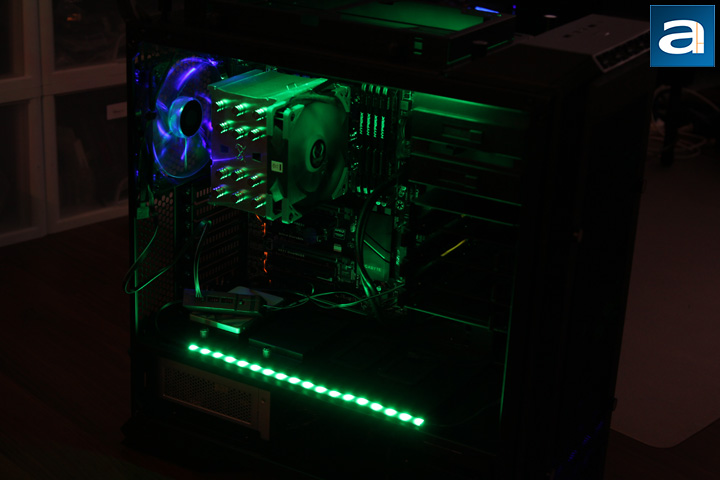
Computer "Pro6" with LSB01 RGB Strips (Green).

Computer "Pro6" with LSB01 RGB Strips (Light green).
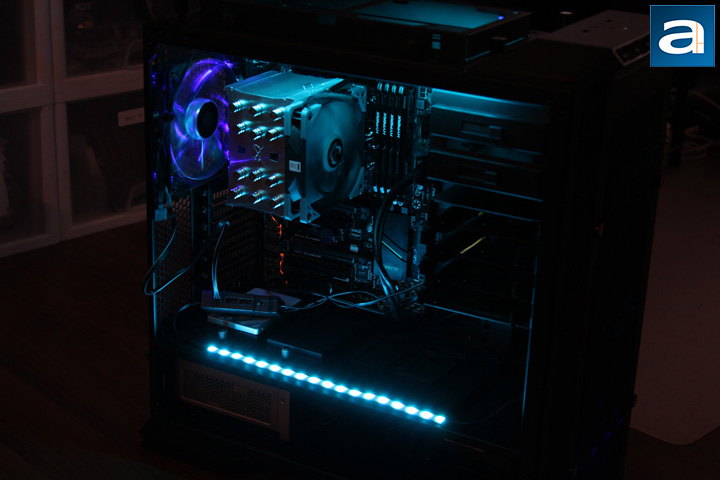
Computer "Pro6" with LSB01 RGB Strips (Light blue).
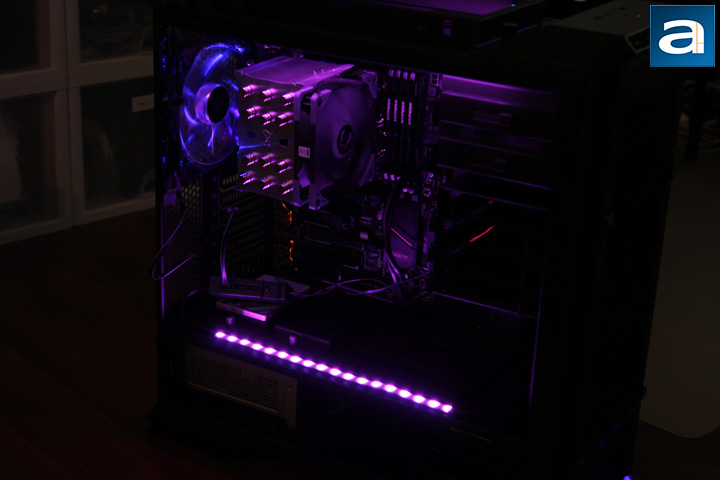
Computer "Pro6" with LSB01 RGB Strips (Purple).
To install the LSB01 and the two included RGB strips and make them work are easy tasks. Everything is ready to go just by connecting some cables. I have an all-steel chassis, so no adhesive tape is needed. However, it may take you some time to figure out an optimum way to mount everything. For me, the optimum way means the RGB strips and the controller box are hidden behind the computer case panels. This is because I just want to show the components through the window, and it is better to not see the bright RGB strips directly. On the other hand, even though the LSB01 controller box features a pretty stylish design, I want to hide it as well, since the connected cables look pretty messy to me. Think about that, if you have all eight ports connected with RGB devices, you definitely want to hide those cables, and you can mount the controller box behind the motherboard tray. In my case, I just put the controller box on top of the PSU, since I only have two RGB strips.
It is worth noting in order to clearly show the lighting effect, the left side panel with acrylic window was not installed when taking the pictures. Since I do not have RGB control signals coming out from the motherboard, I have to use my chassis' reset button to change the lighting effects. As you can see from the above photos, seven different colors are pre-programmed in the controller box. The reset button is just for triggering color change. Aside from static color, the LSB01 can also be changed into breathe and gradient modes. Breathe mode has all seven colors supported as well. There are two kinds of gradient settings; one shows different colors by fading in and out, while the other setting is by a continuous shift. All in all, there are quite a lot of choices in terms of choosing the lighting effects without the help of any software. Furthermore, the RGB strips are bright enough to illuminate the whole computer case. Imagine how bright your computer will be if you have all eight ports connected!
-----------------------------------------
To conclude, I think the LSB01 RGB controller does an excellent job in terms of making your computer light up. The building quality of the LSB01 is really impressive. In fact, both the LSB01 and the two LS02 RGB strips are sturdily built. The controller box is small enough, so finding a place for it should not be too much of a problem. The lighting package is also powerful, and as you can see, a rather big computer case can be nicely illuminated by using only two RGB strips. In terms of lighting effects, a total of seven different colors and three lighting modes are programmed into the controller box. The lighting can be changed by using the reset button on your computer case. I am quite satisfied with the color settings and brightness, and I am extremely happy with the fact I do not need to mess with any software or USB plugs to get it working. Everything is ready to go just by connecting some cables. For the RGB strips, it makes a lot of sense for SilverStone to include a pair of their excellent LS02 RGB strips, although I am still expecting a set of RGB strips with more magnets on them for improved installation quality. The retail price of the LSB01 is about $35 USD at the press time. This is a fair price in my opinion. If you are not satisfied with only two RGB strips, more LS02 are available to purchase. With LSB01 kit, creating a light show inside your computer is an easy job.
SilverStone provided this product to APH Networks for the purposes of evaluation.
APH Review Focus Summary:
8/10 means Definitely a very good product with drawbacks that are not likely going to matter to the end user.
7/10 means Great product with many advantages and certain insignificant drawbacks; but should be considered before purchasing.
-- Final APH Numeric Rating is 7.7/10
Please note that the APH Numeric Rating system is based off our proprietary guidelines in the Review Focus, and should not be compared to other sites.
SilverStone's LSB01 kit allows you effortlessly to light up your computer interior, RGB style.
Do you have any comments or questions about the LSB01? Drop by our Forums. Registration is free, and it only takes a minute!


