Page 3 - Configuration and User Interface
While most users nowadays use routers from their internet service provider, there still is reason to purchase a router. Those who buy routers separately often look for ones with open-source firmware support, especially for those supporting the Linux-based DD-WRT firmware. There are some who even avoid a router altogether if DD-WRT cannot be installed on it. The TP-Link Deco X90 does not have support with DD-WRT, but what is used to make configuration changes? To answer the question, you can start by connecting your device to the TP-Link Deco X90. Unfortunately, the only way to set it up first is to connect one of the units to your internet connection. Afterwards, you can download the TP-Link Deco app from the Apple App Store or Google Play. The app is used for both setting the network up and for making configuration changes, as there is no web interface. As such, we will only be exploring the Android version of this app. We also updated the firmware to the latest available at the time of the review.

Once you install the mobile application on your device, you can launch the application and it will guide you through setting up a single node. You will need to configure one at a time and add additional nodes on the main page of the Deco application. After everything is configured, the front page shows several main pages to get an overall look. The first tab is marked Overview at the bottom of the screen, and this shows you all of the clients connected to the network. If you have multiple nodes set up, you can identify which client is connected to which node. On the "Smart Actions" tab, you can set up actions to create either shortcuts or automation actions. This includes creating shortcuts for various smart devices like outlets or lights. Under "HomeShield", users can add Parental Controls or QoS prioritization. There are other items to let you setup various website blockers, content filtering, device statistics, and usage reports. These are some of the features with the Basic version of HomeShield, but a Pro version is also available if you subscribe to their service. The Pro version unlocks more network protection, parental controls, and usage reporting features. It is a bit of a shame these are now locked behind a subscription service, especially since some of these features were just included out of the box on other TP-Link routers in the past. The only redeeming thing is that you are not required to sign up, and users can start a month free trial to test out the service.
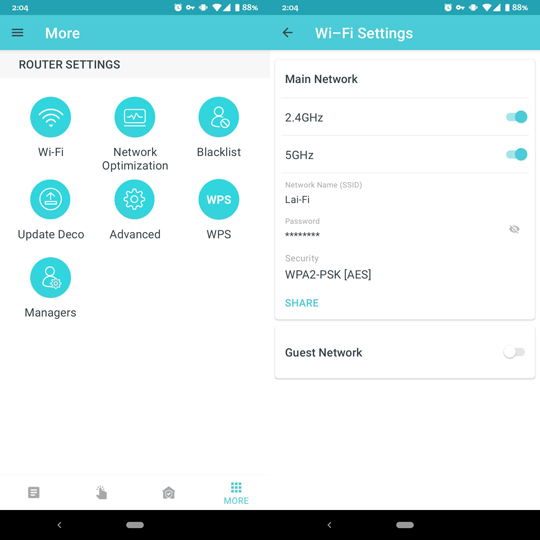
The last 3x3 grid icon is where more router settings exist. The grid displayed is pretty self-explanatory, but I will walk through some of these. The Wi-Fi area is where you can modify the two exposed networks, including the main one and the guest one. You can enable or disable the 2.4GHz or 5GHz networks for both the main and guest, change the SSID, password, and the Wi-Fi security protocol used. Under Network Optimization, the app scans the current network and supposedly optimizes the clients connected, but it does not really expose too much other than a button to optimize. Blacklist is where you can ban certain clients, while Update Deco is where you can update the firmware for each router unit. Under WPS, you can activate it to quickly connect new clients via Wi-Fi Protected Setup. Finally, Managers is where you can setup different user accounts to manage this network.
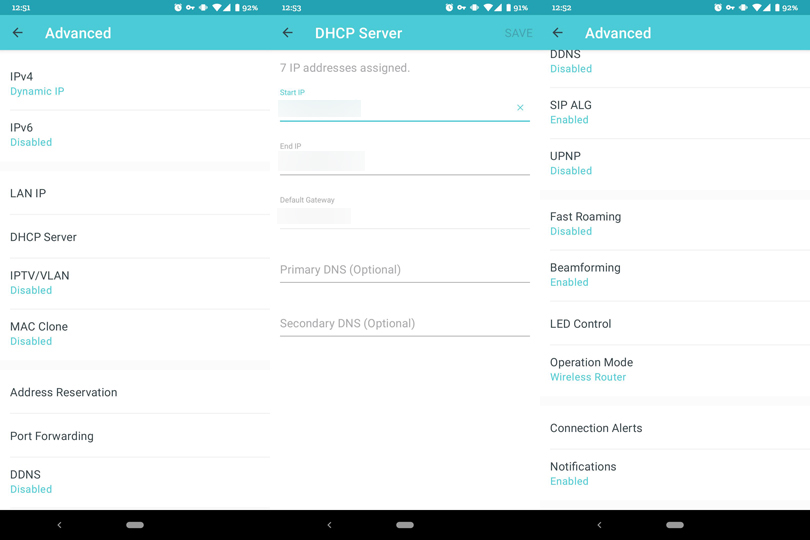
The other meat and potatoes of configurations can be found under Advanced. Here you can modify different settings for the IPv4 and IPv6 settings, set an LAN IP, update the DHCP server settings, and enable different features for IPTV or MAC cloning. There are some NAT forwarding features here too, including enabling port forwarding and UPnP, though there is no ability to set up a DMZ. Fast Roaming is another interesting feature using the 802.11r standards, that allow devices to quickly change between Wi-Fi access points. Other notable features, as listed above, include changing the LED status lights or the operation of the units to just act as an access point or a router.
In general, all of the features are pretty straightforward, but everything feels limited in terms of its customization. For example, we cannot change settings like the Wi-Fi network transmission power or channel bandwidth, or set up USB sharing or a VPN server. Other features you might expect from purchasing your own router, including more parental controls or in-depth logging are locked behind a paywall for their HomeShield subscription. Overall, the settings that are available are probably more than what your standard ISP router and modem combination would provide, but it is also far lacking compared to other third-party routers. This keeps the whole configuration simple and easy to use, but power users may want to look elsewhere.
Page Index
1. Introduction, Packaging, Specifications
2. Physical Look - Hardware
3. Configuration and User Interface
4. Performance Tests
5. Conclusion


