Page 2 - Physical Look - Hardware; Installation

On first glance, the be quiet! Dark Rock Pro 5 does not make a big impression with its appearance. It has a semi-cubic shape with a very cube-like dimension and rounded corners. It definitely looks less boxy than some other coolers we have seen recently, but it still has a distinct shape. The top consists of a metal frame with two mesh areas on opposing sides. In the middle, we can find the company logo in a shiny silver finish. It is nothing too exciting, but it looks cleaner as it hides the terminated heatpipes. The whole unit has a black exterior, including the heatpipes, fins, and fans. It may look simple in design, but I can appreciate the clean fit and finish of the Dark Rock Pro 5.

Removing the top frame is straightforward, as it is held to the rest of the heatsink with four strong magnets. This keeps it in place while also making it easy to remove, if necessary. Once you do so, you can further remove the middle plastic insert, as there are clips on four holes to keep that in place. This plastic middle piece houses the fan. As you can infer by this, we have a dual-stack tower design. The fins are spaced approximately 2.5mm apart, and this gap is relatively consistent across the full stack. There is a total of 45 fins on each stack, but they are different in dimensions between the front and back. From my calculations, the total surface area of the two stacks is approximately 0.96m². In terms of mass, the total weight of the Dark Rock Pro 5 is a weighty 1.29kg. The heatsink alone also weighs 818g. For some perspective, the entire AMD Wraith Prism stock cooler weighs 582g. This is not too surprising considering the amount of plastic and metal we have.

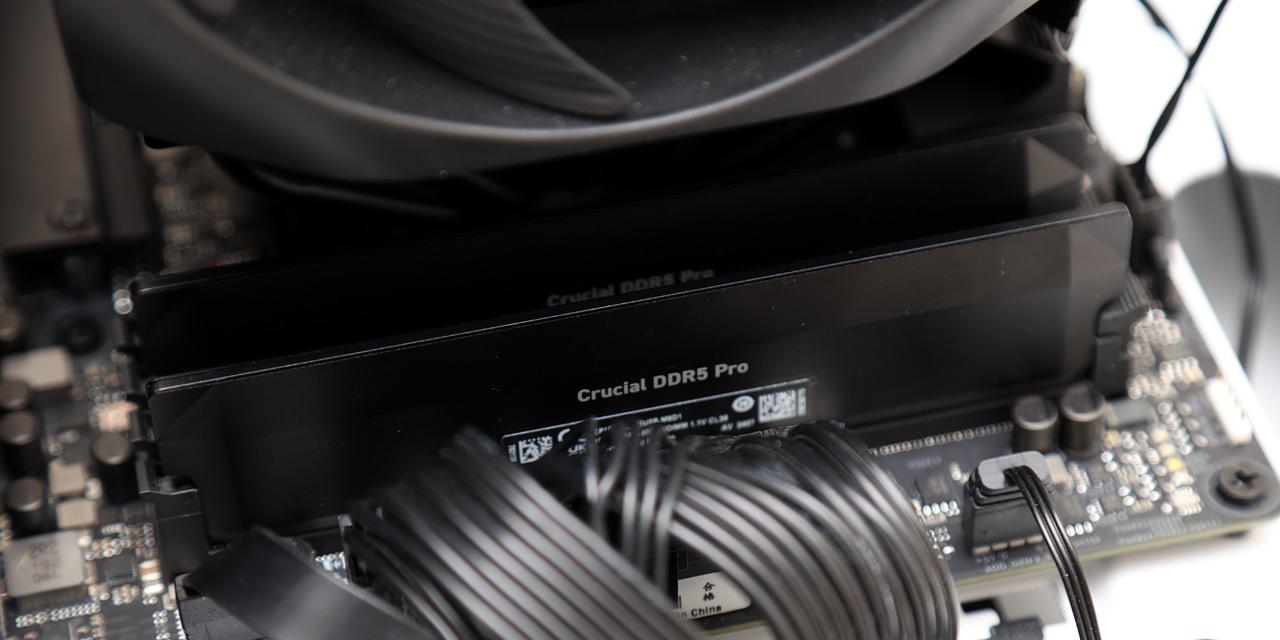
In terms of sizing, the be quiet! Dark Rock Pro 5 is a pretty big cooler. It has a height of 168mm, width of 136mm, and a depth of 145mm with the front fan attached. This is not as wide some coolers, such as the recently reviewed DeepCool ASSASSIN IV WH, but its other dimensions are comparable. The Dark Rock Pro 5 is not symmetrical with a thicker set of fins on the back stack compared to the front. As well, from this vantage point you can see that every three sets of fins are slightly indented, creating pockets of space between the fin and the fan. This should reduce any turbulence potentially created here, as it provides a less-restricted place for air to move through. By default, the front fan does sit directly over your memory slots, so tall sticks of RAM may require you to re-orient the fan by moving it higher. However, the heatsink only hovers over the nearest memory slot. There is still a space of approximately 4.2cm between the bottom of the base and the bottom fin.
From the contact point of the processor, seven continuous U-shaped heatpipes lead away from the base and split into the two fin stacks. This effectively makes fourteen heatpipes in total. The 6mm diameter heatpipes should efficiently lead the heat away from its source due to the low heat of vaporization, or phase change energy, of alcohol. The heatpipes are aligned in a manner to spread out the heat in the array of radiating fins. The 0.96m² of surface area, combined with the two be quiet! Silent Wings fans, should be able to deliver very good heat dissipation performance, but we will see if this statement is true on the next page.

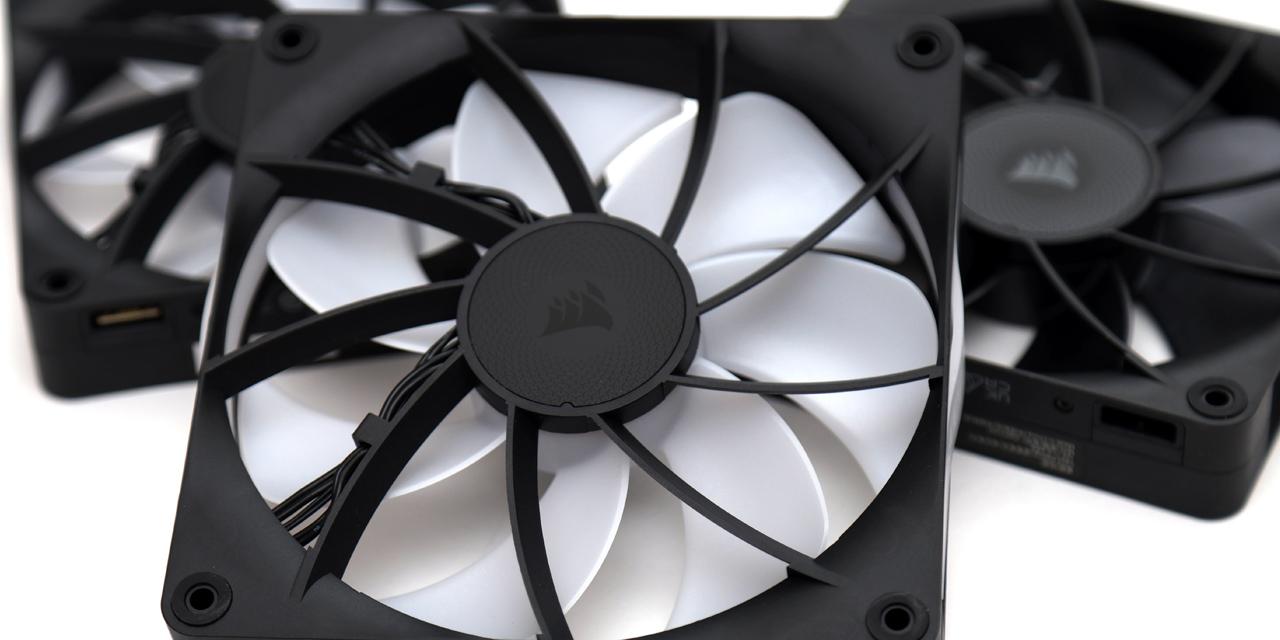
Speaking of which, the two fans in question are both be quiet! Silent Wings 4 fans, although there are some differences. First of all, the middle fan measures 135mm in size, while the front one is 120mm. Unfortunately, be quiet! has not provided specifications for each fan. However, we do know both of them are PWM-controlled fans with a 6-pole motor inside. As well, be quiet! has included a manual speed control switch to choose between a performance and a quiet mode. In performance mode, the fans will drive at 2000 and 1700 RPM for the 120mm and 135mm fans, respectively. In quiet mode, this reduces to 1500 and 1300 RPM. In addition, the maximum noise level in performance and quiet mode is 32.3 and 23.3 db(A). Both of these fans have fluid-dynamic bearings with a lifespan of 300,000 hours.
As we already mentioned, the middle 135mm fan sits with the plastic bracket installed at the top. Two screws hold the fan to the plastic frame. The front 120mm fan attaches to the heatsink with a set of two metal wire clips, which allows it to be positioned higher or lower based on what you might need for clearance. Otherwise, while both of these fans are PWM-controlled, you might notice a different fan header on the 120mm. In order to get both of them functioning with the speed control switch, the 120mm fan plugs into the 135mm fan with its own header, and the two fans can be controlled by your motherboard with one single PWM header. This could be inconvenient if you want to swap out the fans, although its long lifespan should prevent this from happening in the near future.

The photo above shows the base of the be quiet! Dark Rock Pro 5, including the seven heatpipes leading out of the bottom and into the fin array. The base is very flat, which should translate into the entire area pressing evenly onto the IHS of your processor. A quick inspection reveals no abnormalities with only some slight milling marks seen. The whole heatsink is composed of different materials. The base and heatpipes are composed of copper with nickel plating on the outside. Copper is used because it has one of the best heat transfer abilities with a thermal conductivity of 401W/mK. Meanwhile, the fins are made up of aluminum as it is quite a bit lighter in comparison to copper. This reduction in weight will reduce stress on the motherboard, although aluminum has a lower conductivity of 237W/mK, which is not as optimal for heat transfer, but the trade-off is understandable.
In terms of appearance, the copper base is concealed with an electroplated nickel. While nickel has a notably lower conductivity of 90.9W/mK, this layer is very thin and should not adversely affect the performance to a significant degree. Instead, nickel and nickel-base alloys are used here because of their properties in withstanding corrosive environments and high temperatures, which is especially beneficial for a heat dissipation device. The reason why nickel has these properties is because of its ductility and toughness all the way up to the melting point of 1455c, measured at non-standard pressure. Nickel's face-centered cube crystal structure is highly resistant to corrosion, so corroded material will not build up on the surface in the long run. As a result, the be quiet! Dark Rock Pro 5 will be less prone to losing its cooling performance over time as juxtaposed to a corroded copper surface.
At the base, all of the joints are soldered to the base, but the fins are pressed to the heatpipes. Pressed fins are pretty typical, but this may lead to degradation over time as contact between metals decreases due to thermal expansion and contraption. It also means the fins can slightly slide about easier. Even so, everything is well put together on the be quiet! Dark Rock Pro 5 with a solid choice of materials around the heatsink and fins. The black finish also ties everything together thematically.

Installation of the be quiet! Dark Rock Pro 5 is straightforward and imitates other competition's system in how it works. You could see this as copying, but it is also a very consistent experience across all of the recent coolers I have used, which makes it even easier to install. With Intel systems, you will use the included backplate. This comes with bolts and rubber rings to secure the bolts in place. It also allows users to adjust based on the socket they are using. I am not a huge fan of these rubber rings, as I find they are not the most secure in keeping the bolts in place, but they do the job. For AMD systems, you can use the backplate that comes with your motherboard. You can start by screwing in the four bolts to secure the backplate. I do like these bolts have slots to use a Phillips screwdriver to tighten and loosen.

Once the backplate is fixed in place, you can use two mounting bars to attach on the CPU side. As we are using different backplates between AMD and Intel, it only makes sense we also have different mounting bars on the other side. With the Intel bars, be sure the numbers engraved on the top bar are right-side up, while the bottom bar is upside-down. From here, you can use another set of thumb bolts to hold the bars. I would also advise applying some thermal paste on your CPU. We have enough grease from be quiet! for multiple installations.

Afterwards, with the middle fan removed from the fin stack, you can put the be quiet! Dark Rock Pro 5 on top and screw the unit onto the mounting bars. With the included screwdriver, I alternated between tightening the top and bottom screws, ensuring an even mounting pressure between the two sides before finally securing it in place. Next, you can place the middle fan back in between the two towers and clipping it in place. Finally, you can attach the metal top plate with the magnets. As I pointed out before, the front fan does indeed hover over my memory slots, so I had to slightly raise the 120mm fan higher to avoid interference.
Page Index
1. Introduction, Packaging, Specifications
2. Physical Look - Hardware; Installation
3. Test Results
4. Conclusion