Page 2 - Physical Look - Hardware; Installation
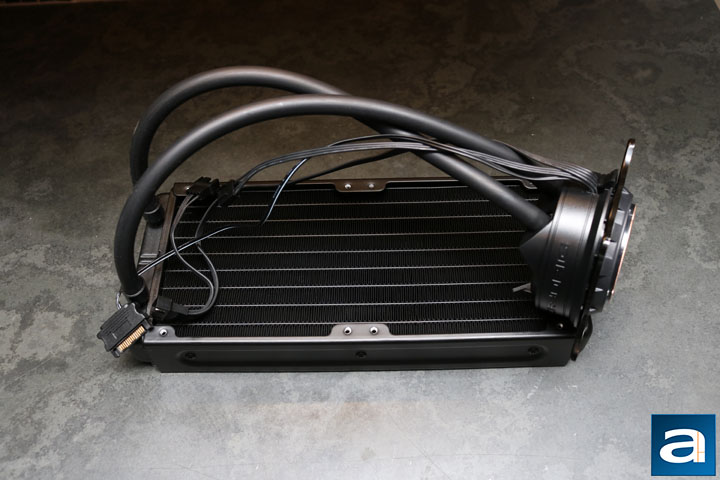
As you know, most all in one water colors are really boring to look at. We regularly see water blocks with the company logo or name on it, although there are a few exceptions to this rule, namely the NZXT Kraken X52 with some fancy RGB LEDs on the water block. However, it looks like we found another exception with the CRYORIG A40 Ultimate. CRYORIG decided to stick a fan on top of the water block to have better airflow for the motherboard components found around the processor. Other than the nice looking miniature fan on top of the water block, the CRYORIG A40 Ultimate features an all matte black appearance, which is a neutral color, and will most likely not clash with the rest of the aesthetic of your case. Most of the product is absent of distinct marking from the manufacturer, but upon looking closer, the pump and the sides of the radiator does feature the name CRYORIG. Also, found on the pump are a couple of cables leading out of it. These cables are a SATA power header for powering the pump, two fan connectors, and a PWM connector to connect to the motherboard. I appreciate CRYORIG making it easy to connect multiple fans while not using many motherboard headers. On top of the water block, we also find the slot for the 70 mm fan, and a connector directly into the pump for said fan.
The dimensions of the radiator come in at a length of 272 mm, width of 120 mm, and depth of 38.5 mm. CRYORIG also offers an A40 non-Ultimate version, which differentiates itself from the Ultimate version with radiator dimensions. The A40 Ultimate is 11 mm thicker than the A40, which is important for cooling. The more surface area there is to work with, the better the heat dissipation, which is why the larger CRYORIG A80 performs better. However, surface area is not the only contender for better heat transfer; the material the radiator is constructed of also plays an important role. The A40 Ultimate is made out of aluminum, which has good heat transfer properties. It is not as good as copper, but aluminum is lightweight. The lightness is required for larger assemblies. Overall, I found no imperfections in the build quality of the radiator, and everything seemed to be in order.
Water cooling works by pumping the fluid through the block contacting the processor to carry the heat away. The heated fluid is then pumped to the radiator, where it is distributed through a series of fins. The fins are organized so their tops and bottoms make contact with the piping, which is how the heat is transferred to the fins. The resulting pattern of the fins is wave-like in structure. This is the most traditional design; I have only ever seen one different design on the Cooler Master MasterLiquid Pro 140, which has a square fin design to optimize the surface area of the touching points. Another important aspect to consider in the build quality of a water cooler is the tubing. Without strong tubing, there is potential for leaks. The length of the tubing is 350 mm and a diameter of 10 mm. The tubing should be long enough to reach the front of most cases on the market. I could not find any more information on the tubing, but it seems strong and flexible enough to be easily installed. Overall, the build quality of the CRYORIG A40 Ultimate is good, and it should not give you much trouble during the extended six-year warranty period.
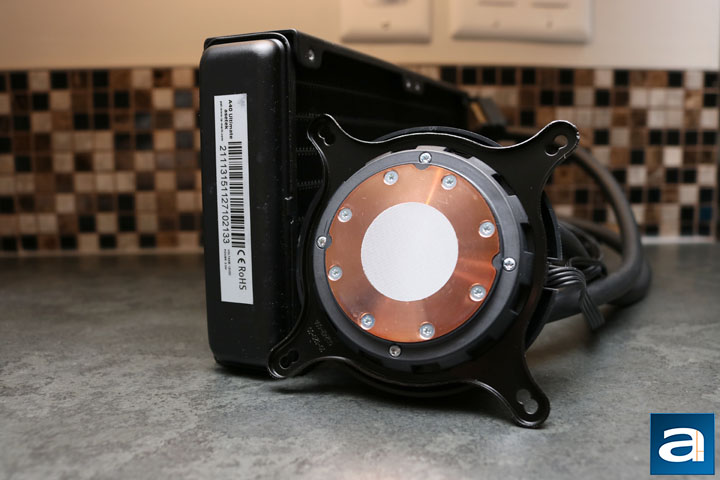
Moving on to the dimensions of the water block, it comes in at 88 mm in length, 88 mm in width, and 52.8 mm in depth without the 70 mm fan attached. With the fan attached, the height increases to 116.2 mm, which could cause some compatibility issues in smaller cases. The CRYORIG A40 Ultimate features a fifth-generation pump built on the bases of Asetek's design. It is advertised with a cold plate design and to have improved flow. The motor system and the impeller have been redesigned to further increase cooling based on previous models, but also promising to not increase noise levels. We will have to see how this holds up on the next page. Other than a well-built pump, another important aspect to cooling, as previously mentioned, is the material the baseplate is made from. The base is made of copper, which has a high heat conductivity; better than aluminum, but heavier. Not usually seen is a circular design for the baseplate. Not that it adds to cooling capability at all, it does have a nice look to it.
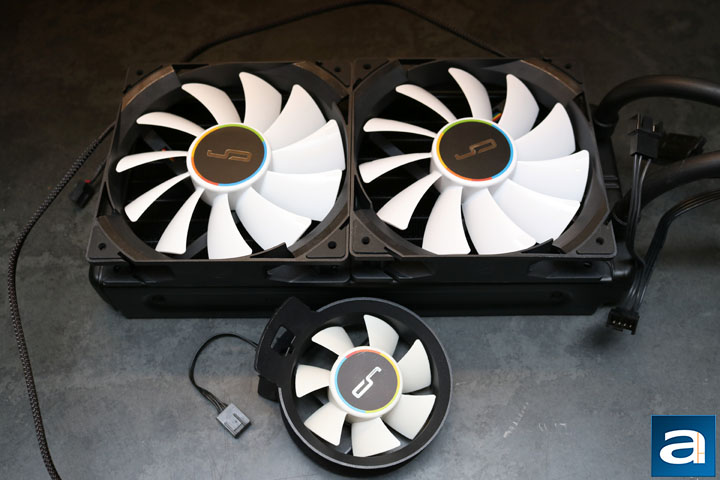
I really like the contrast between the white and black of the fans with the colorful circle in the middle. However, onto more important matters: The fans are CRYORIG's QF120, which are focused on high air pressure and air flow. For a radiator or a heatsink, it is preferable to have high air pressure fans to force the air through the radiator. High airflow fans are preferable for intake and exhaust positions. Finding the right balance for the radiator ensures the fans are pulling in enough air, while also pushing it through the radiator. In terms of technical specifications, the fan speed comes in at a range of 600 to 2200 RPM and noise level of 13 to 37 dBA, which we will have to do some real live testing on to have a better understanding of perceived noise output. Airflow is rated at 83 CFM and fan pressure at 3.33 mmH2O. The tiny 70 mm fan has a speed of 1500 to 3000 RPM, noise level of 15 - 27 dBA, airflow of 25 CFM, and air pressure at 3.1 mmH2O. We will have to see how all these technical specifications apply to testing on the next page.

The installation process went pretty well. The instruction manual is clear and has plenty of numbered pictures, with arrows pointing toward the next step. Usually, it is hard to keep the backplate in place while mounting the water block. However, with the CRYORIG A40 Ultimate, the backplate is screwed in place before attaching the water block, making the entire process so much simpler, since the backplate is not being pushed out. The thermal paste is pre-applied to the baseplate of the pump, meaning anyone new to installing an aftermarket cooler will not have to worry about putting on too much or too little. Unfortunately, it means for any remounting, you will need a separate tube of thermal paste that is not included. I attached the 70 mm fan on top of the pump after screwing it in, making it easier to reach each of the corners. The fan is easily slotted in on top and connected. After that, it was easy to connect all the connectors to where they need to go. Overall, I am very impressed with the instructions included and the ease to install the CRYORIG A40 Ultimate. Therefore, let us move on to the most important part -- how it performs.
Page Index
1. Introduction, Packaging, Specifications
2. Physical Look - Hardware; Installation
3. Test Results
4. Conclusion


