Page 4 - Installation and Conclusion
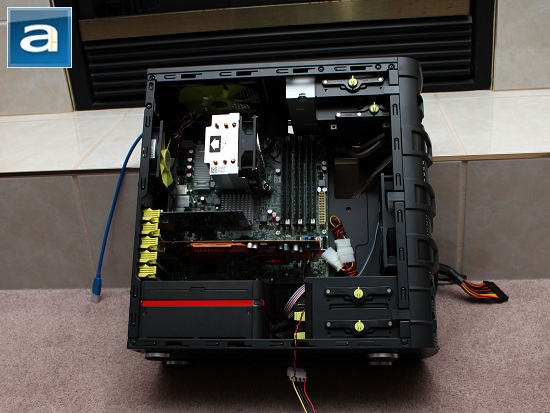
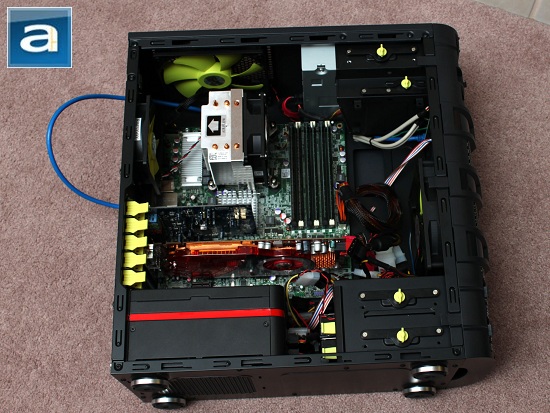
Although it may seem like there is quite a bit of space for a mATX chassis, I find that I have to install certain components in a certain order, or it would most likely give you a headache, especially if you are one of those cable enthusiasts like me. First off, I planned and organized all the chassis cables and where they should be going. Then comes the motherboard and heatsink, with accessories in the 5.25" and 3.5" drive bays, respectively. This was to make sure that the main bulk of the work was out of the way before the cabling work gets messy. My power supply unit came in second last along with the modular cables organized to their respective positions. You will need to have your power supply in first before you even think about installing your hard drives here, because cabling will become very tedious if you have the hard drives in first. Since the hard drive container is detachable, you can either pull that out before or after you install your power supply to proceed with the hard drive installation. In Win provides you with two hard drive rails for each hard drive to slide them into its respective bay. You will need to screw these rails onto your hard drives for a secure fit. Make sure all necessary cables, like your SATA cables, are securely attached to the hard disks before you stick the rack back into the chassis -- since it is another tedious job trying to fit SATA cables onto your hard drive when the drive rack is already installed in your Dragon Slayer.
Once you got all your components installed, you may now celebrate. Most of the pain-in-the-butt work is out of the way. Cabling should not be too hard now, because if you followed what I have explained above -- as most of the cables should already be in place. It is just a matter of making sure everything on the back side is neat and tidy, as well as making sure everything is connected. Be glad that everything here is tool-free, so you have one less screwdriver to worry about after a long couple hours of work. Simple as pie? Let's hope so.
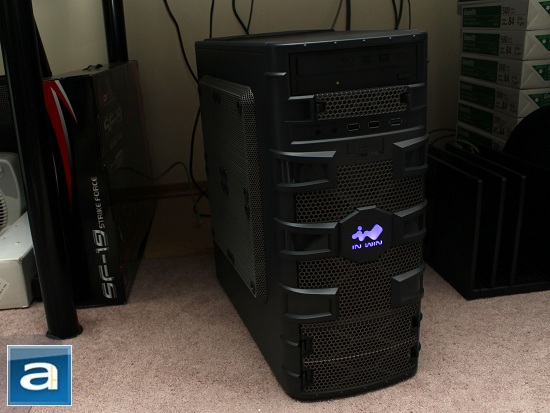
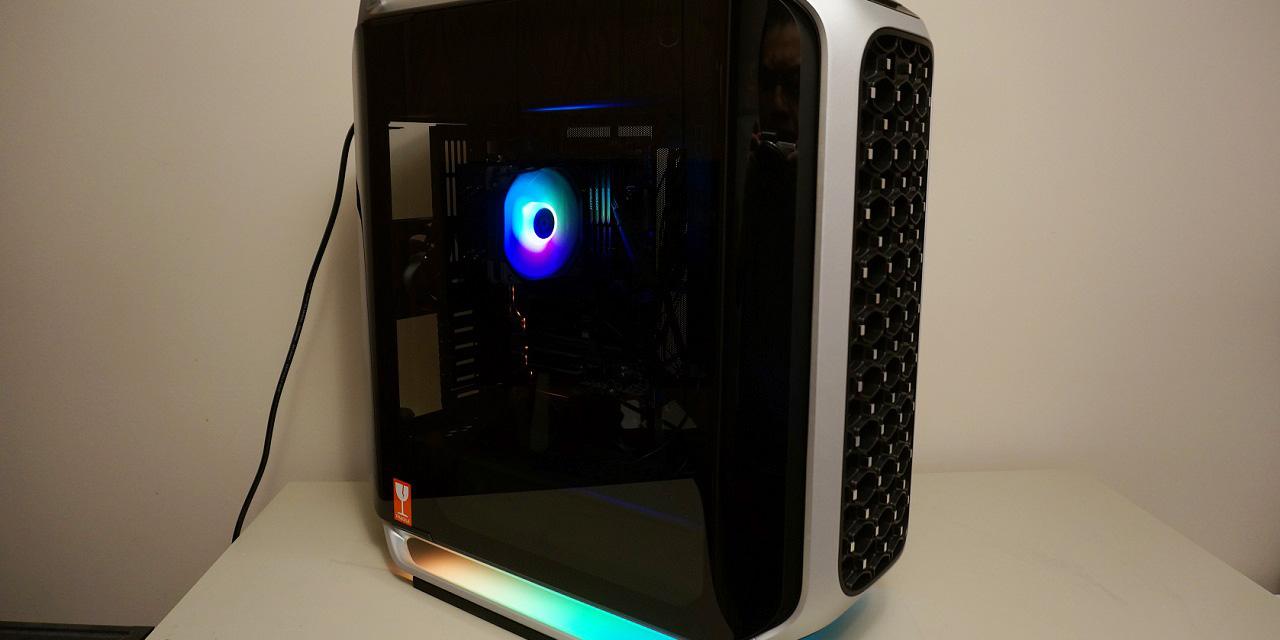
After everything is settled and plugged in, our computer installed inside the In Win Dragon Slayer is ready to be booted up. Hitting the power button brings the system to life with its glowing logo in the front panel. Your finished system should look similar to the photo above.
On a scale from 0.0 to 10.0, where 0.0 is silent and 10.0 is loudest, I would rate the stock fan noise level to approximately 4.0 subjective sound rating at full speeds. Once the fan speeds slow down, I find the noise level to be approximately 2.5 on my personal scale. At least these fans do not generate annoying high pitched sounds, so I am actually quite pleased by relatively its decent performance in this regard.
-----------------------------------------
For around $80 at press time, the In Win Dragon Slayer slots into the midrange mATX chassis market. This means it is neither cheap nor expensive. For the money you pay, you will get many well placed dust filters all around, and can be easily taken out for convenient cleaning. This includes a dust filter on the top fan to prevent dust from easily settling into your system. Depending on how much space you are accustomed to, the Dragon Slayer also provides a nice amount of room to work with as far as a mATX case is concerned. However, it would be nice if In Win provided more clearance on the back side between the motherboard tray and right panel for those who like to hide cables in the back. For cooling, the designer also gives you the option to add four additional 120mm fans to the side of your chassis to give your system that extra kick, but I'll admit this kind of thing is not for everyone. Of course, as with most products on the market these days, there are just a few things I would like to see improved upon. First and most obvious, although it may not be a bad thing and is mainly based on preference, is the first impressions. For Devin and myself (Devin wrote the first half of this review, and I, Preston, wrote the latter half), we found it was somewhat overdone in design -- especially regarding its packaging. Secondly, the reset button is too far recessed into the front of the case, making it difficult to access unless you have an extra paper clip laying around. Lastly, clips are meant to keep things in place. While testing the expansion slot clips, I noticed that sometimes accidentally applying too much force on your expansion cards will result in them recessing into the case because the clips are not holding them in place. These are just a few main points to reiterate; in our opinion, high scores are found in the small details, and we think In Win has some work to do to refine the Dragon Slayer -- in the details.

In Win provided this product to APH Networks for the purposes of evaluation.
APH Review Focus Summary:
7/10 means Great product with many advantages and certain insignificant drawbacks; but should be considered before purchasing.
-- Final APH Numeric Rating is 7.0/10
Please note that the APH Numeric Rating system is based off our proprietary guidelines in the Review Focus, and should not be compared to other sites.
The In Win Dragon Slayer is a decent mATX chassis for around $80 at press time. But "decent" can turn into "awesome" when you refine the details.
Do you have any comments or questions about the In Win Dragon Slayer? Drop by our Forums. Registration is free, and it only takes a minute!
Page Index
1. Introduction, Packaging, Specifications
2. A Closer Look, Installation
3. Test System, Benchmark Results
4. Conclusion