Page 2 - Physical Look - Hardware; Installation

The NZXT Kraken X52 has a nice matte finish, while the entirety of it is black. Black is a neutral color for computer cases, since it will most likely not intrude on the rest of the system's color scheme. The water block itself has some fancy RGB LEDs on it, which as we all know is the new scale of determining if a product is for gamers or not, haha. I mean, we have RAM with RGB LEDs nowadays. The LEDs on the water block feature quite an attractive depth effect. The middle NZXT logo lights up along with a circle that highlight its perimeter. There are quite a few different settings for the LEDs that can be configured through the software. Of course, it can also be turned off completely.
The NZXT Kraken X52 features a traditional fin layout. Fins are placed so they are touching the liquid piping with its tops and bottoms. The resulting look is similar to a simple drawing of waves. Heat from the liquid is transferred to the fins through the contact points, which the fans then dissipate. The liquid is transported from the water block to the radiator via the tubing, which is made from ultra-low evaporation rubber with a nylon braided sleeve. It is 400 mm long, meaning it will easily fit into any standard case on the market. The tubing is also very flexible and easy to bend to any place in the case. As well, they slightly pivot on the water block, allowing them to be easily maneuvered.
The dimensions for the radiator come in at 275 mm in length, 123 mm in width, and 30 mm in depth, which are fairly standard dimensions for an all-in-one liquid cooler. Of course, the size of the radiator plays an important role in cooling. Surface area is one of the main components for heat dissipation, and with a large radiator like the NZXT Kraken X52, there is plenty of it. The material it is made out of is also important, and the choice here is aluminum. Aluminum strikes a good balance between lightweight and heat transfer capabilities, which makes it perfect for larger parts of coolers, like the radiator on a water cooler. The build quality on all the components of the Kraken X52 is very well constructed, and I could find no imperfections on the radiator or the tubing.

The water block is a bit bigger than usual. Its dimensions come in at 80 mm in length, 80 mm in width, and 52.9 mm in depth. The manufacturer's website advertises the pump as newly engineered for better performance. We will have to see how that holds up on the next page. The pump speed is rated at 1000 to 2800 RPM, ensuring it can really ramp up to meet your system's needs. Using the software, there is also a couple of different modes for the pump. The different modes are silent, performance, custom, and manual. As for the actual block making contact with the processor, it is constructed out of copper. It is also circular in design, which is fairly different from many coolers on the market today. Copper is almost always used because of its efficient heat transfer capabilities. When it is mounted, the two cable connectors are located at the top of the water block, ensuring easy cable management.
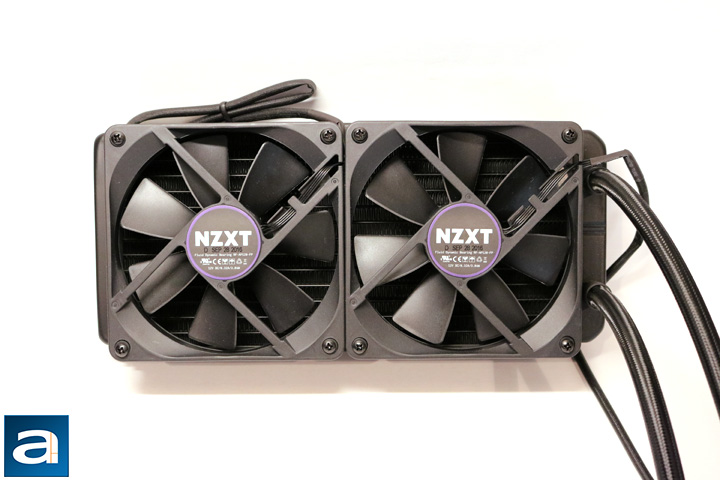
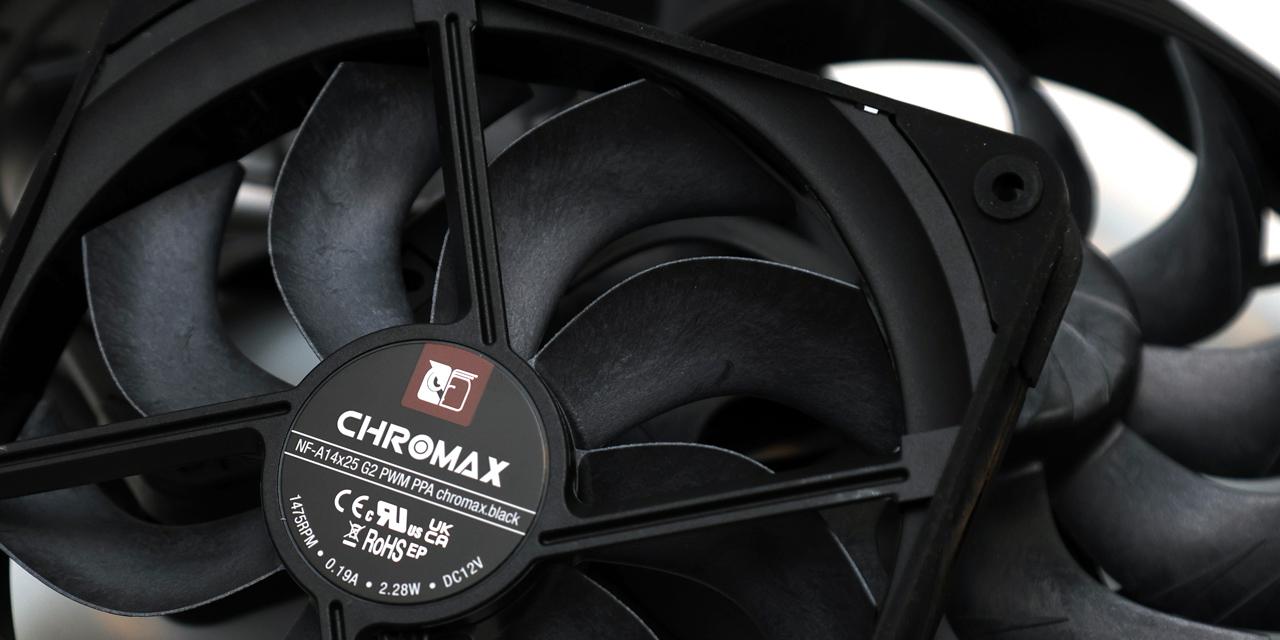
The two included fans are NZXT's Aer P120 fans. The fan speed ranges from 500 to 2000 RPM, meaning they will really ramp up under high loads. The rated noise level is 21 to 36 dbA; we will be evaluating the noise on the next page. The fans are specifically made for use with a radiator. Their design boosts the overall airflow and air pressure. It features a fluid dynamic bearing, which keeps consistent lubrication that reduces bearing noise. According to NZXT, this bearing will last up to six years. Another great feature is at each corner there is some rubber to dampen any vibration noise from the hard components.
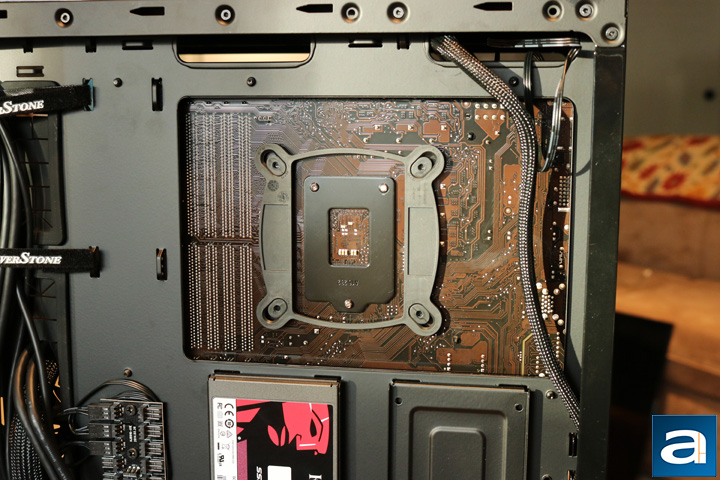
The installation process for the NZXT Kraken X52 went smoothly. The instruction manual has a bunch of pictures, but it has steps outlined along the bottom, which really makes the process easier. The back plate is a little uncomfortable to use, since each corner slides around a bit for the different sockets. All I found that was difficult about this was aligning the standoffs on the one side with each corner. However, this was the biggest issue I ran into during installation. The back plate is kept in place, which makes placing the water block on top quite a bit easier. In my case, I went for a front mount, since it is the only place I am able to mount it.
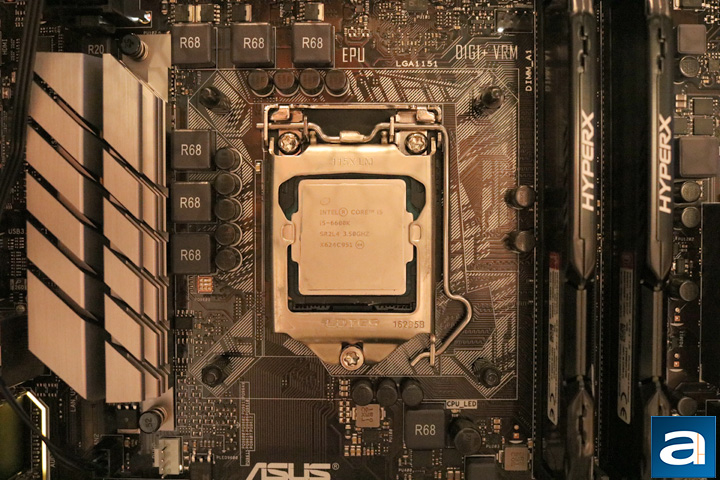
Here is the processor just before mounting the Kraken's water block. The water block already has thermal paste pre-applied, as I have mentioned on the previous page. This is always nice, but it also means you have to find other thermal paste if you need to remount it after some time of use. Mounting the water block is easy, because the back plate is not pushed out when the water block is being attached. There are two cables included in the NZXT Kraken X52 packaging; one is a USB 2.0 cable, the other is the pump's power with four fan connectors. This ensures even if your motherboard does not have many fan headers, NZXT still has you covered, especially for push-pull configurations. There is also a SATA power cable for all the LEDs found on the same cable as the pump and fan header cable. Both of these cables are plugged in at the top of the water block, and because they are black, they are not too easily seen after installation.
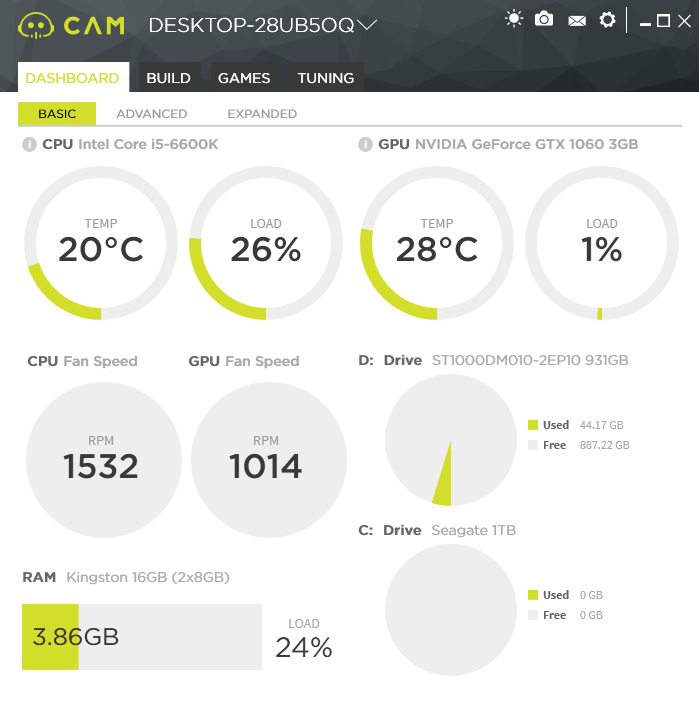
The CAM software was easy to find and install. The software does a little more than just help you to configure the RGB LEDs on the water block. It has some information on most of your computer's temperatures, and allows to tweak some of the fan options for the NZXT Kraken X52. There are a few different modes for the pump and fans, as I have alluded to earlier. The different modes are silent, performance, custom, and manual. The software allows for quite a lot of control over the RPM ranges of the pump and fans. There are quite a few different lighting options as well for the NZXT Kraken X52. These include fixed, breathing, fading, pulse, spectrum wave, marquee, covering marquee, alternating, loading, heat exchange, as well as some reactive modes, which NZXT just named smart and audio. This is quite an exhaustive list on what the RGB LEDs can do, and the final effect is pretty interesting if you are into these things. Overall, the software is easy to use and intuitive in my opinion.
Page Index
1. Introduction, Packaging, Specifications
2. Physical Look - Hardware; Installation
3. Test Results
4. Conclusion