Page 2 - Physical Look - Outside
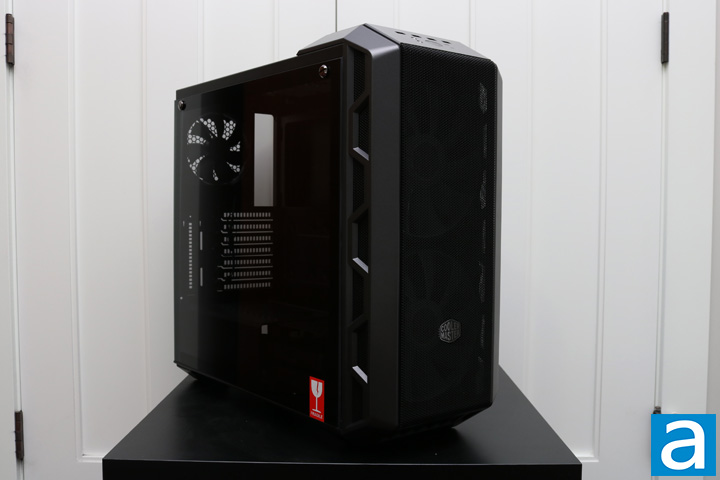
The Cooler Master MasterCase H500 sports an iron grey color scheme, which is mixed in with some black as well in the interior. The grey color is a nice change from the usual all-black cases. The RGB functionality also helps you to effectively customize as much as you would like. The Cooler Master MasterCase H500 has the usual design of Cooler Master cases, at least many of their cases, with a handle found on top, large front I/O, and a giant front mesh for exceptional airflow. The MasterCase H500 actually has an interchangeable front panel, which I will detail in the next section. Otherwise, we find a large tempered glass side panel, tinted black to create the nice gamer aesthetic with some LED lights. The tempered glass panel detaches with two screws that need to be unscrewed using a coin or a screwdriver. I found this to be slightly annoying, especially when I want to make a quick change to the RGB lights. However, the screws create a much better aesthetic than the usual thumb screws, so it is a win-some lose-some situation. Otherwise, the MasterCase H500 is slightly larger than a standard mid tower. Including the side panels, the length comes in at 525 mm, the width at 228 mm, and the depth at 502 mm. I could not find any specifications on the weight, but it is not too heavy, and after installing all the components the handle really helps.
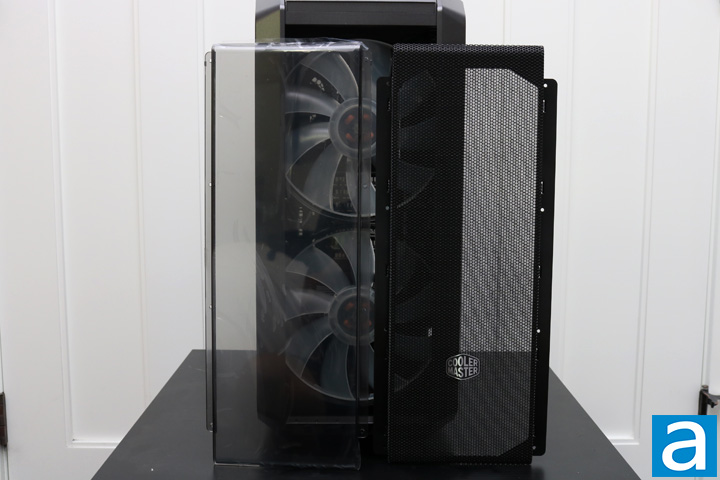
Here is a picture of the two interchangeable front panels. Unfortunately, it does not just pop in and out, but requires six screws to be removed and reinstalled to fit properly. I cannot see anyone needing to change this panel frequently though. Cooler Master has made plenty of attempts to make their cases as modular as possible, and this is definitely an advantage. It allows one to choose between aesthetics or performance, unless you really like a mesh panel front look. I opted for the plastic panel to get a clearer look at the fans.
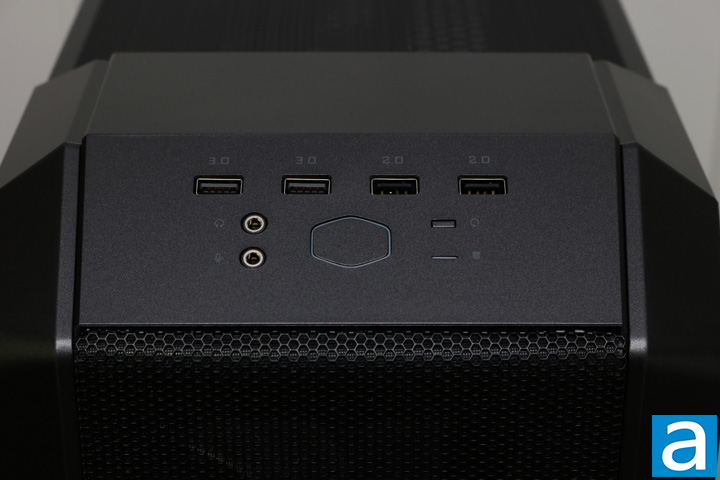
The front I/O is fairly standard. It houses four USB connections with two of them being the slower 2.0 standard and the other two being USB 3.0. Unfortunately, we do not have any USB Type-C here, which is quite disappointing. Also found on the front are two 3.5 mm jacks for audio and microphone inputs. In the center, with an LED ring surrounding it, is a large power button. To the right of the power button, there is the reset button, below which is the hard drive activity LED. According to Cooler Master's website, the RGB LEDs on the fan can also be controlled via the reset button, which is definitely better than having to open the case up to get to the RGB controller inside. Behind the I/O, we have the case handle, which is a nice addition and does not ruin the overall aesthetic.
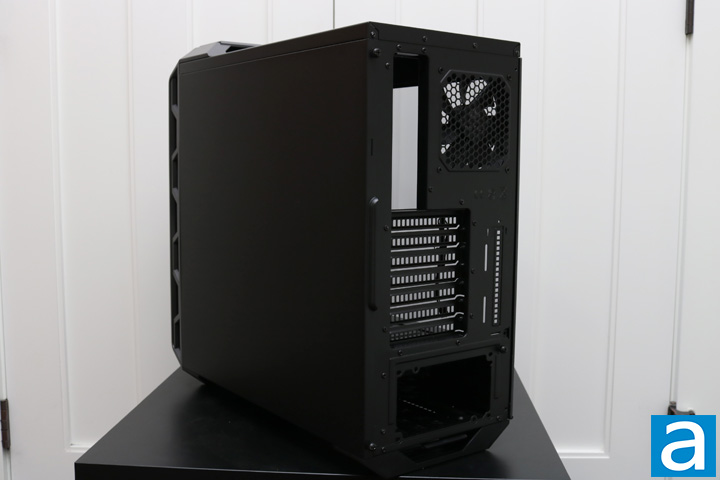
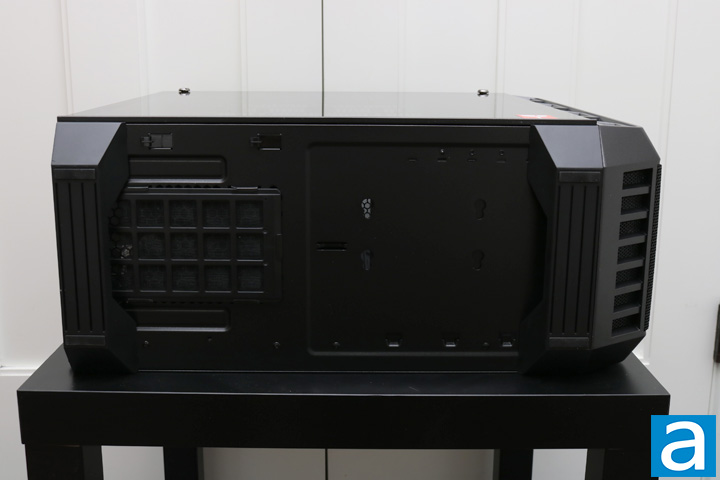
When it comes to the back of the MasterCase H500, it is the same as a traditional chassis. There are seven expansion slots with the power supply chamber found at the bottom. The expansion slots are slightly different than usual. They have no locking mechanism, which is not necessary, but each of them has a screw on the inside of the case rather than on the outside. This creates a much cleaner look on the outside of the case, making the expansions slots slightly indented instead of facing outward. A 120 mm rear exhaust fan is found right next to the motherboard I/O. The back side panel is made of metal, and easily comes off by removing two thumbscrews.
On the bottom of the case, we find the power supply intake as well as its dust filter. The dust filter has a plastic frame and sits on rails, making it really easy to remove and clean. However, the dust filter does not cover the entirety of the intake. There are really small gaps along the edges. These gaps are larger than the holes in the filter and will allow in more dust than the filter. However, it should not pose too much of a problem. Furthermore, we find two large feet on the bottom with a rubber bottom to keep the case steady. It raises the case high enough to allow air to be pulled in effectively, but not high enough to comfortably sit on a carpet. Lastly, to the far right of the case in the above picture, you can see another filtered intake for the front of the case.
Page Index
1. Introduction, Packaging, Specifications
2. Physical Look - Outside
3. Physical Look - Inside
4. Installation and Conclusion


