Page 2 - Physical Look - Hardware; Installation
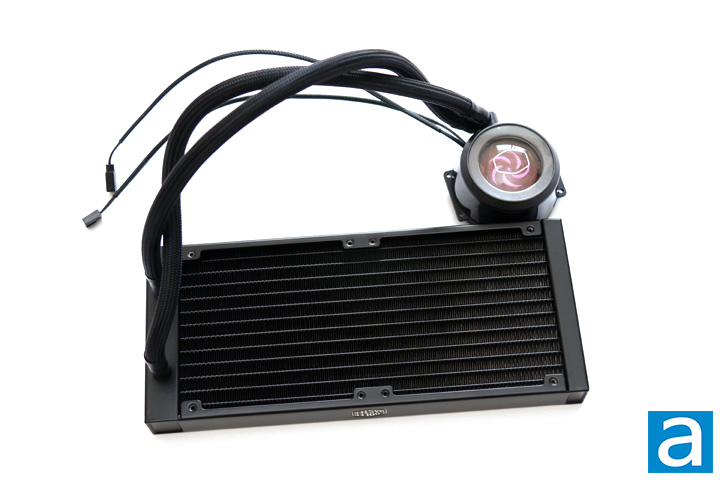
Compared to the last closed loop water cooler I looked at, the Cooler Master MasterLiquid ML240R RGB, the ML240P Mirage is a similar looking product, at least from a radiator standpoint. In this case, we have a full matte black finish with the majority of the parts covered in the same color, including the tubing. Cooler Master's branding can be found on the long side of the radiator. The water block is a bit different, especially with its transparent exterior, exposed impeller, and RGB illuminated pump head. The pump head has a Cooler Master logo outline with a purple hue hearkening back to the company colors. Two cables extend out from the water block. One cable is used to power the pump and terminates in a four-pin fan header connection. The other is an addressable RGB header with a three-pin header. Aside from the pump block, the all-in-one cooler looks similar to other competing products.
The radiator on the Cooler Master MasterLiquid ML240P Mirage feature a standard fin layout. Fins are placed in this manner so they come into contact with the liquid piping through its tops and bottoms. The result is a wavy set of fins. Heat from the liquid is pumped through the radiator and transferred to the fins through the contact points. Fans are attached on the radiator to dissipate the heat. The liquid is transported from the water block to the radiator via tubing. The tubing is made from an ultra-low evaporation rubber, measuring 400mm in length. This should fit in most standard midsize cases on the market, though it is possible this may be too short in some larger full-size towers. This depends on where you place the radiator in relation to the processor on the motherboard though, so your mileage will vary. The tubing is strong but flexible and should not form any kinks, even in extreme bending. The tubes also pivot slightly on the water block, allowing for an easier maneuverability should it be required. The tubes are covered with a braided cover to add a bit of a premium look.
The radiator measures approximately 277mm in length, 120mm in width, and 27mm in thickness. These are pretty standard dimensions for a 240mm all-in-one liquid cooler. The size of a radiator plays a pretty big role in cooling, as the larger the surface area, the better the heat dissipation. The radiator is made up of aluminum, which performs satisfactorily in terms of heat transfer. However, this metal material is lightweight, which should reduce the strain placed on the case. Overall, the build quality of the Cooler Master MasterLiquid ML240P Mirage is decent with no real bends in the radiator to be concerned about. This is not too surprising if you do find any, especially considering how malleable aluminum is.
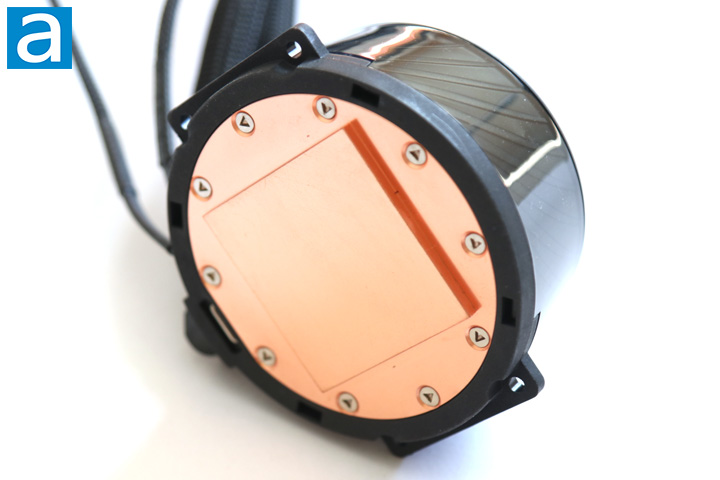
Going down the tubing, we get to the water block of the Cooler Master MasterLiquid ML240P Mirage. For the most part, it too has standard dimensions of 85mm in length, 80mm in width, and 43.2mm in height. A clear plastic shell goes around the rest of the pump to reveal some stylized lines. Internally, Cooler Master has advertised a dual chamber pump to carry water in and out. Otherwise, the base making contact with the processor is copper, which is expected. Copper is often chosen due to its excellent heat transfer properties. Four plastic holes on each corner are used to mount the included metal brackets for installation. Interestingly enough, this copper area protrudes out, rather than remaining flat overall. Otherwise, Cooler Master did have a plastic label on this area to protect it, but be sure to remove this label prior to installation.
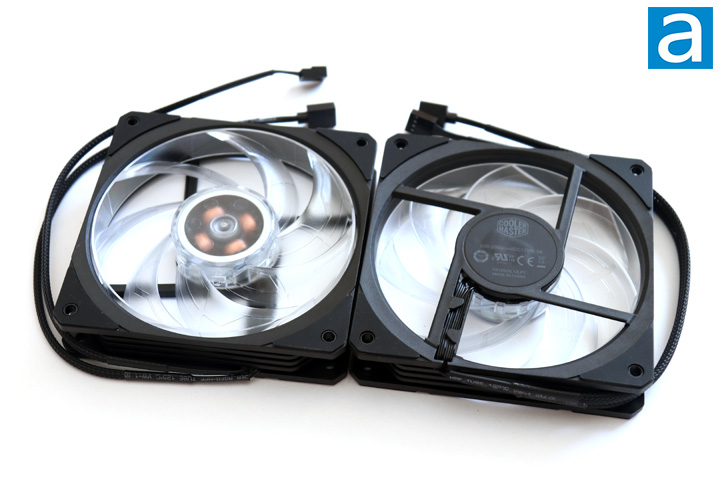
The two fans included with the Cooler Master MasterLiquid ML240P Mirage look to be variants of the MasterFan SF120R ARGB, especially as its specifications are close to the retail fan. Speaking of such, these fans have a speed range of 650 to 1900RPM. The rated noise level is a maximum 26dbA, though we will see what this means when we test for noise levels. Cooler Master has said these fans are created to balance between airflow and air pressure, as there is a decent amount of overlap between each consecutive fan blade. In addition, the fan produces an air pressure of 2.00mm H2O with an airflow rating of 59CFM. Otherwise, these fans also have rubber dampeners at each of the mounting points to soften vibration between the fan and the radiator. As you can tell by the fan name, these fans also have addressable RGB LEDs installed to make for a vibrant output. These fans have two connectors with one controlling the fan speed and power, while the other is used for the RGB header connection. The latter connects into the motherboard directly or the included RGB controller.
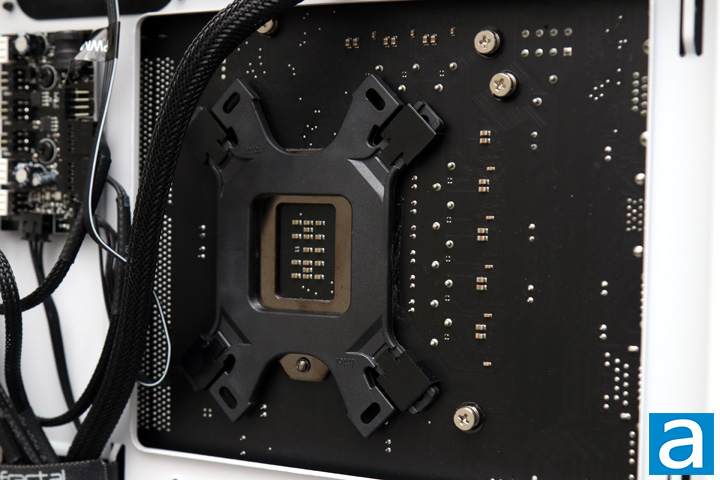
Installation of the Cooler Master MasterLiquid ML240P Mirage was as simple as any all-in-one coolers, but I will take you through a step-by-step walkthrough. The first step is to take the correct backplate for your system. A single backplate is provided for both of the consumer AMD and Intel mounts. As I am using an Intel test machine, you can see there are three different positions for the pegs, which cover the majority of the Intel sockets. AMD sockets can be mounted using the other arms on the backplate. Other sockets like the LGA20xx or AMD TR4 do not use this backplate, so you can use four screw pillars mounted directly to the motherboard. Slotting the backplate through the back of the motherboard is painless, as is securing the backplate with the four screws. Otherwise, the next step continues on the inside of the case.
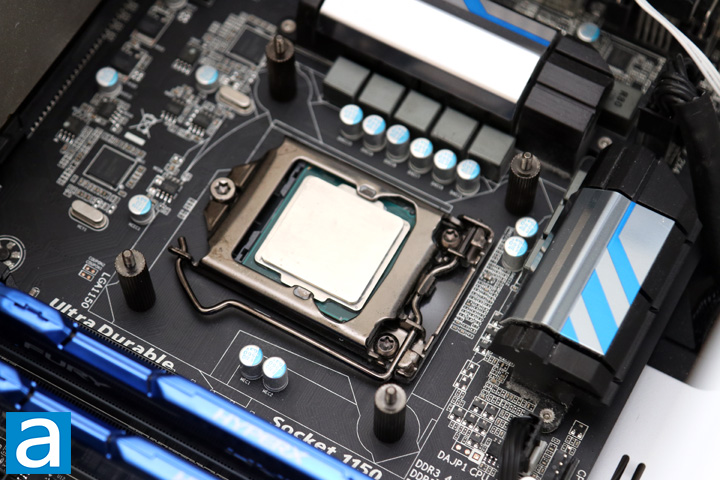
The next step would be to install the mounting arms on both sides of the water block. From here, you can either install the radiator and fans into the case or mount the CPU cooling block in place. Personally, I mounted the radiator and fans first, as it can be quite unwieldy trying to mount the CPU block with a dangling radiator. Thankfully, my case utilizes a top mounted removable frame, so users can install the radiator outside of the case before slotting it in. Next, I mounted the CPU block in place with the provided thumbscrews. Cooler Master includes a small tube of MasterGel Pro to apply to the processor. The last step is to plug all the connectors in place. I connected the power to a fan header and the fans to the motherboard.
One additional step I made was plugging in all of the RGB connectors to the included light controller. While I had a bit of difficulty with the last Cooler Master RGB controller, they have provided a few minor revisions to make connecting the cables easier. For one, the manual outlines what the different connections are for and where some of these should connect to. Secondly, they include a few plastic brackets to hold the connection points to the extension RGB cable provided. However, the connectors on the controller are still pretty weak as the RGB pins slide out easily. From what I understand, these buttons cycle through effects, colors, and speeds of the effects.
Page Index
1. Introduction, Packaging, Specifications
2. Physical Look - Hardware; Installation
3. Test Results
4. Conclusion