Page 3 - A Closer Look - Disassembly and Internals
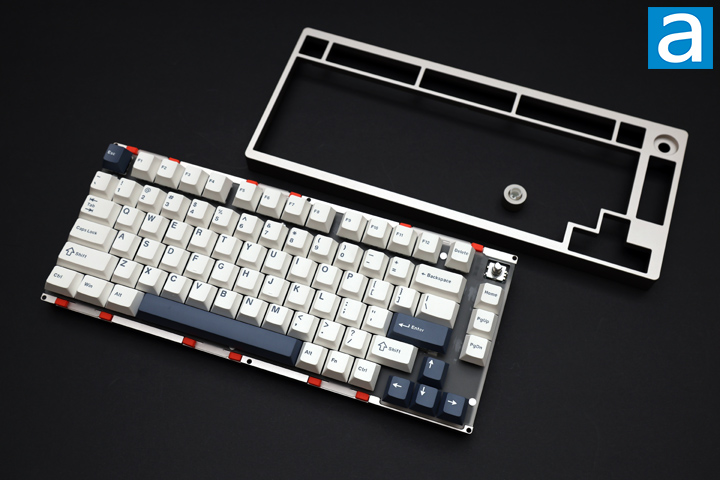
Unlike other Epomaker keyboards we have seen so far, the P75 is quite easy to take apart. In fact, Epomaker even provides a hex key if you do not have the proper screwdriver, although it will likely be easier with a screwdriver. On the bottom of the keyboard is a total of six hex screws that hold the enclosure together. You will also need to take the metal volume knob off the top. Once you do so, the top separates from the bottom, revealing the hardware inside. From this angle, there are multiple important things to note. First, all the switches sit on top of a polycarbonate plate. The whole keyboard deck is not fixed in place, but rather sits in grooves with orange gasket mounts to cushion any pressure from the top. The deck then sits in place since the top and bottom aluminum enclosures keep it in place. These gaskets should also reduce vibration or unwanted movement transferring from typing to the rest of the enclosure.
In between the plate and the PCB, there are several layers of sound dampening material, including a thicker sandwich foam, thinner IXPE switch foam, and another thinner sheet. These aspects help deal with multiple things, including stabilizing the stabilizers, providing a deeper tone to the sound, and reducing unwanted noise. They also provide a softer feel in each keystroke when bottoming out.
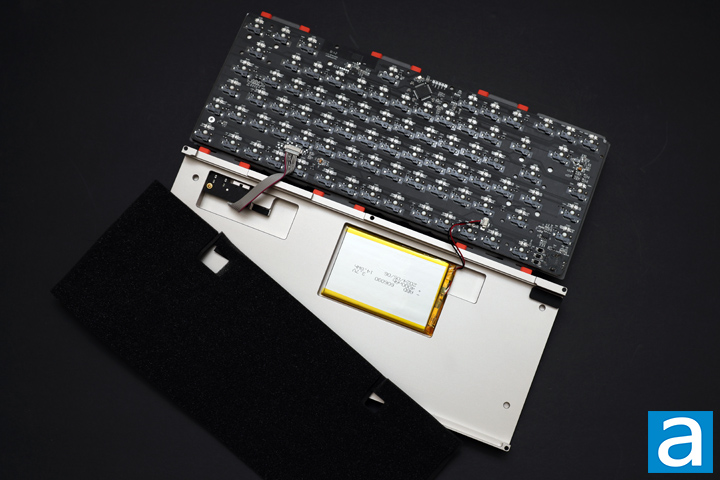
Lifting the Epomaker P75 keyboard deck off its indentation, you can see two other components connected to the keyboard. First, we have a smaller daughterboard that connects to the USB port and mode selector switch at the back. There is also a small indentation where the USB transmitter can sit. Next, we have a large 4000mAh battery. Ours was manufactured in May 2024. This plugs into a socket on the keyboard PCB. Speaking of which, you can see all the hot-swap sockets on the back of the keyboard PCB. I am not entirely sure who the manufacturer of these is, as it has a branding of "Omsen" on each one.
In addition to the battery and connection board, we have a less dense sound absorption foam and an EVA case foam. In total, we have five added layers to the keyboard deck and the PCB, which is quite impressive to see how much they have sandwiched into this enclosure. The other real thing to note is just how sturdy the metal shell is, although this should not be too surprising.
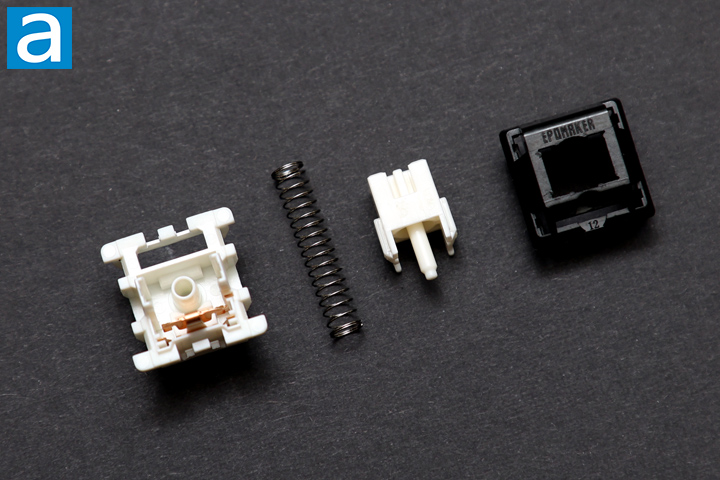
The Epomaker Zebra switches are appropriately black and white in their housing and stem. After you open the switch, there are a few things to take note of. The top black shell is made of polycarbonate, while the bottom white material is nylon. In between, we have a white polyoxymethylene plastic stem, which is also known as POM. It might be a bit strange to see all these different plastics used here, but there are benefits for each. For example, polycarbonate generally is strong and hard, which should keep the switch housing durable to multiple swaps. POM is beneficial to use, as it has a high resistance to abrasion and strength, which should make for smooth travel. Altogether, we should have a consistent and creamy sound when bottoming out. The metal spring inside is 21mm long, which is a tad longer than most. This should provide more stability and linear movement. There is minimal stem movement from side-to-side or forward-and-back, which is good to see. Otherwise, everything inside is factory lubricated to keep movement smooth for longer.
Page Index
1. Introduction, Packaging, Specifications
2. A Closer Look - Hardware and Software
3. A Closer Look - Disassembly and Internals
4. Conclusion


