Page 3 - A Closer Look - Disassembly and Internals
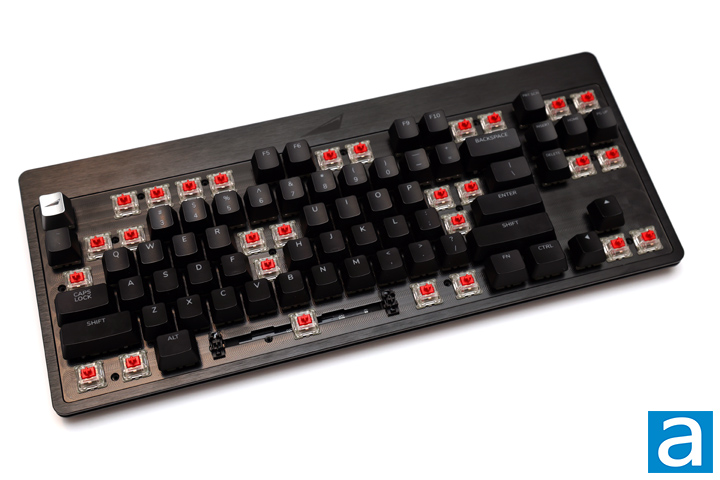
Another feature that stands out in the Mountain Everest Max is its easy disassembly, which is not too common in keyboards, either old or new. Unlike most keyboards that use hard plastic clips that can be tricky to release and pull apart, the Everest Max is held together with fourteen screws that all easy to access. To disassemble the keyboard, you can start by removing the necessary keycaps to reveal all of the screw heads. I used a #0 Phillips head screwdriver to remove the screws. Once all fourteen screws are out, the top plate lifts off easily, allowing you to separate the keyboard portion from the rest of the body.
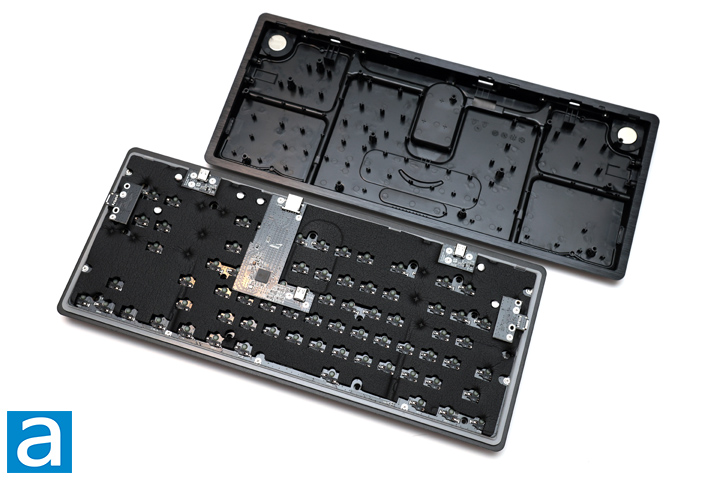
Inside, you can get a clearer view of how the two halves of the Mountain Everest Max are divided. The top half houses all of the components, including the five USB Type-C ports for connecting additional accessories and the primary connection to the computer. You can also see the rear-facing full-sized USB Type-A port. The entire back is lined with a thick, plush sound-dampening foam that fills the hollow shell, reducing pinging sounds and general resonance. The foam layer effectively fills gaps and minimizes noise. The soldering quality on the PCB is excellent, with no excess soldering visible. All of the hot-swappable sockets are made by Gateron, indicating compatibility with three-pin mechanical switches. However, I would have preferred five-pin compatibility, as it would allow for a wider range of switches from other manufacturers.
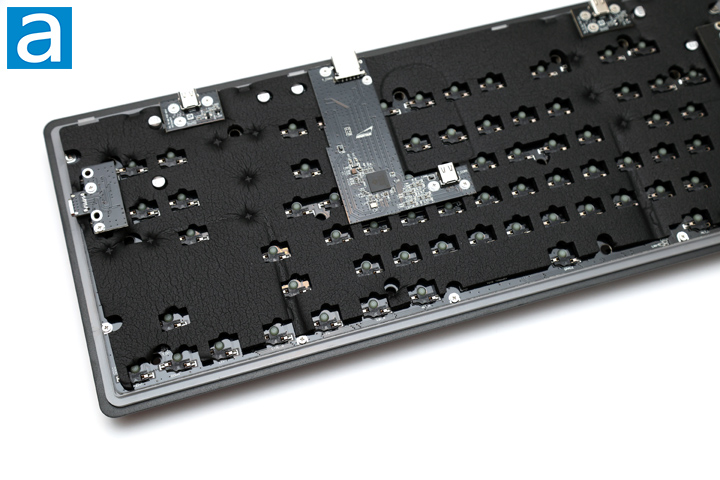
There are a few smaller daughterboards on top of the primary printed circuit board, including a larger one with a Genesis Logic GL3523 USB 3.2 Gen 1 4-port configurable hub controller. This controller is backward compatible with older USB versions. Underneath the foam, you will find a Holtek HT32F52352 32-bit ARM Cortex microcontroller with 128KB onboard flash memory. Additionally, there is 8MB of flash memory for storing profiles and their associated configurations. Interestingly, a label underneath the foam indicates this keyboard was built two years ago, in 2022. Overall, I am quite impressed with the build quality and the choice of materials.

Examining the plastic bottom, you will notice an additional aluminum rim on top that creates a sandwich effect on the sides, allowing light to bleed through. The rest of the shell is made from ABS plastic, which is both sturdy and lightweight. Multiple cross standoffs reinforce the board and prevent sagging. The bottom of the Everest Max features several channels of cable valleys and two large circular magnets, one in each of the back corners, to keep the feet in place. In terms of modernization, I would like to see some dampening where the PCB contacts the shell to reduce the slight pinging we heard.
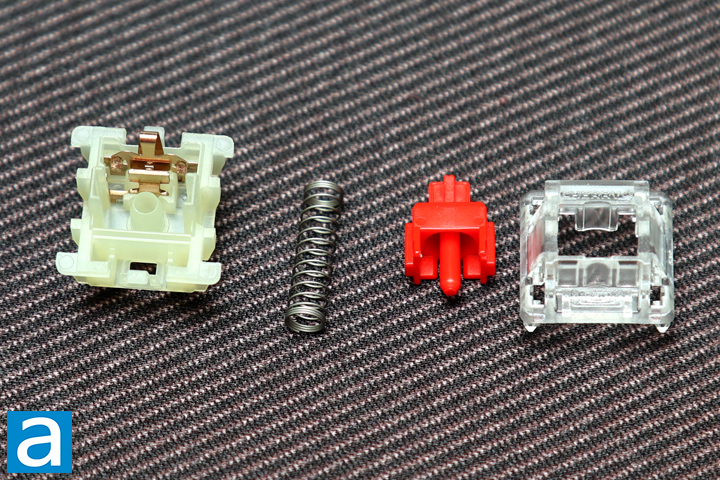
With the Cherry MX Red switches taken apart, you can see all of the elements in the mechanical switch. There is a clear top with a translucent bottom housing rather than using a black bottom and top shell. This bottom is slightly green in hue, which almost makes it look like it would glow in the dark, but it does not. Inside, we have the contacts made from a gold alloy. The stainless steel spring sits in between the bottom housing and the red stem. This stem is made of polyoxymethylene, or POM, plastic. Meanwhile, the top housing is made of polycarbonate while the bottom housing is nylon. One thing you will see is a lack of any lubrication, which is present in the newer MX2A switches. This could have potentially helped with reducing the rougher travel while also producing a more "thocky" click.
Page Index
1. Introduction, Packaging, Specifications
2. A Closer Look - Hardware and Software
3. A Closer Look - Disassembly and Internals
4. Conclusion


