Page 2 - A Closer Look - Hardware and Software
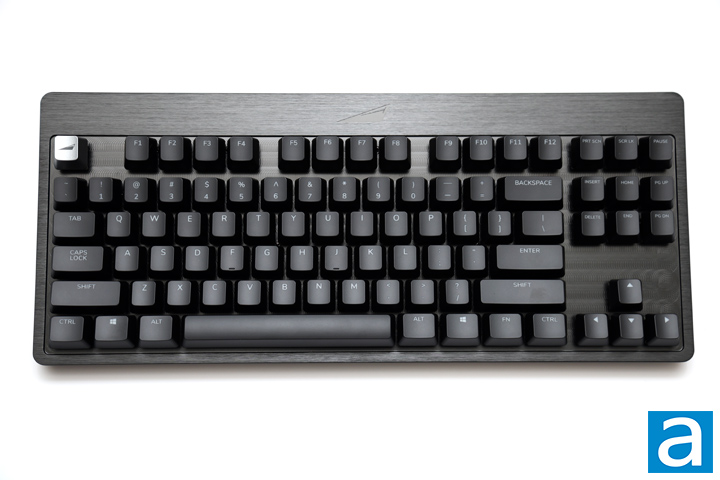
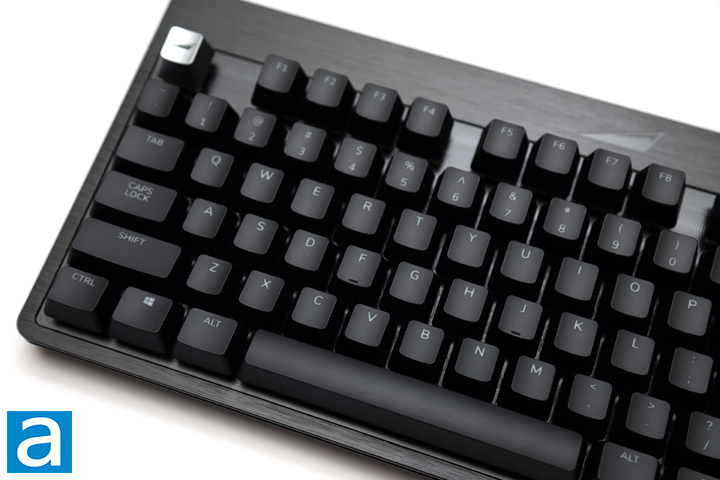
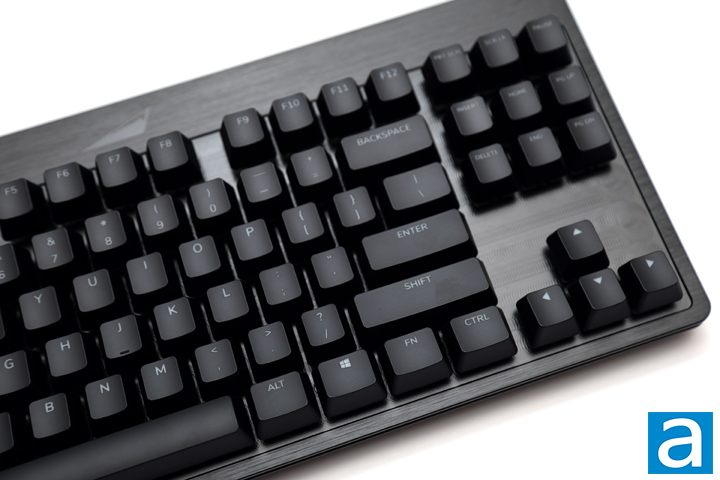
As you know by now, I really enjoy the tenkeyless format, and technically, this is what the Mountain Everest Max is, at least without the separate number pad attached. From here, you can see the design of the Everest Max is pretty straightforward, featuring an exposed metal backplate and switches that are visible on the sides. The metal has two different finishes with a brushed feel on the border and more prominent milling marks in the middle. This means you can see the circular swirls, especially near the arrow key cluster. Personally, I am not a huge fan of this finish, but I can appreciate the contrast regardless. In either case, the finishes do a good job of hiding fingerprints. The Mountain Everest Max is an island-style keyboard with full-length keycaps. According to the specifications, you can get this product in Gunmetal Gray or Midnight Black.
The Mountain Everest Max has dimensions of 365mm in width, 155mm in depth, and 43mm in height. These measurements assume the lowest height without any accessories attached. Furthermore, the tenkeyless portion of the keyboard weighs 814g. Adding the accessories increases both the dimensions and the weight. The media control pad, when attached to the back of the keyboard, adds an additional 58g and approximately 20mm in depth. The wrist rest weighs 167g and adds 70mm of depth. Finally, the number pad, when attached to the sides, adds 94mm in width and 298g. All in all, with everything attached, the keyboard becomes quite hefty. As a whole, the Everest Max is extremely well-built, with no signs of flexing or torquing. The top aluminum backplate is very strong and does not bend at all. The base of the keyboard is still plastic, but there do not seem to be any weak points underneath.
The layout of our Mountain Everest Max is QWERTY ANSI, with a total of eighty-seven keys. This layout makes the keyboard easy to adjust to, as all the keys are where you would expect them. The bottom row is spaced out in a standard fashion, with the Ctrl, Windows, Alt, and Function keys in a consistent 1.25U size on both sides of the space bar. You will also notice that we have two Windows keys rather than a Menu key on the right side. Features such as the indicator LEDs for different lock statuses and a volume knob are all found on the detachable media cluster.
As for secondary functions, none are labeled on the keycaps, but they are detailed in the quick start guide. To access these functions, start by pressing the Fn key on the bottom right side before pressing the indicated key. For profiles, you can switch between five options by pressing 1 to 5 on the number row. Media controls are located in the six-key cluster above the arrow keys: Insert functions as Play/Pause, Home as Mute, Delete and End as Previous and Next Track, and Page Up and Page Down for increasing and decreasing volume. To activate Game Mode, which deactivates certain keys like Windows or Alt+Tab, press Fn+Pause. Finally, holding Fn+R for five seconds will reset the Everest Max to its default settings.
The keycaps of the Mountain Everest Max are made of ABS plastic. I prefer PBT, or polybutylene terephthalate, keycaps because this material is more durable and retains its color better. The lettering is applied using a laser etching process, which removes the black cover to reveal the translucent plastic underneath. This is a typical and cost-effective method for keycap printing. The choice of font is good and legible throughout. The keycaps use standard MX stems and follow an OEM profile, featuring a slight concavity in the middle of each key to help users’ fingers rest comfortably.
The Mountain Everest Max offers full NKRO over USB. NKRO stands for N-key rollover, which refers to the number of keys that can be independently scanned by the hardware. This feature addresses issues of ghosting found on cheaper keyboards. While "ghosting" is a marketing term, it describes situations where the keyboard fails to recognize more than one keystroke at a time, potentially causing missed keys. This can be frustrating whether you are playing games or typing very quickly. Historically, "ghosting" referred to a problem where a third key was registered when two other keys were pressed, but thankfully, this is no longer a common issue.
Before continuing, one of the key selling points of the Mountain Everest Max is its key switches. There are three main types of keyboards on the market today. The most affordable and common is the membrane keyboard, which is easy to manufacture but provides a poor typing feel and response due to its squishy keys. Next is the scissor switch keyboard, which is almost like an enhanced rubber dome. It features two interlocking plastic pieces connected to the key and the keyboard, offering a better tactile response and typing experience compared to membrane keyboards. Mechanical keyboards are the most expensive because each key switch is an independent component. These switches typically consist of a housing base, stem, and spring, with varying degrees of tactile and audible feedback.
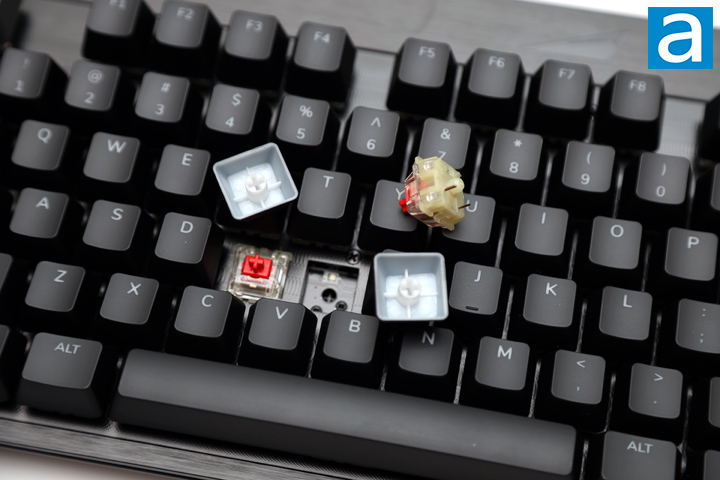
Our unit of the Mountain Everest Max comes with genuine Cherry MX Red switches. It is worth noting that Cherry announced their second version of switches sometime last year, but from what I can see, these are the original variants. Linear switches are often favored by gamers for their quiet typing experience and relatively low actuation force. They are rated to last up to one hundred million keystrokes, with a 45g actuation force, a travel distance of 4mm, and an actuation distance of 2mm. Additionally, each switch has a clear enclosure that allows the RGB LED lighting to disperse effectively. The lights are north-facing and mounted on the PCB. Furthermore, these switches are hot-swappable, which is why the package includes a switch puller and additional switches. Longer keys, such as the Space bar and Enter, are equipped with Cherry stabilizers to prevent wobbling and are lubricated from the factory for smoother and quieter action.
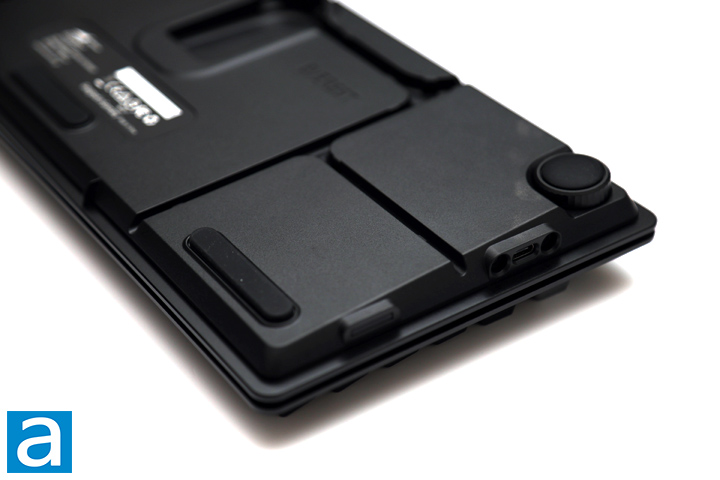
Looking underneath the Mountain Everest Max, you will find a label in the middle with certification information and a serial number to identify this specific unit. The label also indicates that this keyboard was designed in Germany and made in China. In the center, there is a large opening with a USB Type-C port. The keyboard features Type-C ports all around with two at the back and one on each side. However, only the port underneath the keyboard is used to connect to your system. Instead, the others are for attaching accessories. Rubber feet are located in the corners and in the middle at the front to keep the keyboard in place. You might be wondering where the riser feet are. Instead of traditional riser feet, Mountain includes several magnetic feet pieces that attach to the back. These allow you to increase the height in 0.5cm increments with a total of eight spacers available. This means that if you use the number pad and raise everything evenly, you can lift the back an additional 1cm. Indented guides around the keyboard help direct and lead the cables out the back or sides.
The other two distinguishing features of the Mountain Everest Max are located on its sides. First, you will notice a thin gap around the edge, fitted with a translucent plastic piece. This serves as a diffuser for the lighting around the edge of the Everest Max. There are a total of thirty-two LED zones around the keyboard, with two lights per zone that can be individually customized. By default, these lights are synchronized with the keys closest to them, but they can be changed individually for a distinctive effect.
Secondly, you will find the previously mentioned side USB Type-C port along with a second narrow area nearby. This is designed for mounting and aligning the number pad to either side of the Everest Max. The number pad includes a mechanism underneath that allows a plug to extend from either side. Although this connection is not the strongest, it also easily disconnects without causing damage to the port. Finally, not pictured but located at the very back of the Everest Max, is a USB 3.2 Gen 1 Type-A port. It is a nice addition, providing an extra port that can be used to connect another peripheral to your system.
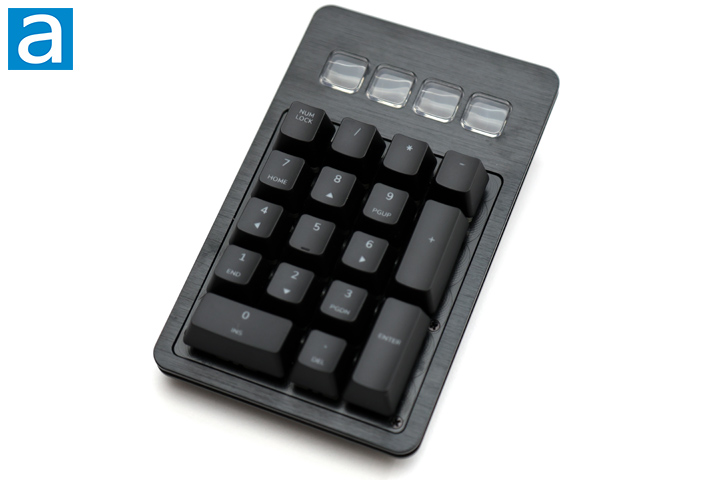
The number pad for the Mountain Everest Max is quite standard, with one notable feature. Its appearance and construction closely match the rest of the tenkeyless portion, ensuring a cohesive look. The distinguishing aspect is the four clear buttons on the top. These buttons are programmable for various functions, including executing macros, keystrokes, running operating system commands, opening programs, or launching websites. The 72x72px display can be customized to show different images, such as program icons or your own custom images. I am still pleased to see this functionality even though the buttons lack depth and may not feel the most pleasant to press,
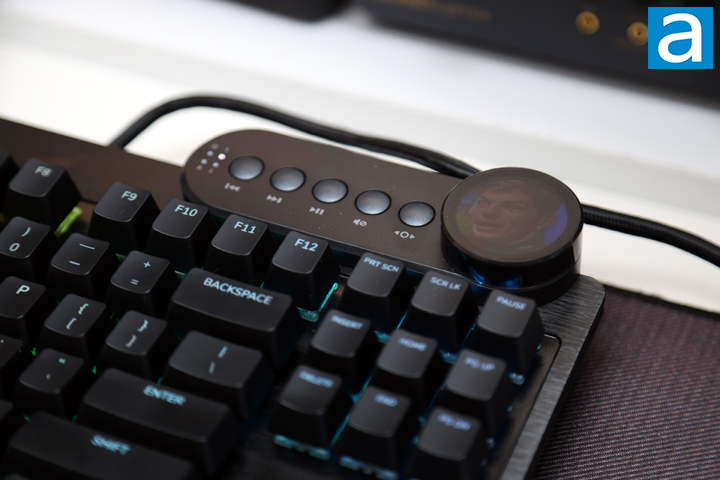
The media control pad of the Mountain Everest Max attaches to either the left or right side via a physical USB Type-C connection. The control unit features several lights and buttons. First, there are four lights to indicate the Game, Num Lock, Caps Lock, and Scroll Lock statuses. Next, the four media buttons allow you to change tracks, play or pause music, and mute the volume. The final button, located near the large dial, is used to navigate the items displayed on the dial. A single click enters the menu and a double-click returns to the previous screen. The large knob is one of the largest and most sophisticated we have encountered, serving multiple purposes. It includes a screen that displays different options for adjustment, and you can set your own image as a screensaver, as shown above. The knob rotates both left and right with distinct notches. Although it does not feel premium due to its plastic construction, the notched movement is distinct. We will explore its capabilities further in the software utility review.
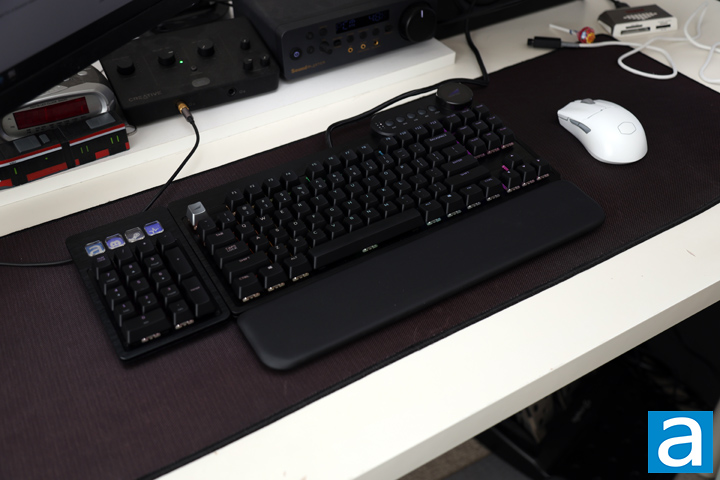
On my desk, the Mountain Everest Max is fully assembled and connected to my PC with all attachments in place. I truly appreciate how many adjustments can be made in small increments to suit my preferences. This includes height adjustments and the modular nature of the various accessories. As you can see, I placed the number pad on the left side to provide more space for my mouse movement. However, I did encounter a usability issue with the number pad. It often disconnected after booting up my system. While the LED lighting would illuminate and the numbers would function as expected, the four macro buttons would display the correct icons, but fail to execute the configured commands. Additionally, the Mountain software would not recognize the number pad as connected. The only solution was to fully unplug and reconnect the keyboard to my computer. It is somewhat disappointing to encounter these glitches, especially given how long this keyboard has been on the market.
The typing experience of the Mountain Everest Max felt like a throwback, as I had not used Cherry MX switches in a long time. I generally prefer linear switches, but the Cherry MX Red feel dated with a rough travel and sponge-like bottoming out. Each key press is quiet, although you can occasionally hear the hollowness of longer keys like the Space bar, some squeaking from stabilized keys, and a slight metal ping from the backplate. Overall, the sound has a higher pitch, but remains relatively quiet. Key wobble is generally minimal, which is a positive aspect. Personally, the biggest adjustment for me was the actuation distance and the 2.0mm travel felt a bit too deep. It ultimately comes down to personal preference, but I would have preferred to see an update to using Cherry’s MX2A options.
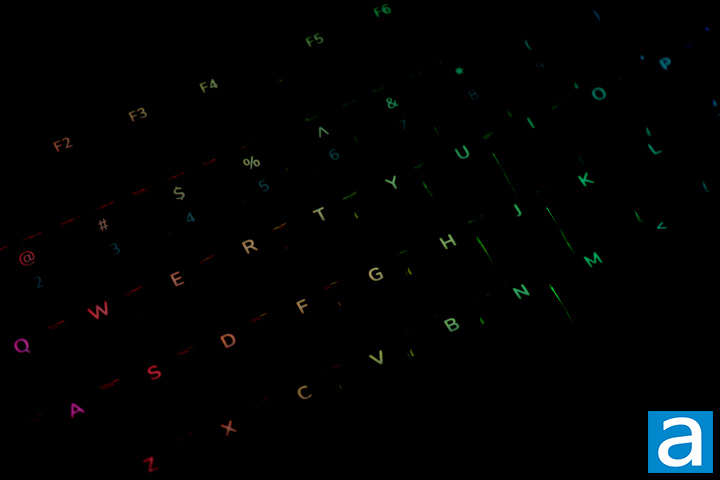
The RGB LED lighting on the Mountain Everest Max has several favorable aspects. It offers all the standard effects, including a rainbow mode and various static and reactive options. Each key features legible legends with north-facing lighting that illuminates the top font on each key. Even though most alphabet keys are easily light up, the number row and secondary functions are not backlit at all. Additionally, there is an uneven light diffusion on longer keys like "Backspace" and "Caps Lock". The color temperature of these lights are a bit warmer in color with a slight yellow hue. At maximum brightness, the lights are not as vibrant as its competition, and a slightly brighter backlight would be appreciated. A standout feature is the side lighting, which add a subtle glow around the Everest Max. Lighting controls can be adjusted using secondary functions on the arrow keys. The up and down arrows control brightness, while the left and right arrows cycle through backlight modes. These settings can also be modified in the Mountain Base Camp software.
All of Mountain's products are compatible with their Base Camp software, which aligns with their branding theme. The software is available for download on their website and can be easily located on the front page. The file is a 248MB compressed download. The setup process is straightforward and the software immediately recognized the Everest Max to install the necessary components. Upon first launch, it updated the firmware to the latest version. The main page displays all connected peripherals. You can select your product from this page or use the tab at the top to navigate to the keyboard page.
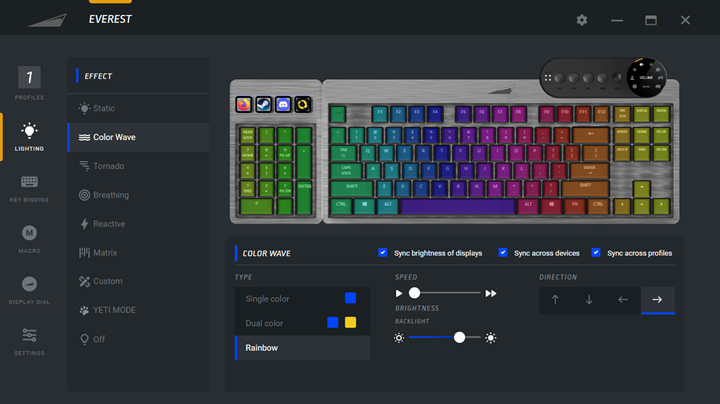
On the keyboard page, settings are organized into six sections, each with a distinct icon and subtitle. The first section, named "Profiles", allows you to create and save up to five different profiles. For each profile, you can set activation triggers for program launches, duplicate the profile, or reset it to default settings. You can also import and export profiles. The second section is for lighting configurations, where you can adjust the backlight settings. This includes the same set of effects and a custom option for overlaying multiple effects on a per-key basis. You can configure brightness, effect speed, colors for non-rainbow effects, or turn off the lighting altogether. The third section deals with key bindings, allowing you to modify every key except the Function key and the multipurpose button on the media control pad. This section also lets you adjust the display buttons, including the icons they show.
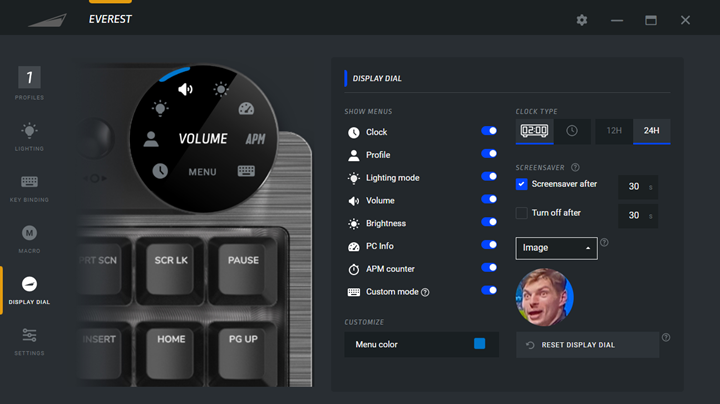
The fourth section is labeled "Macro", allowing you to create new macros by recording mouse and keyboard actions. The fifth section, "Display Dial", lets you configure the media control pad wheel's functions. This includes various options such as monitoring or adjusting time, profiles, lighting modes, volume, backlight brightness, PC status information, APM counters, and a custom mode. You can customize the selector color, clock display type, and screen saver settings, with the option to display a default menu as the screen saver. Finally, the sixth section is labeled "Settings". Here, you can adjust additional keyboard settings, such as configuring what Game Mode deactivates, deciding if the indicator LEDs should reflect the keyboard backlighting, and changing the keyboard's language. You can also update the firmware from this page.
Overall, I found Base Camp to be functional but with some annoyances. I had to reinstall the utility several times before it worked properly. Even after successful installation, Mountain's software frequently reverted my settings, either after booting my system or just when navigating around Base Camp. This issue ceased only after I exported my profile to an XML file. Additionally, I encountered several usability problems, including the occasional failure of the software to recognize the number pad. Saving changes to the keyboard also took longer than expected, as it would try to update the keyboard immediately after every modification. It would have been beneficial to have a "Save" button to batch saving multiple changes and providing visual confirmation that changes had been applied. For a utility that has been available for several years, I expected a more refined solution from Mountain, but unfortunately, it did not meet those expectations.
Page Index
1. Introduction, Packaging, Specifications
2. A Closer Look - Hardware and Software
3. A Closer Look - Disassembly and Internals
4. Conclusion


