By: Jadon Lee
July 24, 2020
In the past couple of weeks, my brother and I have been on a hunt to find our ideal house. If you have read my profile, my current goal is to become a homeowner by the age of 20. When considering the price, square footage is a component people look at. Geographical location is another key aspect regarding price. While I personally do like smaller and tighter homes with good layouts, there have been several occasions where these smaller homes were more expensive compared to other larger homes due to the location. Much like homes, there are several smaller ITX and mATX cases that cost more despite the difference in size. One thing smaller cases must consider in their design is the general layout. Unlike larger ATX cases, the layout of smaller cases absolutely needs to be well planned out as cable management is much more important. Larger cases with bad layouts can be dealt with more easily due to the greater amount of space inside. It is kind of like having a washroom directly next to your dining room. It will work functionally, but will not be pleasant for anyone using it. In a smaller case, this analogy is more exaggerated as the toilet seat will likely also be your dining room chairs. Taking this into consideration, FSP has sent over their CST110 mATX case for us to try out. How will the FSP CST110 function given its smaller form factor? Keep reading to find out!
The FSP CST110 arrived via FedEx International Ground shipping in its retail box from Chino, California alongside the CMT260, which I have recently reviewed. The retail box had very few marks and scuffs, but the package arrived in one piece. FedEx had successfully performed its task at hand to ensure the safety of the contents.
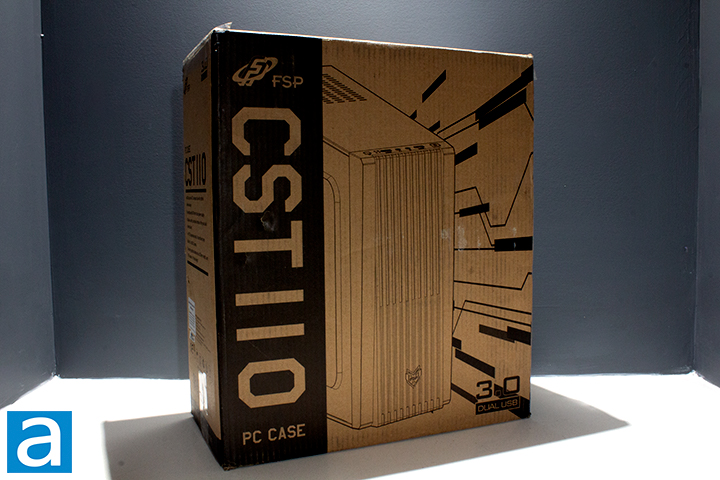
As seen in the photo above, FSP uses a brown corrugated cardboard box with black ink to display all content about the CST110. On the front of the retail box, the design is generally basic; having FSP's logo proudly displayed right above the case's name on the left. On the right of the text is an image of the general design of the case itself and follows up in the bottom right corner showing how this case has dual USB 3.0. In the current standard of cases, USB 3.0 is not too big of a deal, as most cases nowadays do have USB 3.0 or even USB Type-C. The right side of the retail box dives into the specifications of the case, while the left side of the box speaks directly to the case's features. The back of the box displays a diagram of the case taken apart with three fans. This diagram could be misleading as this case only comes with one preinstalled fan as an intake. One feature about the retail box design I thoroughly enjoyed was the included handle on the top of the box. The handle made carrying a small box like this one significantly easier. That is enough with the box, let us move on unboxing the CST110.
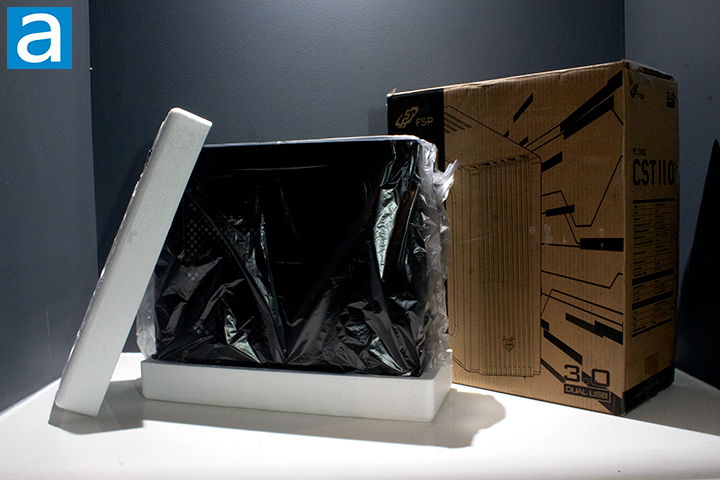
FSP used two large Styrofoam blocks on the top and bottom of the case to absorb any impact that may have occurred in the delivery. This is important for any case in general as it prevents dents. The case itself was wrapped in plastic to prevent scratches. Inside the case are all the screws needed for installation, some zip ties, extra brackets, a motherboard speaker, as well as an instruction manual. The packaging did its job in preventing any damage to the case.
Before we continue, here are the specification for the FSP CST110, as posted on the manufacturer’s site:
Model Name: CST110
Type: SFX Small Tower
Color: Black
Materials: SPCC; Plastic
Dimensions DxWxH (mm): 350 x 140 x 335 mm
Maximum CPU Cooler Height: 115mm
VGA Card Length: 180 mm or 270 mm (only install HDD/SSD x1) Height Limit: 120mm
Expansion Slots: 4
MotherBoard Support: Micro ATX, Mini-ITX
External I/O port: USB3.0 x 2, HD Audio
Power supply Type: SFX PSU
3.5” HDD: 3 (share with HDD x3)
2.5” SSD: 3 (share with HDD x3)
Cooling System: Front: 120 mm Fan x1 (pre-installed), Rear: 2x 60 mm fans
Maximum PSU Length: 150 mm
Page Index
1. Introduction, Packaging, Specifications
2. Physical Look - Outside
3. Physical Look - Inside
4. Installation and Conclusion