Page 2 - Physical Look - Outside

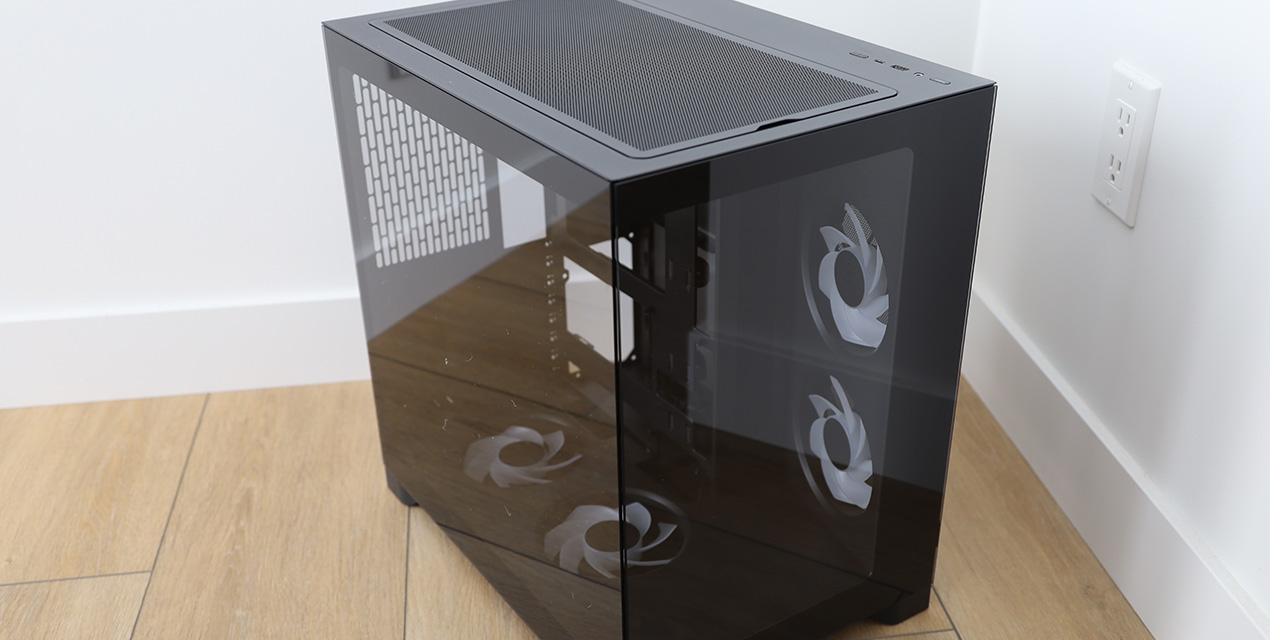
The first thing you will notice, or at least I hope you will notice, is the exterior is completely black. Sticking to a simple design and a nice dark body makes for a very simple, plain, and smooth surface. On the downside, nothing about this chassis jumps out at me. I guess if you want to call it a sleeper look, you could push that, but it really just looks like a generic box with nothing outstanding about it. I am happy about the fact that it doesn't look ultra cheap; it simply has a clean look, which might even tickle the interests of a few people. The edges of each panel and component are clearly visible, which is great from a functional point of view, but takes a little bit away from the overall visual appeal. This case could be described as a girl going out for a night at the bar in a black dress, and happened to put on a bit more eyeliner than necessary. While it doesn't make her ugly, it does take away from the look.
The BitFenix Merc Alpha provides you with three 5.25" drive bays, as well as a single 3.5" external drive bay. The 3.5" external drive bay comes as another pleasant and unexpected surprise, as there are many value chassis don't even bother with this feature. I can't tell you the last time I ever utilized the external 3.5" bay, but I wouldn't be surprised if a few people still do. Near the bottom, you can see an opening for the ventilation. I'm not sure how much ventilation this can actually provide, but I guess it is better than nothing at all. If you look at the specifications, you can see that BitFenix states there is room for two 120mm fans on the front. I'm not sure about you, but I don't see how two fans at the front would provide any serious benefit. I mean, sure you can put a bigger turbo into your car, but that doesn't always mean a performance improvement.
When looking at the dimensions, you will come to find that this chassis is smaller than what you would expect for an ATX computer case. In fact, it measures in at 190mm width, 439mm height and 490mm depth. This is almost the same size as the In Win Dragon Slayer, which was an mATX chassis. Honestly, 190mm width is pretty much the smallest I have ever worked with. Even the NZXT Source 210 Elite was only 195mm wide, and I felt that was restrictive, but maybe BitFenix has something up their sleeves. One particular note I should make about the front is that there is no logo located on it. If you wish to display your BitFenix pride, you will have to put the provided sticker on the front. So naturally, for those who are lazy like me, are not even going to bother doing this. I don't see Kia dealerships handing out emblems to people for their cars, why would a computer case manufacturer be any different?

When peering at the front panel, the clear lack of a USB 3.0 port is a little bit depressing. Essentially, it makes it only possible to have USB 3.0 ports located at the back, but like everything low cost, you are will need to compromise a bit. On the other hand, you will get four USB 2.0 ports instead, which is more than enough for most people. In addition, there is a microphone and headphone jack to suit your basic audio needs. Now those are fairly typical features, but I have definitely had a chassis in the past that didn't have any front audio I/O. It was many years ago, and thankfully, nowadays even value cases have these ports as standard. Above the audio ports are two LED lights; one for the disk activity and the other for system power -- handy and simple.
I also would like to point out that each port is also nicely labeled for the not-so-tech-savvy users out there. On the right side of the top, there is a reasonably large power button with a much smaller reset button adjacent to it. Both buttons have a reasonable amount of travel before becoming fully depressed. So while you are trying to figure out which way to plug in the USB, rest assured, you won't accidentally hit the power button out of frustration. As you look further down the top, you will see two vents for 120mm case fans. A very nice touch for the computer as these will allow you to install additional fans for additional cooling. Overall, I have to say the top of the Merc Alpha is very well laid out, and provides a reasonable amount of functionality, minus the USB 3.0, but this isn't 2012 the end of the world.

After performing a majestic 180 spin, we can see the back side of the BitFenix Merc Alpha. From this angle, you can see the one and only fan that comes with the case. It is just a plain 120mm fan for rear exhaust of the computer; right beside the motherboard I/O panel. I'm curious to see how much cooling this single fan can actually provide. Certainly, this case is not something I would want to be overclocking heavily inside of. I have a feeling this fan provides a negligible amount of cooling. Immediately below the exhaust fan, you will see two holes that can be used for water cooling; however, BitFenix doesn't provide rubber grommets for these holes. Hopefully you aren't thinking about using water cooling inside of this mid-tower. Jumping to the very bottom, you can see the opening for the PSU, providing the typical openings and holes to secure your power supply.
I know it is hard to see in this picture, but beside the PCI slots, you will find a metal rail, which is used to lock the slot covers. It is a very odd configuration, especially since it is located on the outside, but the benefit is more usable room on the inside of the case. The rail requires the removal of three screws in order to get access to the PCI slots. This isn't the most intuitive design, as it provides no quick and easy way to swap out cards or change the configuration. However, I would not be expecting someone with this case to be changing their hardware very often. The back side of the BitFenix Merc Alpha has a total of seven PCI slots; the top and bottom come with replaceable slot covers. The other five, which reside in the middle, are metal flaps that you will have to break off. This eliminates the possibility of reattachment once you have removed them. Obviously, this isn't very friendly, but it is acceptable for this chassis as it isn't likely for parts to be switching PCI slots.

If you haven't already, please go ahead and count the number of feet located on the bottom of the case. Yes, there are only three of them. At first, I was very confused, but I guess reviewers these days aren't just about reviewing the products, we must also learn to balance like great masters. Even after searching around the box to see where the foot may have gone, I turned up empty. It wasn't until I was ready for the installation that I noticed the missing foot was wedged at the bottom front corner of the chassis. Balance, minimalism, and observation are keys to the Merc Alpha. Even after I reattached the missing foot to the BitFenix Merc Alpha, I noticed the foot refused to fit properly, and it actually fell off when I was sliding the chassis on top of my table. Whoever does the quality assurance at BitFenix must have fallen asleep this time around. Well, enough talk about feet. Also on the bottom of the case, you can see two vents. The one located at the back is for the power supply, and the vent near the middle allows for the installation of another 120mm case fan. Additionally, you can see between the two vents an array of holes along each edge. This is for the installation of a power supply brace; however, if you read onto page four, you will see why these holes aren't very useful. Next, we will take a look at the stuff going on inside.
Page Index
1. Introduction, Packaging, Specifications
2. Physical Look - Outside
3. Physical Look - Inside
4. Installation and Conclusion