Page 2 - A Closer Look - Hardware and Software
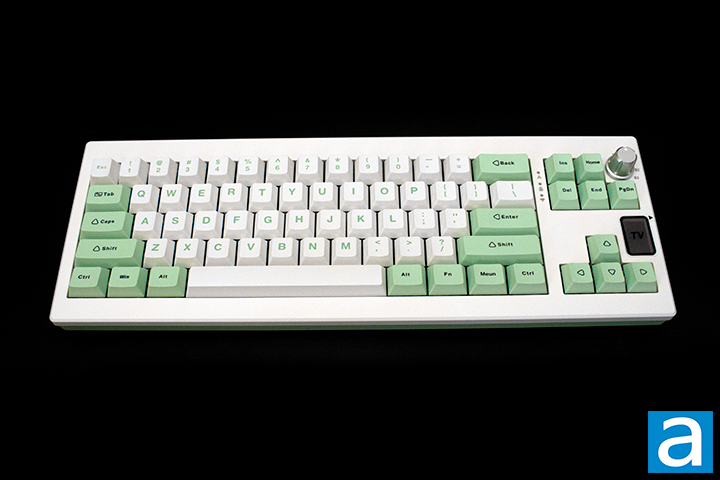
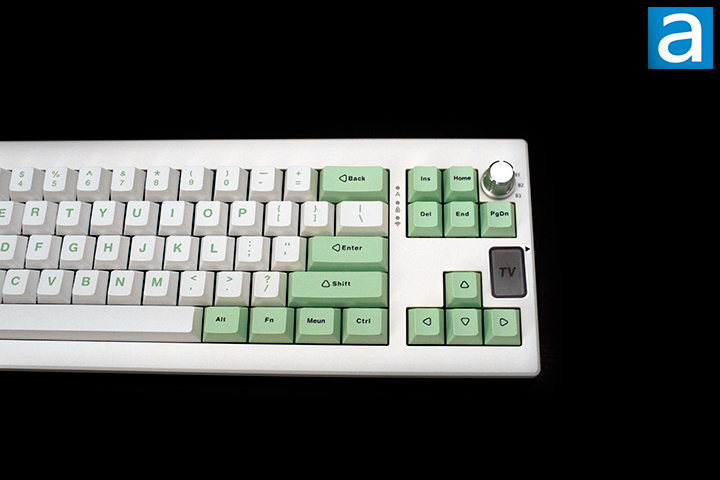
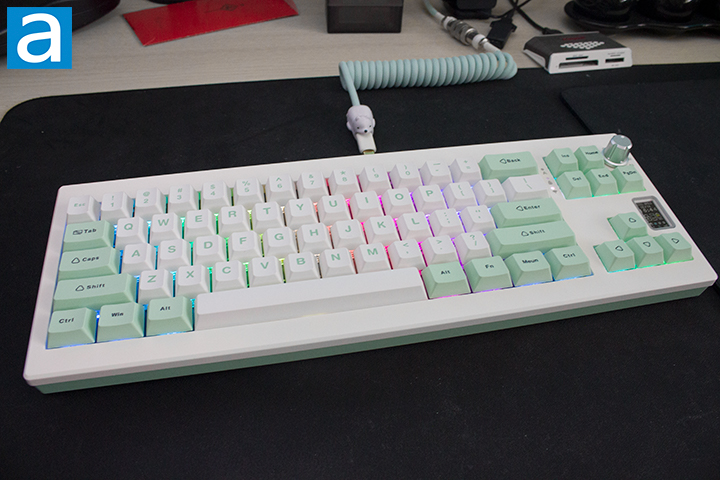
The Epomaker Shadow-X is an interesting and unique keyboard when it comes to appearance. It is important to note this keyboard comes in four different variations, with them being Black Silver, White Blue, White Green, and White Purple. Our particular model is the White Green. Epomaker opted to use a plastic case with double shot PBT keycaps, having a consistent appearance across the board. The Shadow-X features a standard high-bezel design, keeping the keycaps almost level with the frame of the keyboard. Epomaker chose to place their written logo on the back of the keyboard, leaving no noticeable branding on the exposed side. I personally appreciate this as someone who likes minimal branding. The knob is very smooth to use, but I question the usage, as it is merely used to change connectivity types. For those unfamiliar with knobs on keyboards, manufacturers commonly use knobs as a volume dial. This is a very strange choice by Epomaker. The method I would go about this would be to have connectivity options bound to a three-level switch in combination with some keyboard shortcuts. This method will allow the knob to be used as a volume dial, a more commonly used function. The Shadow-X does not come with a wrist rest, but you can use the adjustable feet to create a more aggressive typing angle. I found no issue with typing on this keyboard after adjusting the feet, but your experience may vary.
The Epomaker Shadow-X measures in at 370.4mm length, 129.8mm width, and 47.8mm height. Given the design, this is only slightly noticeably shorter than a tenkeyless keyboard. The size makes sense given the layout. In terms of mass, this weighs in at about 906g not including the detachable cord. This might seem quite heavy for a 70% keyboard, but when considering the weight of the battery and the silicone pad inside, everything makes sense. Going into the build quality, the top deck shows no flex when pushing between the small gaps of the keyboard. When pushing into the keys, there is very little to no flex. This is interesting given the structure, but we will expand on that more on the next page. I proceeded to try and twist the keyboard, finding little to no avail due to the dense build of the Shadow-X. For being a fully plastic enclosure, the structure is quite solid. I was decently impressed with the build quality.

The Epomaker Shadow-X comes in a 70% QWERTY ANSI layout. The standard 70% layout typically has seventy-one keys, but the Shadow-X has seventy, as one key is replaced by a knob. The ANSI layout is the standard American layout, which uses a single row Enter key, as seen in some of the previous images. The keyboard does use a standard bottom row. For those who do not know, 1U stands for a single unit, meaning a 1.25U keycap is 1.25 times wider than a regular one. As such, all of the bottom row keys aside from the space bar and arrow keys are 1.25U. For the average user, the typing experience will feel relatively the same, as the only difference is the missing F row and number pad.
The Epomaker Shadow-X has full N-key rollover, meaning every single key pressed will register even if they are all pressed simultaneously. This means there will be no ghosting issues, where some keys may not be registered. Gamers and fast typists who have fast actions per minute or words per minute will benefit from this, as it will allow more keys to be recognized at the same time. In reality, people usually only need 6-key rollover, so the addition of N-key rollover is nice for extremely fast typists who can reach about 250 words per minute.
Taking a look at the secondary functions on the top two rows, arrow, and a few extra keys, the user will have some memorizing to do. None of the secondary functions are labelled on the keycaps, thus the manual will be of use. These can be accessed by holding down the Fn key on the bottom right side before pressing the indicated key.
Starting on the top row from left to right, we have the Esc key, which has a factory reset secondary function. The 1 and 2 keys, we have Volume Up and Volume Down as secondary. From 3 to 6 keys, we have Task, Search, Mail, and Browser. 7 to the + key act as the media keys, including Previous Track, Play/Pause, Next Track, Mute, Volume Down, Volume Up. F7 to F12 are for media control, including Previous Track, Play/Pause, Next Track, Mute, Volume Down, and Volume Up.
On the second row, we have the different connectivity options as secondary functions. The Q to E keys allow for Bluetooth connectivity. The R key is for the 2.4 GHz connection. . There are a few random keys, such as the Z to C Key used as layer toggles. Furthermore, you can access the F keys through Fn, the left Ctrl key, and the top row. There are some combinations to access the built-in screen. Fn and the PgDn key toggles the screen display. Fn, Menu, and Enter will access the Display Menu. Fn, Menu, and the side arrow keys will choose among the Display Menus. Personally, I found the display commands to be quite pointless, as there is not much you can do. I would personally install the software to adjust the screen with more ease.
Now, here comes the lighting controls. The combination of Backslash and Fn will change the lighting animation, while Tab and Fn will change the color of the animation. The up and down arrows change the brightness of the backlight. I will say, it is nice that you can use secondary functions to accomplish your goals. If you are not a fan of RGB, then the Fn and Del key are for you as it turns off any backlighting. This is my preference, as these are not shine-through keycaps, and having the lights off will save on battery life.
As for the keycaps, these are made out of PBT plastic or polybutylene terephthalate, as previously mentioned. I personally prefer PBT as the material is harder and resists shining better. The lettering is printed out on the top of the keycap using a doubleshot process, which is created by molding two pieces of plastic together. This helps preserve the legending, as the color goes all the way through. The font used is quite standard and consistent with the rest of the board, which is something I personally prefer.
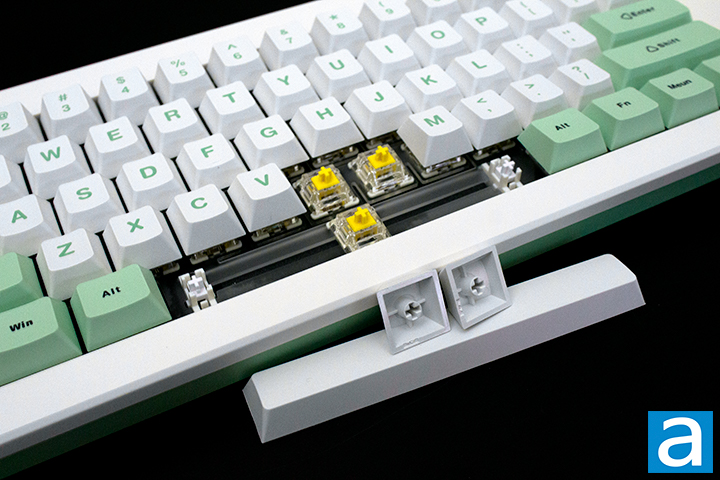
Underneath the keycaps, you can see the typical MX stem. This means you can replace the keycaps with another set. This keyboard uses south-facing lights, which is good, as there will be no interference problems using Cherry profile keycaps. In regard to thickness, they are about 1.4mm thick, which is good. The significance of the thickness of a keycap is important for the feel and pitch. To keep things simple, thicker ones have more depth and produce a deeper thock, while thinner ones produce a higher pitch sound.
The Epomaker Shadow-X features Gateron Yellow switches. These switches are linear by nature, having a smooth travel from beginning to end. The Gateron Yellow switches have a key travel of 4mm, and an actuation point of 2mm. This is the standard travel specifications for many mechanical switches. The total force required to actuate is roughly 50g for operating and 60g for bottoming out. They have an expected lifespan of 50 million keystrokes.
Even with these specifications, it is quite hard to picture what these switches actually feel like, so I will try my best to explain. For a stock switch, the Gateron Yellow switches are more than acceptable. The linear characteristic gives a decently smooth travel. If you have used a standard mechanical keyboard before, it will feel quite normal, having a standard actuation and bottom out. With that said, the Gateron Yellow switches are great switches, and widely considered one of the best budget switches on the market.
Moving on to stabilizers, we have plate-mount Cherry stabilizers. If you are unfamiliar, there are two main designs of stabilizers, which are Cherry and Costar. In both cases, these are used to maintain balance in the longer keys and stabilize them, as the name implies. Cherry ones will have stems matching the bottom of most keycaps, while Costar has a wire hooked into a hoop on the keycaps. The main issue with Costar stabilizers is how they are a rattly mess, and there is practically nothing you can do about it. Cherry stabilizers also rattle, but there are ways to reduce the sound, making it the superior choice.
There is also a large difference between plate mount and PCB mount stabilizers. Generally, there are three types of mounting method, including plate mounting, screw-in, and clip-in. The latter two are PCB-mounted. I personally prefer screw-in stabilizers, as they stay in place the best out of the three options, followed by clip-in. Given the keyboards design, plate mount stabilizers make a lot of sense, as they are the easiest to maintain and remove. The ease has a caveat that they can also easily fall out. With a small bit of knowledge, anyone should be able to fit them back into place.
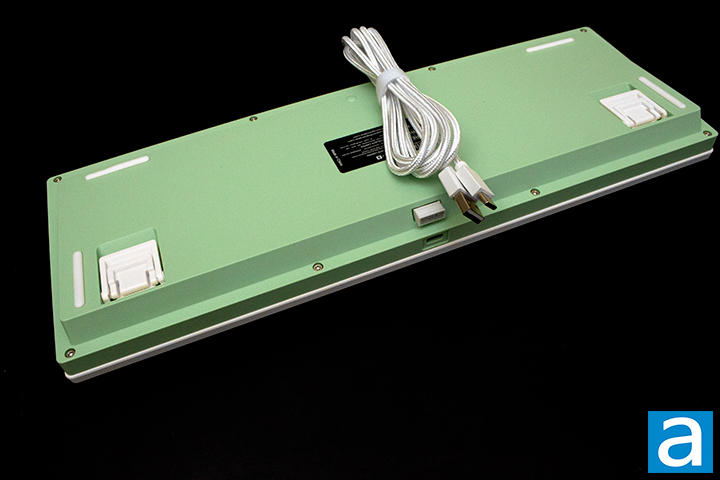
Taking a peek at the bottom of the keyboard, we have four rubber feet. The feet on the bottom side are average in size, doing a great job of keeping the keyboard in place. There should be no noticeable unintentional sliding. There is no cable raceway to manage cables, as the Epomaker Shadow-X uses a detachable cable design. This is my personal preference, as it makes swapping between keyboards easier. The included 2m USB Type-C cable is greatly appreciated, but the quality is slightly questionable. The head of the Type-C end of the cable actually came out unexpectedly. I did end of fixing the cable by simply putting it back into place, but this should not have happened. A long braided cable would be beneficial for durability and usability, but in my use, I found myself using 2.4 GHz most of the time. The 2.4 GHz connection had no noticeable connectivity issues in my setup, being fast and responsive.
After doing my thorough inspection, I put the Epomaker Shadow-X to use. As these Gateron Yellow switches are linear in nature, I made sure to account for this in the typing test. My first observation was a good bottoming out sound with no ping. I should note I am typing on top of a desk mat, which dampens higher pitched sounds. However, the lack of pinging is more due to the dampening within the keyboard. Epomaker has provided a good use of foam to prevent unwanted noise. The smooth linear feel was consistent throughout all the keys, which was nice. As someone who generally enjoys linear switches, I had a satisfactory experience, but would have appreciated pre-lubricated switches. I enjoyed the 2mm actuation point, as I never had any unintentional inputs like I did when I used Cherry MX Speed Silver switches. The travel distance was good, and I had no issues whatsoever. A sound test of the Epomaker Shadow-X can be found above.
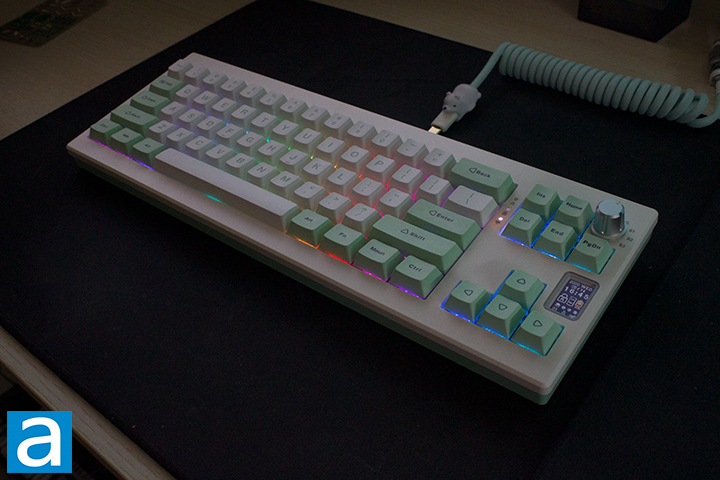
The Epomaker Shadow-X definitely has good lighting effect potential. The lighting effects can only be seen around the keycaps, because the keycaps are not shine-through. Despite that, the backlighting effects are still nice to have. I personally found the lighting to be absolutely acceptable, as I had no issue with configuring it using software. I do not think any users will have any issues in regard to this, but if you really want the shine-through effect, you can swap the keycaps for any shine-through keycap set, given the usage of the Cherry stem and standard bottom row. Twenty-two different lighting variations can be toggled through by using the software I will talk about in a moment.
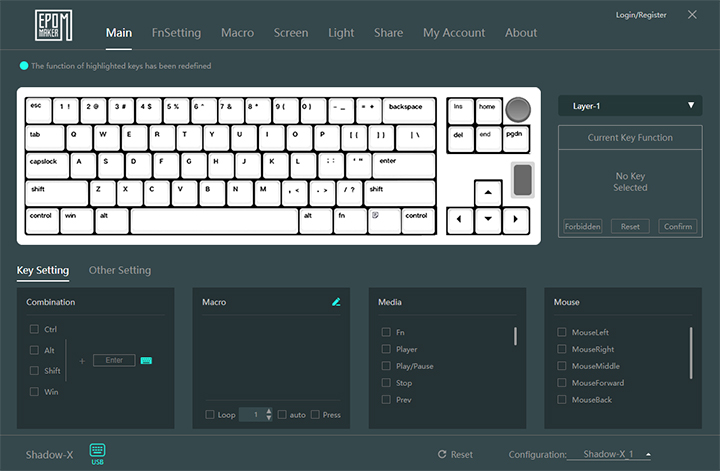
In terms of software, we have Epomaker Driver. This software is quite expansive. I really appreciate having software for the Epomaker Shadow-X, as I personally found the key combinations to be confusing. The Main panel is an overview of your keyboard and shows what layer you are on. FnSettings allows you to edit key combinations. The Macro tab allows you to setup macros on your keyboard. An interesting feature I found in this tab is the “Hot” button, which brings you to the share tab that holds a bunch of different macros that other users have uploaded. While we are talking about the Share tab, you can also share your lighting settings, animations, and settings. This is actually quite useful if you want to change your keyboard screen to display something common like cat jam with little effort.
Going back to the tabs, we have Screen, which allows you to customize what is displayed on your screen. The screen can display either an animation or a picture. Following this, we have Light, which simply allows you to adjust the backlighting option. My Account allows you to login to save your settings to the cloud and download them at any time. About allows the user to change startup options, language, and update the software.
Page Index
1. Introduction, Packaging, Specifications
2. A Closer Look - Hardware and Software
3. A Closer Look - Disassembly and Internals
4. Conclusion


