Page 3 - A Closer Look - Disassembly and Internals
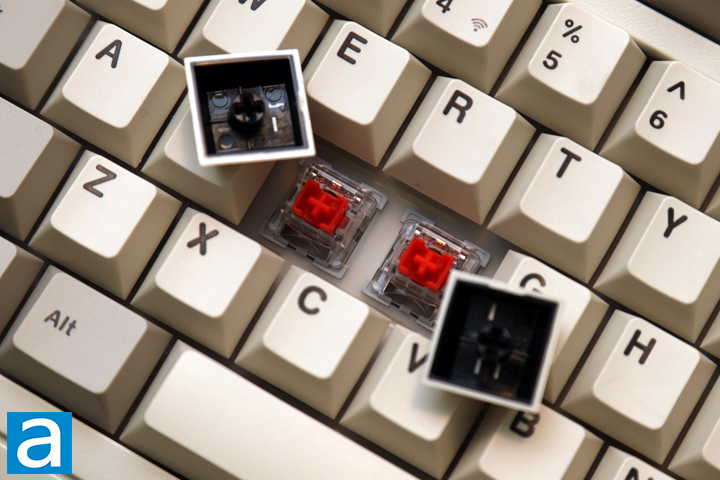
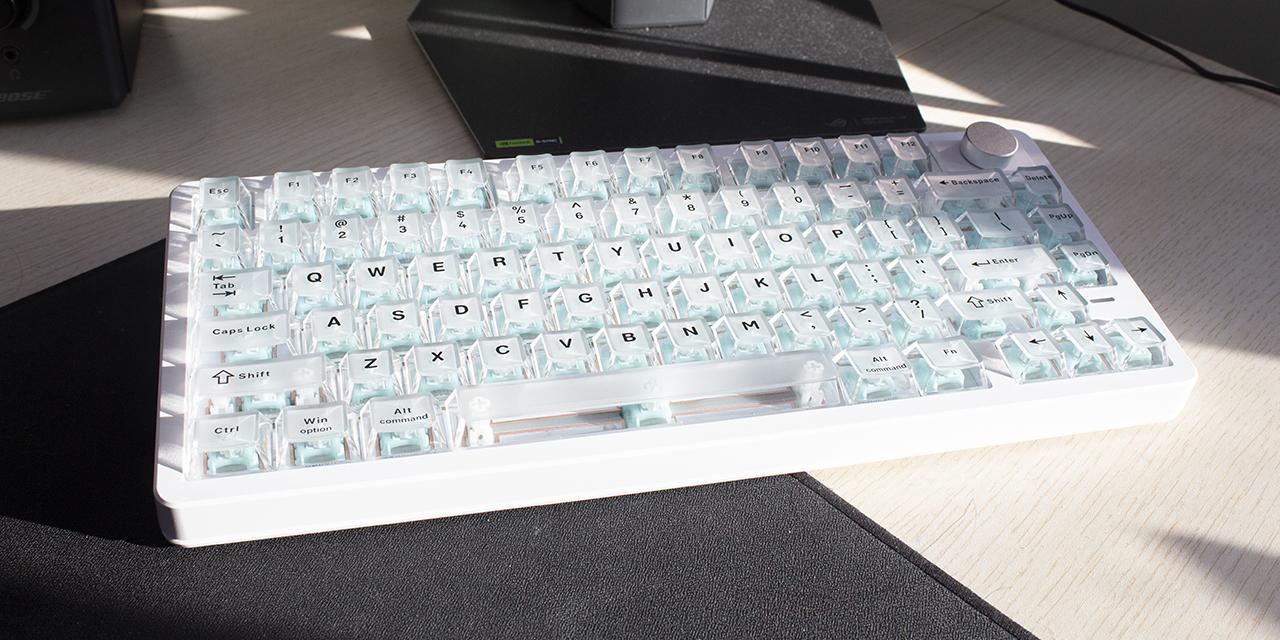
The first part of disassembly starts by looking at the keycaps. These are PBT or polybutylene terephthalate plastic with a double-shot injection. I like PBT keycaps because they are more durable and do not shine or fade over time compared to cheaper plastics like ABS. The thicker wall also adds to the better audible feedback, even if the R5 leans towards the quieter side. The legends are inserted with a second layer of plastic that fills a mold. This is why you can see a gray outer shell and a black inner plastic. As such, the legends will not fade or wear. On the other hand, this is the most expensive way to make keycaps too. The legends on the keys are clear and match an older OEM-style writing. However, I did notice some of the letters were a bit thinner in certain areas, and even the "a" in Backspace was not fully filled in. It is unfortunate, but I would count this as a one-off error. The keycaps use standard MX stems with a Cherry profile. The Keychron R5 offers NKRO for all operating modes, whether wired or wireless. NKRO stands for N-key rollover, which refers to the number of keys scanned independently by the hardware.
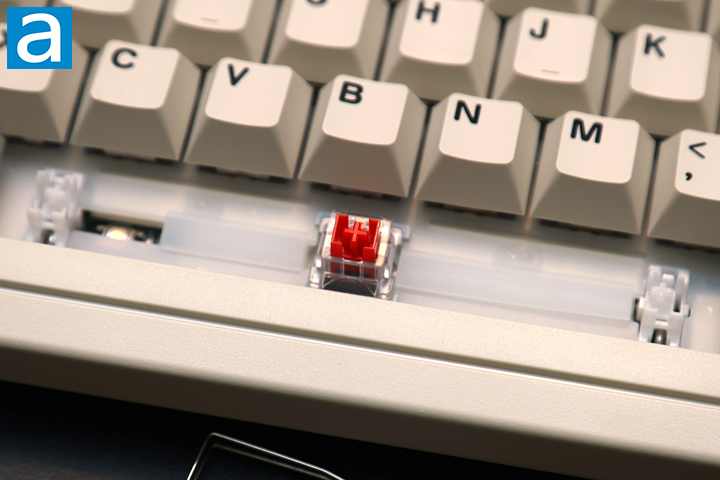
Longer keys of the Keychron R5, like space bar and Enter, have Cherry stabilizers on each side to ensure even actuation and to prevent the keys from wobbling from side to side. These are factory lubricated and have a smooth travel. They do not rattle or squeak either. The stabilizers are plate-mounted with clips rather than screwed into the PCB. This is usually a cheaper alternative, as plate-mounted stabilizers can lead to more rattling. Thankfully, this was not a problem with our R5. The plate is polycarbonate and flexes under pressure. There are flex cuts on the plate and the PCB board underneath. This affects how each keystroke sounds and feels. Otherwise, you can also see gaps near the space bar are filled with a silicone insert to reduce hollow sounds.
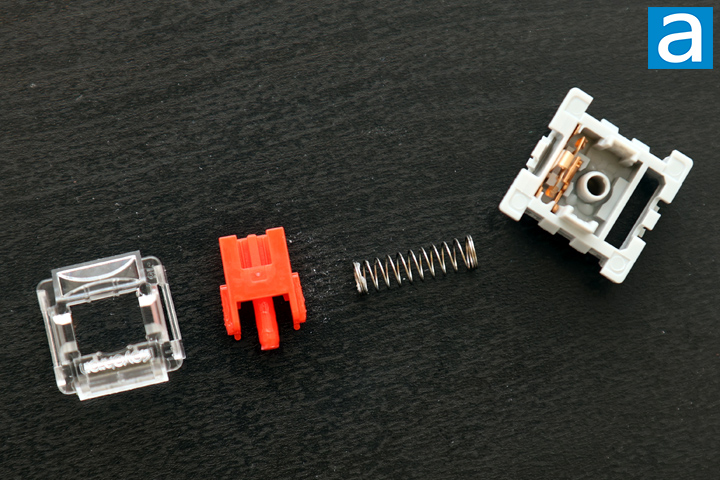
A key selling point of the Keychron R5 is the switch technology. These use mechanical switches, which consist of a housing base, stem, and spring, and offer varying levels of tactile and audible feedback. More specifically, these are Keychron Apex Red mechanical switches. They are linear in travel and require a bottoming out force of 45g, actuation point of 2.0mm, and total travel of 4.0mm. They have an expected lifespan of fifty million keystrokes. These connect to the PCB with hot swap sockets, and the sockets support both three-pin and five-pin mechanical switches. As such, if you do not like these or an individual one fails, you can swap it out without replacing the entire keyboard.
Disassembly of the Keychron Apex Red switch lets us see all the individual parts. This includes a transparent upper housing and a gray base. A 14mm spring keeps the stem elevated above the bottom. The switch stem has minimal lateral movement within the housing, which ensures keys do not wobble about. It also has a wider box wall around the MX stem to further increase stability. The switches are factory lubricated for a smoother typing feel and sound. The stem is made of POM or polyoxymethylene plastic, which is said to offer a smooth feel. The upper case is polycarbonate, while the bottom is nylon.
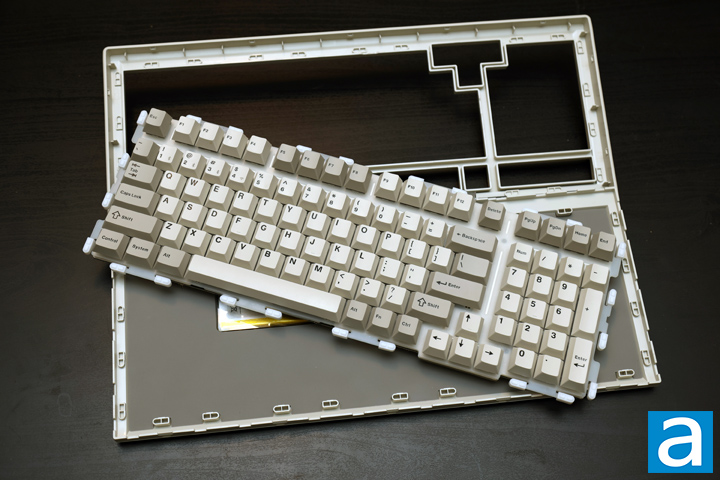
Taking apart the Keychron R5 is a bit more of a chore due to the use of plastic clips holding the entire structure together. Although Keychron has provided a screwdriver, I could not find a use for it with the R5. Instead, with some pry tools, I was able to expand a gap on the edges and work my way around slowly to prevent the clips from breaking. Once released, the top and bottom separate from each other. There are ribbon and JST cables that connect between the enclosure and the PCB, so be careful. One leads to the switch and lights on the top shell, while another goes to a daughterboard for the battery and back I/O. It is nice to see extra cables here, as they prevent a moving keyboard deck from affecting fixed portions of the keyboard.
The keyboard deck sits in here with gasket mounts. On the border, you can see extensions with rubber socks on the end to cushion where the entire board sits. These gaskets should also reduce vibration or unwanted movement transferring from the deck to the rest of the shell. Underneath the deck, there is a single 4000mAh battery and a daughterboard with a USB Type-C port.
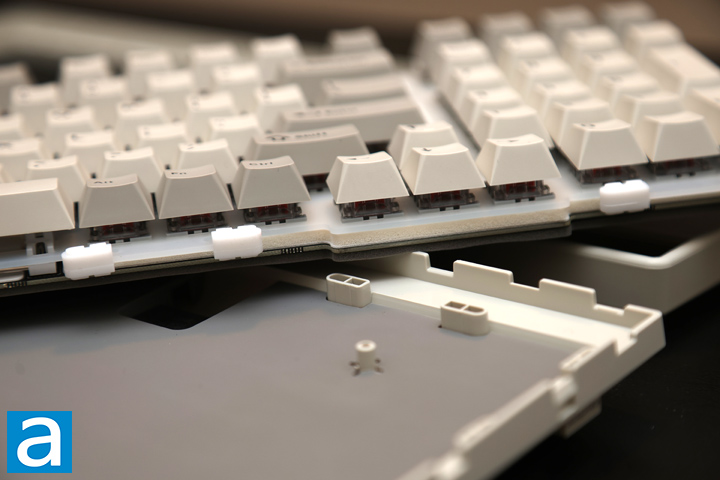
In between the plate and the PCB, there are several layers of sound damping material, including a sound absorbing foam, IXPE foam, and PET film. Underneath, there is a thick silicone padding that fills all the hollow areas in the base. These layers contribute to the overall typing sound and feel by reducing any hollow sound. All these layers also contribute to the overall heft of the Keychron R5.
Page Index
1. Introduction, Packaging, Specifications
2. A Closer Look - Hardware and Software
3. A Closer Look - Disassembly and Internals
4. Conclusion