Page 3 - Physical Look - Inside
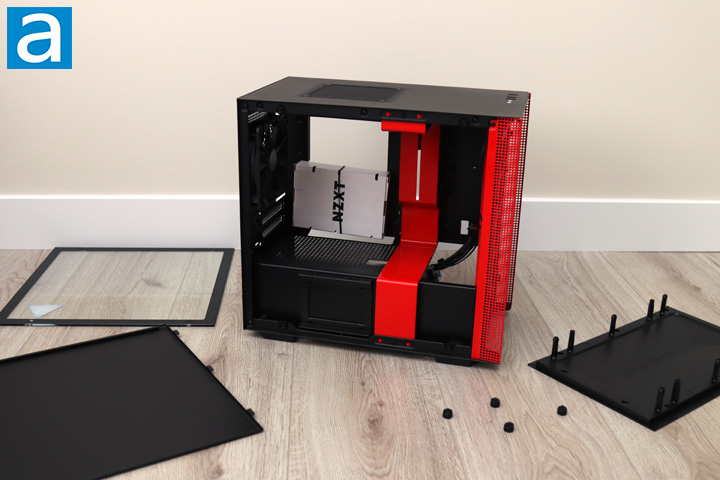
The process of removing the side panels on the NZXT H200i is pretty straightforward. With the tempered glass panel, you can unscrew each of the four thumbscrews and remove the glass. The tempered panel features a black rim to hide any marks you make when handling the panel. The four mounting points are rubber rimmed to prevent any vibration noises between the glass and the H200i. As for the right panel, this is a standard steel panel with captive thumbscrews, which is really awesome to see. More case manufacturers are including these thumbscrews and they should be the standard nowadays.
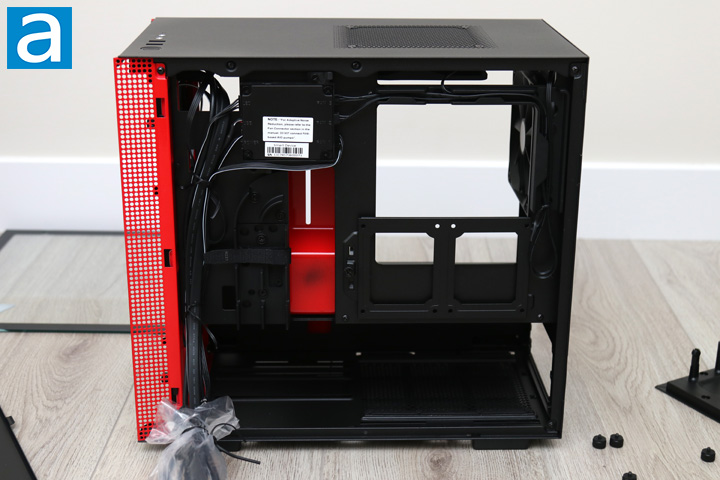
After you open up the panels, you can get a closer look at the inside of the NZXT H200i. The layout is similar to the H700i, albeit on a smaller scale. As such, we have a bright red metal bar down the front with a relatively open area for the motherboard and expansion cards. The power supply shroud cover is found in black at the bottom of the case. This separation divides the motherboard area from the power supply basement, which is pretty standard. This shroud has circular holes on the top of this panel to allow air to pass through. Considering how close your expansion cards may be to this bottom, it makes sense NZXT has placed some ventilation here. Otherwise, the area with the rectangular opening can only fit motherboards in the mini ITX size. Overall, the layout is pretty open. With practically nothing between the front and back of the H200i, this should allow for air to flow easily through.
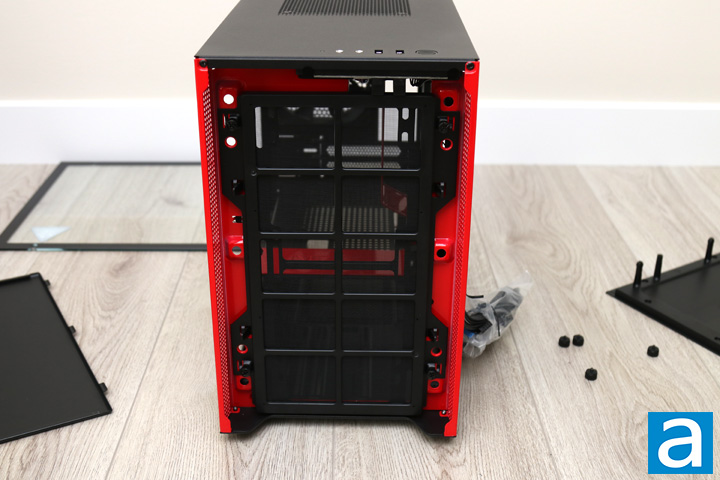
The front panel can be removed by popping it off. Many pegs on the back hold the steel plate in place. Behind this plate, we have a plastic mesh panel attached by plastic pressure slots. This is affixed to another bracket where you can attach cooling options. Unfortunately, NZXT has not included any fans here. However, we do have two fans in total included with the H200i already, so it is not a big deal. As for this front area, users can put two 120mm or 140mm fans, or a radiator with a size of 120mm or 240mm. I really like the fact they have used a removable bracket here for front mounting, especially since it makes mounting these aforementioned cooling options quite easy. They are also held to the case with captive thumbscrews, which is another bonus.
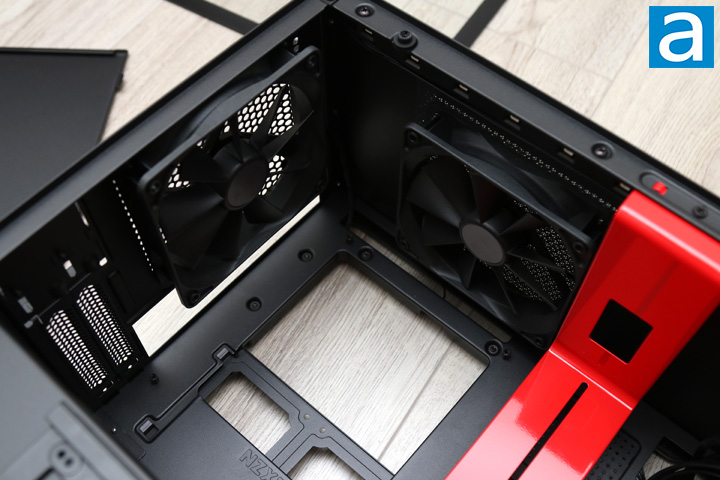
Looking at the back of the case, you can see the motherboard opening and the two included Aer F120 fans with the H200i. Once again, these fans are not exactly the same as the Aer F120 fans we reviewed despite sharing the same name. Thus, these fans can spin at speeds up to 1200 RPM, an airflow rating of 50.42 CFM, and a noise rating of 28 dBA. These fans use a rifle bearing rather than the fluid dynamic bearings we found on the retail Aer F120 fans. Thus, I would not completely be surprised to see different noise ratings, as we will see later on. Otherwise, you can also get a better look at the motherboard opening and two expansion slots below. One thing you may have missed is right at the top, as you can see some LED lights poking through. This is the single strip of LED lights NZXT has included with the H200i, though you can add more NZXT RGB strips if you are so inclined.
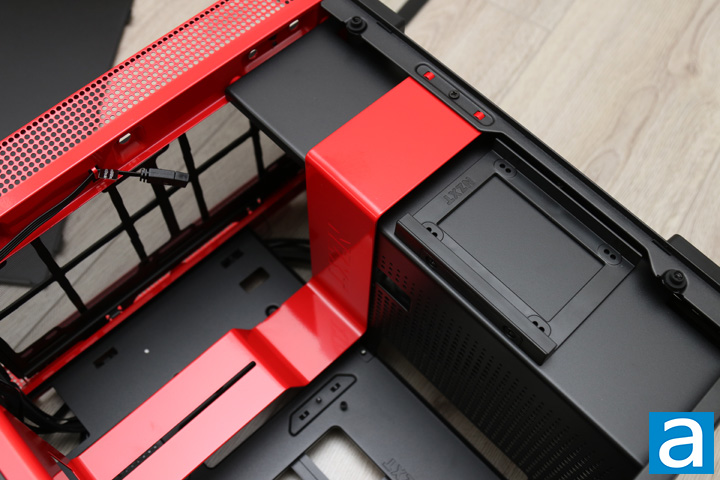
Near the front of the case, there are a few more interesting things to point out. For one, we have a drive sled where you can mount a 2.5 inch drive. As there is a routing hole behind the red metal bracket, you can easily lead your cables here. You can also see another opening on the power supply, where you can lead more cables to your expansion card. The red bar hides the primary routing holes at the back, which make for a cleaner cabling job. There is ample space here to sit cables here without them spilling out on either side. Again, you can see the front and its space where you can mount different cooling options. This area extends into the basement of the power supply, so mounting fans there will cool above and below the PSU divider.
As for the back, there are several different mounting places here in the NZXT H200i. A dual 2.5" drive sled can be found behind the motherboard opening. It is mounted with a single captive thumbscrew. Next to this and above it, we have several plastic routes for cables to slide through, in addition to a Velcro strap to keep them in place. Above this, we have a small hub-like device where many cables are already connected to. NZXT refers to this as their Smart Device, which combines features from their previous controllers, the HUE+ and GRID+ V3. The "i" in the H200i name actually refers to the intelligent controller, which allows you to control your fan speeds and included RGB lighting with NZXT's HUE software. This module also includes a small microphone to help with detecting noise and optimizing your system for a better noise to temperature ratio. We will see how this works later on in our review. However, if you like the case without the extra controller, non-i versions for all of the H-series cases are available. You will also lose any included RGB LED strips if you go this direction.
In the basement, you can see we have a large opening at the back for the power supply to sit here. Your mounted power supply will be raised up by two rubber strips, which also help in dampening the vibration between the case and the PSU. At the front is where you could mount an additional drive option, such as a larger 3.5 inch drive. Finally, you can see we have all the necessary cables bundled up for the front I/O for the NZXT H200i. In terms of spacing, NZXT has provided us about 16.3mm at the back of the case. While this can be a bit tight for most cases, we will see how this affects our cabling during our installation.
Page Index
1. Introduction, Packaging, Specifications
2. Physical Look - Outside
3. Physical Look - Inside
4. Installation and Conclusion


