Page 3 - Physical Look - Inside
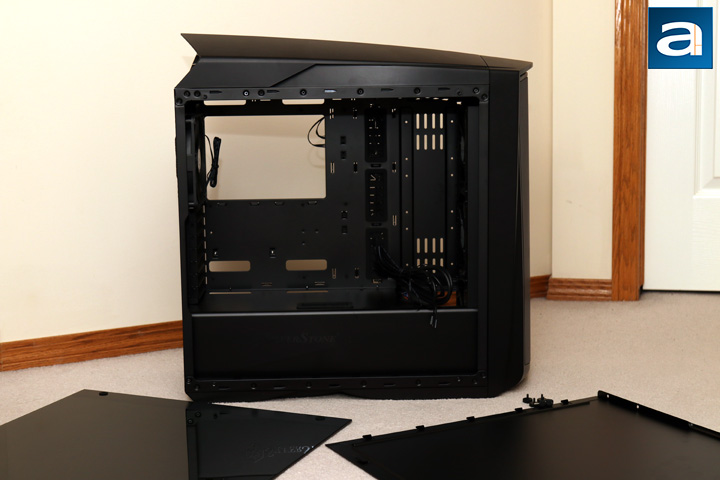
Removing the SilverStone Primera PM01-RGB's side panels is all about the thumbs. On the left, we have a tempered glass panel held on the side with four thumbscrews. These thumbscrews have rubber lined holes to hold the glass snugly and prevent any direct contact between the metal of the screws or the case. It would have been nice to see rubber lining the entire frame for added protection, but it is not a huge deal. On the other side is a standard steel panel held in with two thumbscrews. Unfortunately, these thumbscrews do not stay attached to the panel, which is disappointing. Captive thumbscrews have become quite popular, and it would have been great to see this feature here.
Internally, the layout on the Primera PM01-RGB is pretty standard, and of course pretty much the same as the original Primera PM01. We have a very open design, with barely any interference from the front fans all the way to the back. As you can see, there are two main areas divided off by the power supply shroud. Above this division is where your motherboard and all the connected components exist. Underneath, you will find the power supply as well as a drive bay, but we will see this later on. As you know by now, this is an ATX case, but smaller form factor motherboards, such as micro ATX and mini ITX, can fit inside. As such, mounting risers are not pre-installed.

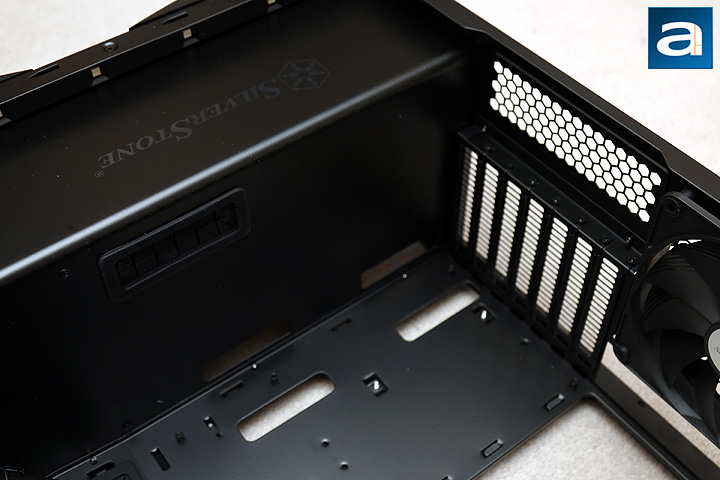
As I normally do, the first look we have inside the SilverStone Primera PM01-RGB is at the top-back corner. In this corner we have two things to speak of. One is the fan, which is a SilverStone specific fan. Unfortunately, not a lot of other information can be found on it, other than the fact it is a 140mm fan with a four-pin PWM connection. At the top of the case you can see the mounting slits for a top mounted option. This includes the option to either mount fans or radiators, with support of up to three 120mm or two 140mm fans. As for radiators, the top can accommodate up to 240mm, 280mm, or 360mm sized ones, as long as they do not interfere with the top components on the motherboard. This is less of an issue for radiators using 120mm fans, as they are offset away from the motherboard, while the 140mm fans take up all of the space. One improvement we do see here is the inclusion of a small routing hole near the back of the top frame. This allows you to pass the fan cables through here, which was something we complained about in the initial PM01. This is great to see SilverStone responding to a request with a simple solution. As with the original PM01 though, you can remove the top cover with a screwdriver to install these cooling options.
From here, you can see the power supply shroud closer and the bottom of the motherboard area. You can see the seven black expansion slot brackets here held in with a standard screw per slot. I was a bit surprised at the lack of thumbscrews, but considering you do not generally move expansion cards all the time, it is excusable. Even so, I would like to see more tool-free parts. As for the shroud, you can see this cover is not completely solid, as there are three holes that allow air to pass through the bottom and top area. The main hole is near the left side of the case, which is where users may route the power cables for their video cards. This hole is lined with a rubber grommet to hide any extra cables under this hole. However, two more holes are located closer to the motherboard for other plugs like the front audio jacks, front input pins, and fan headers.
Before we move on, there is one more thing I should point out, and that is the RGB light strip, which is located discreetly on the top and bottom of the PM01-RGB. You can actually just see a few of the LEDs in the photo above, and I think SilverStone has done an excellent job in hiding the rest of the strip under this plastic cover. The whole strip is held in with screws, so changing the location of the lights is unlikely.
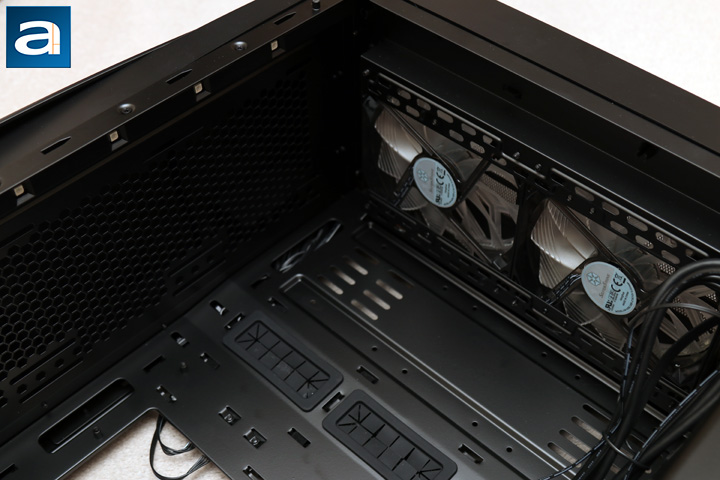
At the front of the SilverStone Primera PM01-RGB, we have three translucent 140mm fans, which is the maximum support for fans here. You can also put up to a single 360mm radiator here too. In order to do this, SilverStone has implemented a sliding cutout, as the radiator can hang into the shrouded area. Thankfully, the storage bracket is shifted over, so you will not have to adjust the bracket. The three included fans are translucent to allow more lighting to go through, but we will see how this looks like when we do the actual installation. Otherwise, from this angle you can see a few other things. For one, the front area does not have any brackets for either storage, 5.25" optical drives, or any custom water cooling brackets. Instead, we have zero interference at the front for larger radiators or longer graphics cards. Next, you can see the grommets lining the holes. It would have been nice to see other holes, especially near the top and bottom, to be lined with the same grommets. Finally, the other LED strip can be found mounted at the top. Each strip has six light emitting diodes for all your lighting needs.
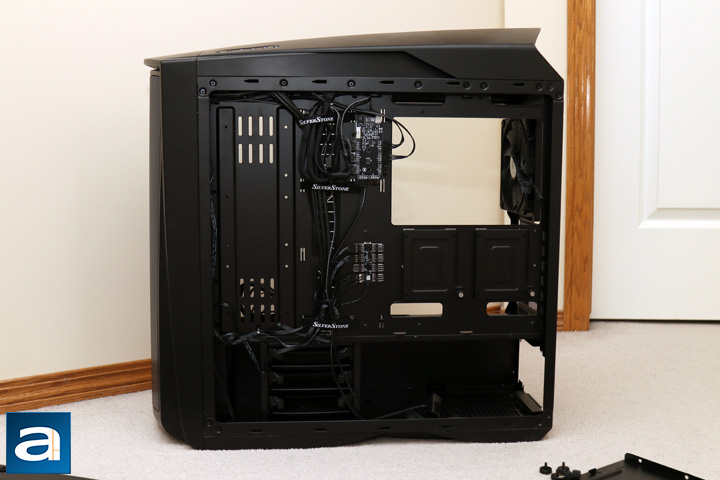
Flipping to the right side of the SilverStone Primera PM01-RGB, and we have a pretty standard layout. SilverStone has not made too many changes compared to the original Primera PM01, though one addition has been made. From here, you can see SilverStone has graciously provided three Velcro straps, which are really handy in holding all the large cables. We also have not one, but two controllers at the back. In addition to the fan header that was included with the past PM01, the RGB version we have today also has an RGB controller, which allows you to connect and control the lights through either the case switch, or through the motherboard. Major motherboard RGB implementations are supported, including ASUS Aura Sync, ASRock Aura RGB LED, Gigabyte RGB Fusion, MSI Mystic Light Sync, and Biostar Racing Vivid. I really appreciate the wide range of motherboard brands, as practically every motherboard now has an RGB header on it for this reason. The PM01-RGB's fan controller also has PWM support, which the previous version did not. To the right of these controllers is the large motherboard cutout and two 2.5" drive mounts. At the bottom, we have the three-bay drive rack, capable of holding both 2.5" and 3.5" storage options. At the bottom right side, we have space for a power supply. The standard ATX PSU will fit here as long as it is shorter than 240mm. If there is one thing I would complain about this area, it would be the lack of cabling space, but we will see how this affects us during our installation.
Page Index
1. Introduction, Packaging, Specifications
2. Physical Look - Outside
3. Physical Look - Inside
4. Installation and Conclusion


