Page 3 - Physical Look - Inside

There is a total of seven panels found on the Thermaltake The Tower 300. All of these can be removed without a screwdriver. They are well-built and designed using magnets or with push-to-remove clips. Below the middle glass panel, there is a small rectangular panel that is also magnetically held on so you can install the separate 3.9" LCD screen accessory. The side panels, with dust filters, are held on by magnets. These are quite strong and some force is required to pull the panel off. Similarly, the back panel has a large dust filter held on magnetically, which can be easily taken off. The back panel itself, also held on with magnets, can be easily removed too.
The top panel is clipped in and can be easily taken out by pulling it in and pulling it out. The tool-less removal of all these side panels make accessing the internals a breeze. Removing so many panels also makes installation a bit easier, since you can access the interior from multiple different angles.
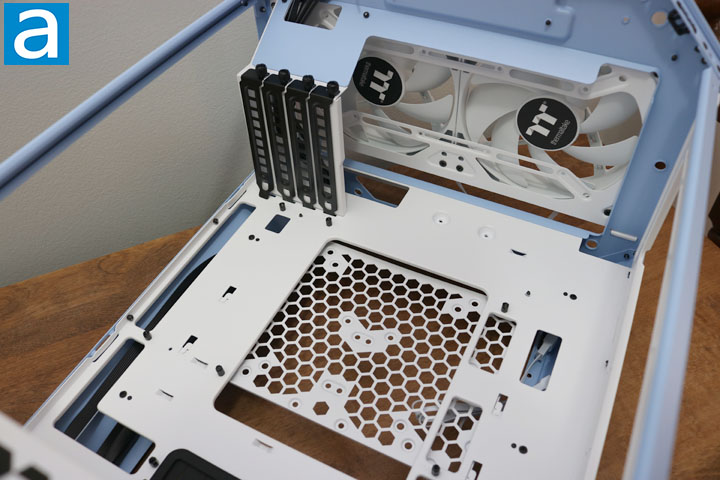
The above photo provides a view of the top of the interior of the Thermaltake The Tower 300. As you can see, there are two large 140mm fans installed in the top that act as an exhaust. Below them is a large gap for cables to lead towards the graphics card and the motherboard I/O. In the top left corner of the above photo, we find the expansion slots and their respective covers. There are only four of them, which is standard for mATX motherboards. These have thumbscrews that can be easily removed to make room for installing a graphics card or other PCIe components. As for the motherboard tray, you may see it is slightly different than usual. The cutout is not completely open with a hexagonal patterned metal back to it. This metal backing must be removed to access the back of the motherboard, making it slightly harder to change out CPU coolers. The height limitation for a CPU cooler is 210 mm. This should allow for large heatsinks to be installed on the motherboard. Micro ATX is the largest motherboard form factor that can be installed here, but a mini ITX can be installed as well.
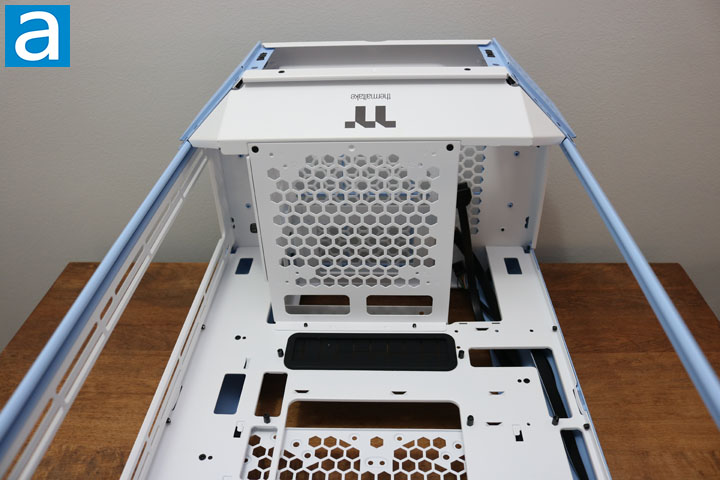
Looking towards the right of the motherboard area, we find a large area for either fan intakes or a radiator. For fans, three 140mm or 120mm fans can be installed here. Alternatively, a radiator up to 420mm in size can be installed. This provides a wide range of cooling capabilities. A helpful feature for the Thermaltake The Tower 300 is a bracket that can be removed on the right side. Installing a radiator or fans on the bracket first makes it much easier to then install the bracket as one physical item into the case.
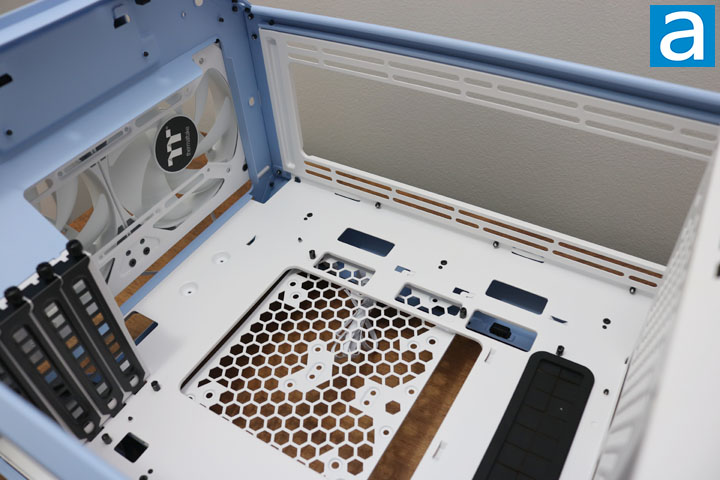
This view of the power supply basement area provides a helpful look at how the Thermaltake The Tower 300 can accommodate such large components. To either side of the power supply cover, which is perforated to allow air through, are two cutouts. These cutouts allow a large radiator to be installed on one side, while a graphics card up to 400mm can be installed. A small power cover is included to hide cables and provide a final clean look. If you install this cover, then the largest graphics card that can be installed is 280mm. Thermaltake definitely makes use of the vertical space in this case design. The perforated cover can also accommodate a 120mm or 140mm fan to act as an intake. Next to the cover, there are two large cutouts to allow for cables to pass through, while next to those is a cutout with a large rubber grommet to allow for more cables. This is likely where the 24-pin power cable will go through. There are openings around all the edges of the motherboard for cables to run through.
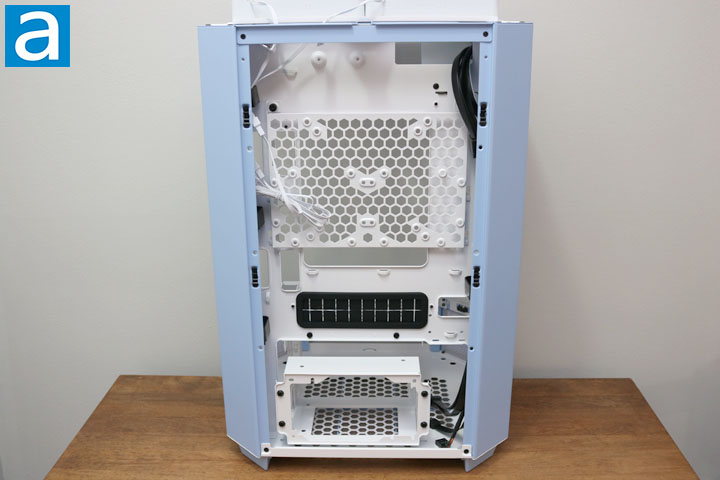
The back of the Thermaltake The Tower 300 is fairly straightforward. Right in the middle is where your hard drives can be installed. Two 3.5'' or two 2.5'' options can be accommodated on this metal bracket. Right above the power supply, an additional drive of either size can be installed. This allows for quite a decent amount of storage.
As you can see in the above photo, there are many cutouts placed around the motherboard area to allow for cables to pass through. This should make routing cables around an easy process. There is about 50mm of space in the back for cables, which is plenty more than traditional cases. Cables can easily be routed along the sides, hiding most of them from being seen on the back.
All the way at the bottom, we find the power supply basement. The case can accommodate a power supply up to 220mm. Accessing cables down here is a challenge, so keep that in mind. One more thing to note on the back is that the back panel can also accommodate up to two 120mm or 140mm fans. This also impacts how much room you have for cables in the back.
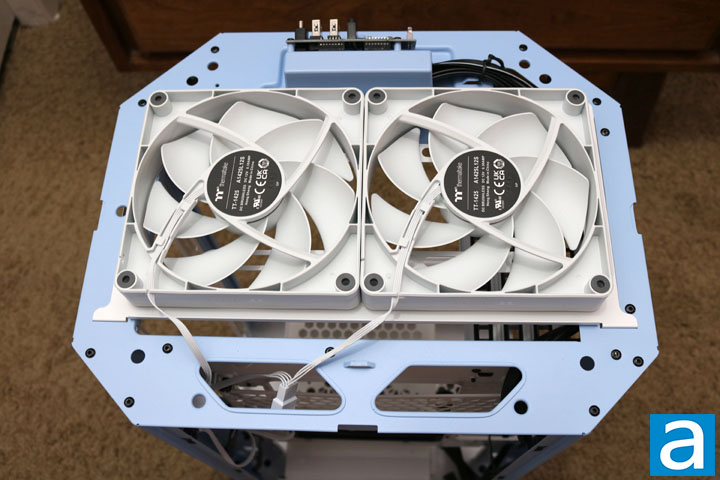
All the way at the top of the case, we find two pre-installed 140mm fans. Two 120mm fans can also be installed here. The ones that come with the case are Thermaltake CT140 hydraulic bearings fans, which operate at 12V and 0.17A. These PWM fans can speed up to 1500 RPM, providing 2.3 mmH2O in air pressure and 77.37CFM in airflow. They are rated at 30.5 dB(A) and are installed in an orientation to pull air out the top of the case.
Page Index
1. Introduction, Packaging, Specifications
2. Physical Look - Outside
3. Physical Look - Inside
4. Installation and Conclusion


