Page 2 - A Closer Look - Hardware and Software; Installation
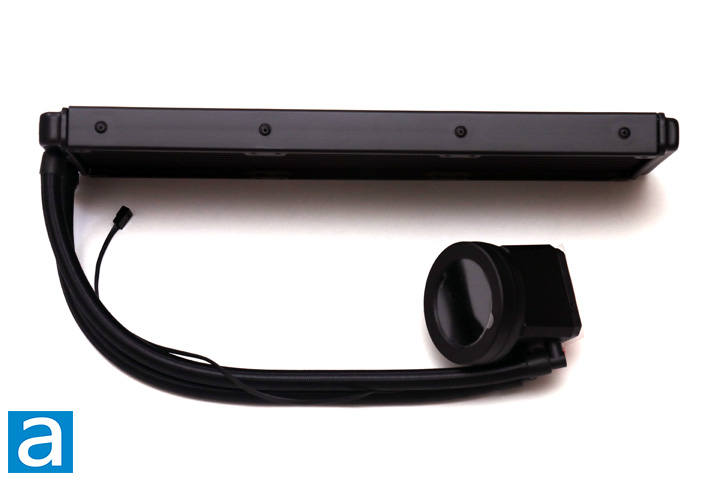
Unsurprisingly, if you expanded the 240mm version radiator to fit three 120mm fans, you will get the Thermaltake TOUGHLIQUID Ultra 360. As such, we have a pretty similar look on our AIO cooler today compared to all of the other current options. This includes the same matte black finish on the components and the tubing. The Thermaltake branding is also kept to a minimum with it only printed on the side of the CPU block head. It should be noted this is not an Asetek AIO solution even though it may resemble some other closed-loop liquid coolers. As expected, the Thermaltake TOUGHLIQUID Ultra coolers stand out with its 2.1" TFT-LCD screen on top of the CPU block. This is a rotating screen that swivels in 270 degrees of movement to accommodate different mounting orientations. Out of the pump block is a single cable to power the pump, while the screen has a micro-USB port on the side to plug into your motherboard. This provides both power and communication with Thermaltake's TT RGB Plus 2.0 software, as you will see below. Once again, I wish they made this a bit more discrete, as the cable sticks directly out of the top when it is installed.

The radiator of the Thermaltake TOUGHLIQUID Ultra 360 is pretty standard, with fins placed in this manner to come into contact with liquid running through the radiator. As this liquid runs through, the heat is transferred from the liquid to the wavy set of fins through the contact points. Fans are attached on the radiator to dissipate heat. This liquid is transported around from the water block to the radiator via tubing. The tubing is made from rubber and sleeved for a good-looking finish. The tubes measure 400mm in length, and should fit in standard mid-tower cases. It is possible these tubes are a bit short in larger full-size towers, though it also depends on the placement of your CPU and radiator. The tubing is strong and flexible and should not form any kinks. These pivot on the water block to allow for easier maneuverability when required.
For the radiator, this measures 395mm long, 120mm wide, and 27mm thick. These are pretty standard dimensions for a 360mm all-in-one liquid cooler. This size plays a big role in cooling, as the larger surface area should result in better heat dissipation. The radiator is made up of aluminum, which offers decent heat transfer qualities. However, the primary advantage of using aluminum is for its low mass, which should reduce the strain placed on the case where this is mounted. Near the end of the radiator, next to the two tubes, is a small outlet. This provides access to the liquid inside, though it does not look user serviceable, so I would not recommend opening this up. Overall, the build quality is great on the Thermaltake TOUGHLIQUID Ultra 360, as I do not observe any defects or nicks to be concerned about. The only thing I think would be nice is to see some protection under each mounting hole location, to ensure if users accidentally screw in mounting screws too far, it does not penetrate the radiator fins underneath. That being said, if you use the hardware provided here, it does not touch the fins when fully tightened.
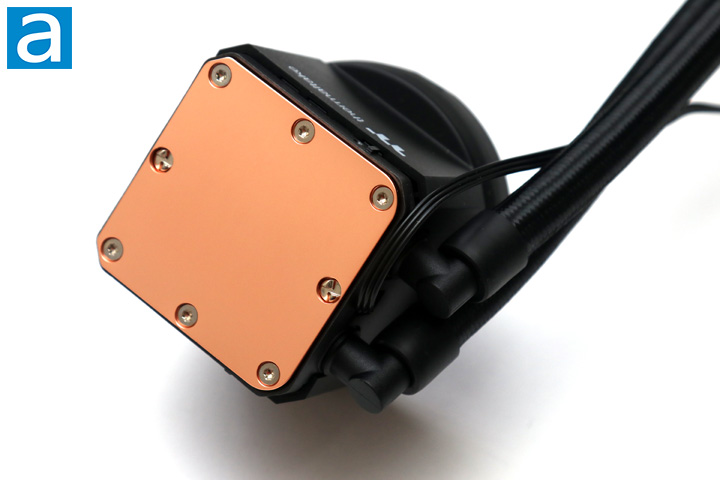
At the other end of the tubing is the water block and pump combination of the Thermaltake TOUGHLIQUID Ultra 360. This compact but chunky block measures 85mm in length, 75mm in width, and 68mm in height. The majority of this height comes from the pump and the screen all existing on the same combination. Otherwise, the whole unit is black with a matte finish. The screen on top is a 2.1" TFT-LCD screen that displays graphics measuring 480x480px. Otherwise, the base that makes contact with the processor is composed of copper, as you can see by its color. The base is flat and does not show any milling marks at the bottom. A plastic label was placed on this area for protection with a warning to remove the label before installing the TOUGHLIQUID Ultra 360. On the sides of this area are deep tracks for different mounting arms, depending on what socket you are installing the TOUGHLIQUID Ultra 360 onto. Internally, the water pump exists here to move water between the radiator and the CPU block. This pump spins up to 3200 RPM while operating at 12V voltage and 0.38A current. A cable leads out of this area with a 3-pin header to power the pump.
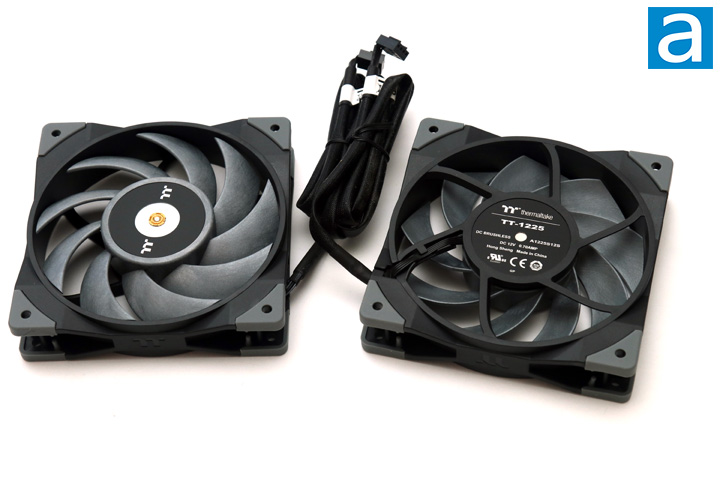
The three fans included with the Thermaltake TOUGHLIQUID Ultra 360 are retail Thermaltake TOUGHFAN Turbo 120mm fans. Inside, we have hydraulic bearings with a lifespan of 40,000 hours. The rated noise level is a maximum 28.1dbA, but we will see what this means when we test for noise levels. In terms of other numbers, each fan produces a maximum air pressure of 3.78mm H2O with an airflow rating of 72.69CFM. Each fan also has rubber dampeners on each corner to soften vibrations between the fan and radiator. Finally, these are PWM controlled fans with 4-pin headers. We also have a triple-fan adapter included so that all fans can be powered and driven by a single header on the motherboard.
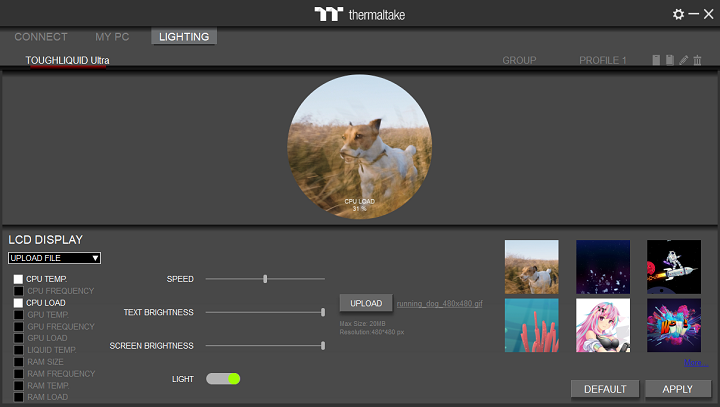
The TT RGB Plus v2.0 utility can be used here to change what is displayed on the screen. It is important to use the second version, as the first one is incompatible with the TOUGHLIQUID Ultra series. There are several tabs that do not affect the TOUGHLIQUID Ultra as this utility is used to control other Thermaltake hardware and peripherals, so I will only explore the utility with respect to this product. If you download this utility from Thermaltake, you will be looking at a 125MB compressed file for the latest version, 2.0.6, as of the time of this review.
Once installed, you can see this single page that shows you the ability to select different graphics or information. By default, this screen will start up showing you the liquid temperature on top of a speedometer-like graphic. You can change this screen to show other information including CPU and GPU temperatures, loads, and frequency, as well as the aforementioned liquid temperature. This includes different screens that cycle through this information or show a single dedicated one. You can make changes to the speed of cycling between the information, brightness of the screen, as well as the text. From this screen here, you can also upload your own GIFs or JPGs to use as a background graphic. Unfortunately, with the latest version of the utility, I have not been able to open the window to upload my own images, as it would always crash when doing so. Only when I downgraded to 2.0.5 did this issue disappear. I hope Thermaltake fixes this, as it really takes away from what is a fun way to personalize the cooler. There were also a few other hiccups while using TT RGB Plus, including mismatching preview images and a slightly confusing interface, but broken functionality needs to be addressed first.
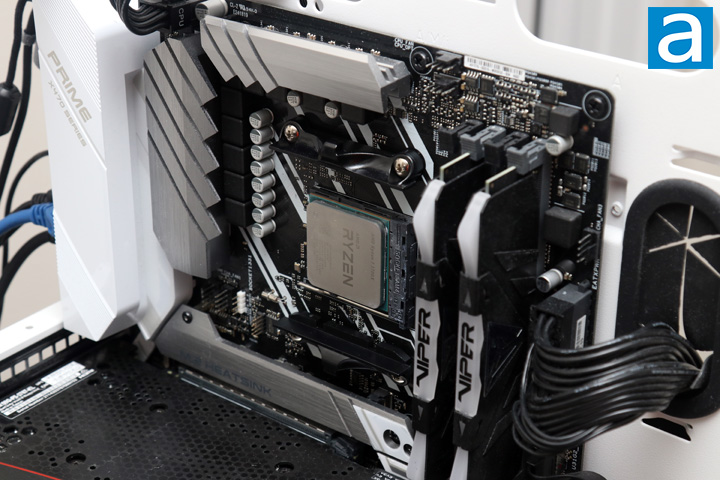
Before opening up the product, I thought the installation process for the Thermaltake TOUGHLIQUID Ultra 360 would be the same process as the 240mm variant, but this was not the case, especially for the AM4 socket. While the Intel socket still uses backplates provided by Thermaltake, the AM4 installation instructions actually use the mounting hardware and retention brackets that come with your motherboard. To do so, you will need to install the correct mounting arms onto the CPU block with the metal clamps to the sides. As for Intel, be sure to use the correct backplate, as there is one for older LGA115x and LGA1200 sockets, and a separate one for the LGA1700 socket.
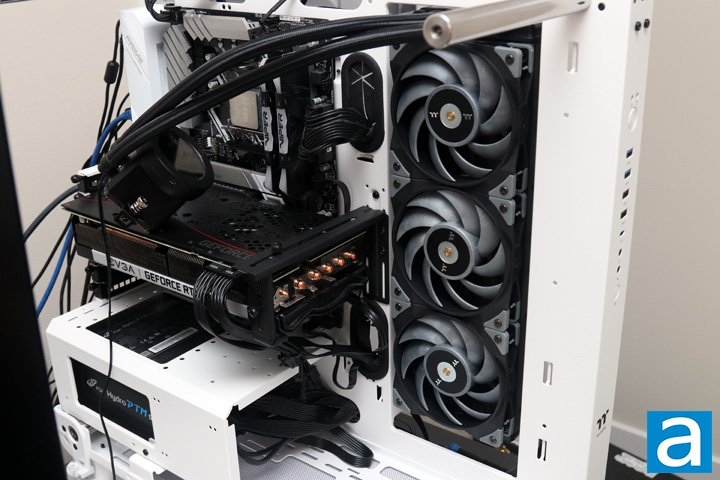
The next step would be to either mount the fans and radiator to the case or mount the water block onto the motherboard. I chose to go with the former and mounted my radiator with fans attached to the side of the case first. Thankfully, all of the holes were threaded properly and easy to install this time around. After mounting the radiator at the side of my case, I applied a sufficient amount of thermal paste, which is included from Thermaltake, and mounted the water block and pump combination on top of my AMD processor. Before I did this, I installed the correct metal frame onto the block that matched with the mounting bolts. I also removed the plastic protective sheet on the bottom of the block. Based on the instructions, Thermaltake recommends lightly putting the metal clamps onto the frame, putting the block in place, pushing the clamps into place on the plastic retention brackets, and then screwing in each side to secure the hold. If you do not read the instructions, you can end up damaging the plate at the bottom, so do be careful. That being said, if you have two hands and a screwdriver, it should be easy enough to put in place. For Intel processors, after mounting the right backplate, you can tighten the screw in each of the four corners to mount it in place.
Page Index
1. Introduction, Packaging, Specifications
2. A Closer Look - Hardware and Software; Installation
3. Test Results
4. Conclusion


