Page 2 - A Closer Look - Hardware and Software
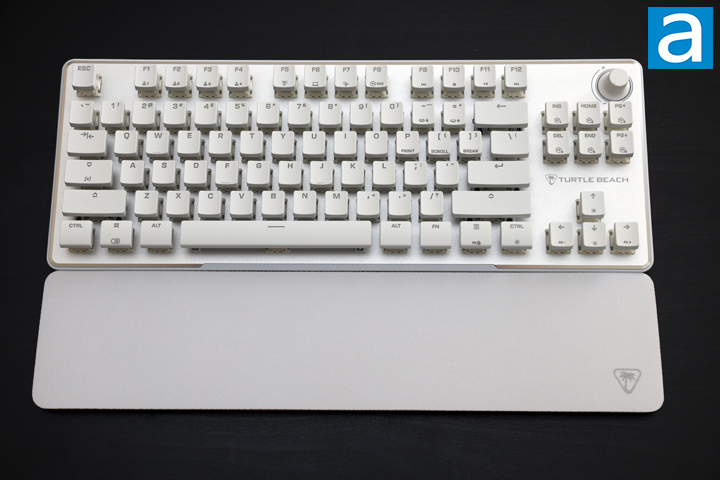
No matter how many keyboards I have reviewed, my favorite size is still the tenkeyless format. The last one I reviewed was back in 2021 with the Vulcan TKL Pro. Regarding our Turtle Beach Vulcan II TKL Pro today, you can see there are not too many differences from the first rendition. It retains the same exposed metal backplate, although this time with a matte finish instead of a brushed one. Secondly, it keeps the very shallow keycaps. These island-style keyboards expose the clear housing on the key switches underneath. The aluminum backplate is generally well-finished to hide fingerprints. Its edges are beveled and meets with the sides and bottom, which are made out of plastic. As I mentioned, the Vulcan II TKL Pro comes in black or white.
As for its dimensions, the Turtle Beach Vulcan II TKL Pro is 365mm in width, 33mm in height, and 137mm in depth. The height increases to 45mm with the kickstands fully extended. This is quite slim and low-profile compared to other tenkeyless keyboards, but it is slightly larger than the outgoing model. This slimmer size is due to the flat keycaps and overall design. In terms of mass, the Vulcan II TKL Pro weighs in at 633g. The keyboard is very sturdy, showing no signs of flex or movement, even when intentionally torqued and twisted. This sturdiness is partly due to its smaller size, but also because of the strong aluminum backplate. Despite the plastic shell around the keyboard, the construction holds up well. Fortunately, Turtle Beach did include a palm rest with this smaller keyboard. It is rather basic, measuring 362mm in width, 81mm in depth, and 9mm tall. It does not attach to the Vulcan II TKL Pro, but I am happy to see it included with their smaller form factor options.
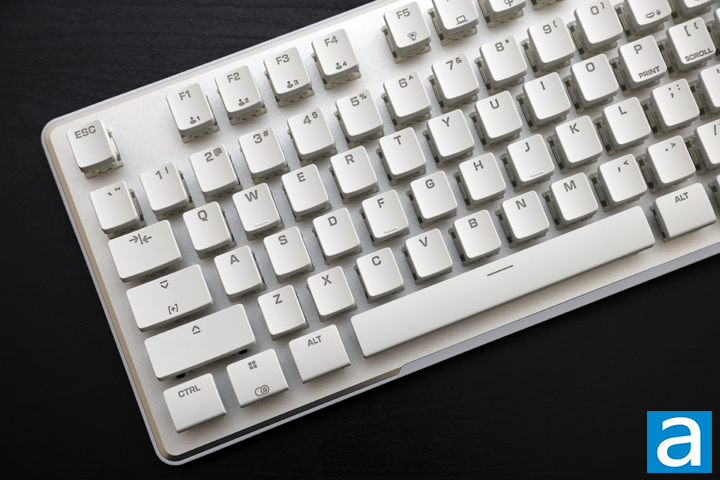
Most people would expect a tenkeyless keyboard with a typical QWERTY ANSI layout to have eighty-seven keys, but this one actually has three less at eighty-four. This is because the functions of the top three keys are implemented with secondary functions. In its place, a notched knob lets you quickly adjust the volume by turning or toggle mute by pressing down. Otherwise, the rest of the keyboard is pretty standard. The bottom row is spaced out in a standard fashion, with the Windows, Fn, Ctrl, Alt, and Menu keys all being the same 1.25U size on both sides of the space bar. The indicator LEDs are located on the keys themselves. In this case, when it is active, it will breathe in a white pattern compared to the rest of your keyboard. This is an improvement on constant white illumination, as it gives a more distinct indicator when this is active.
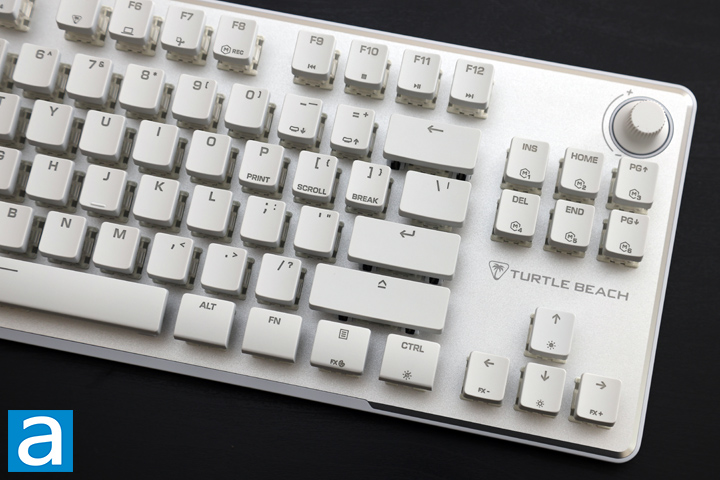
As for secondary functions, there are a few secondary keys and most of them exist on the right side of the keyboard. These are activated by pressing the Fn key on the bottom right side before pressing the marked key. Starting at the top, F1 to F4 is used to choose between the four saved profiles. F5 to F7 are shortcut keys to open the Swarm II software, file explorer, or take a screenshot, respectively. F8 is used to record macro keys, while F9 to F12 are used for media functions, including Previous Track, Stop, Play/Pause, and Next Track. On the right side under the volume knob, the six-button cluster can be assigned to activate six different macros. This can be set in the Swarm II utility, as we will see later on, or recorded on-the-fly. Moving on, the Print Screen, Scroll Lock, and Break keys are secondary functions on P and the square brackets. The dash and equals key are used to reduce or increase the actuation point of all keys. The Windows key can be used to toggle game mode, which deactivates the Windows key functionality. Finally, Turtle Beach's Easy Shift function is still present and can be toggled with Caps Lock while you are in Game Mode. The rest of the secondary functions are for adjusting the backlighting, but I will go over these functions later in the review.
As for the keycaps, these are ABS plastic. I prefer PBT, or polybutylene terephthalate, keycaps because the material is harder and keeps its color better. These ones are also notably shallower than traditional keycaps. This allows for the clear housing on the switches to be visible for each key. The lettering is printed on with a laser etching process, which removes the black cover to reveal the translucent plastic. This is a typical and cost-effective solution for keycap printing. The choice of font here is good and legible throughout. The keycaps use standard MX stems. One more thing I should point out is that while most keyboards have the tactile indicator on the "F" and "J" keys, this keyboard also has a tactile indicator on the "W" key, so that users can position their left hand for WASD on their keyboard. The keycaps on the Turtle Beach Vulcan II TKL Pro follow an OEM profile, with a bit of concavity in the middle of each key to keep users' fingers resting here.
As for key rollover, the Turtle Beach Vulcan II TKL Pro offers NKRO over USB. NKRO is abbreviated for N-key rollover, which refers to the number of keys independently scanned by the hardware. This fixes issues of ghosting found on cheaper keyboards. While ghosting is a marketing term, there are cases where it will not be able to recognize more than one keystroke at a time, causing missed keys. This can be frustrating when you are playing games or even if you are just a very fast typist. On an aside, the original usage of ghosting actually referred to a third key being registered when two other keys were pressed, which thankfully is not a modern-day problem anymore.
Before continuing on, one of the selling points of the Turtle Beach Vulcan II TKL Pro is the key switches. There are three main types of keyboards in the market today. The cheapest but most common is the membrane keyboard, which is the easiest to make, but also has poor typing feel and response due to squishy keys. Next is a scissor switch keyboard. This can be thought of as an enhanced rubber dome with two extra interlocking plastic pieces connected to the key and the keyboard. This creates a better tactile response and typing experience in comparison to the aforementioned membrane. Mechanical keyboards cost the most, because each key switch is an independent part. These switches are generally composed of a base, stem, and spring with varying degrees of tactile and audible feedback.
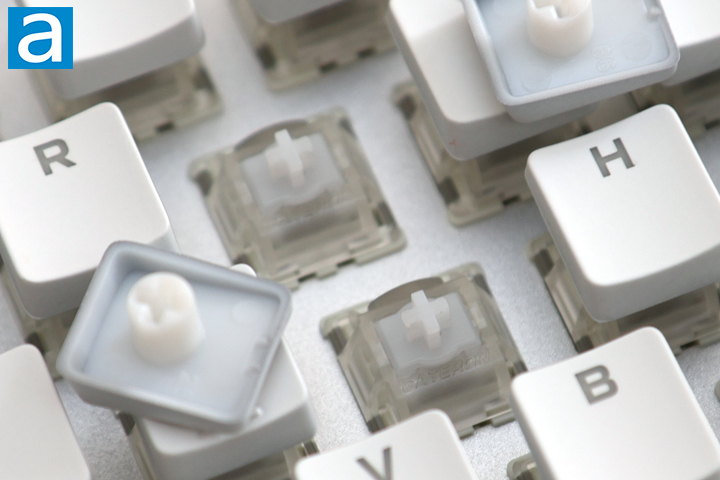
From further inspection, our unit of the Turtle Beach Vulcan II TKL Pro comes with Gateron KS-20 Magnetic White Hall Sensor switches. These are notably different from other switches as there is no defined actuation point. Instead, these have magnets internally to determine how far the key has traveled and the actuation point will be set in firmware. The physical switch has a linear travel with an operating force of 30g, which is quite low. In addition, Gateron claims these switches are self-lubricating for a smooth and quiet operation. Longer keys like the Space bar and Enter have Cherry stabilizers to prevent them from wobbling about. Unfortunately, these keys are not hot swappable. The RGB LEDs are north-facing and mounted on the PCB. The KS-20 switches have a white bottom and a translucent top to better disperse the light.
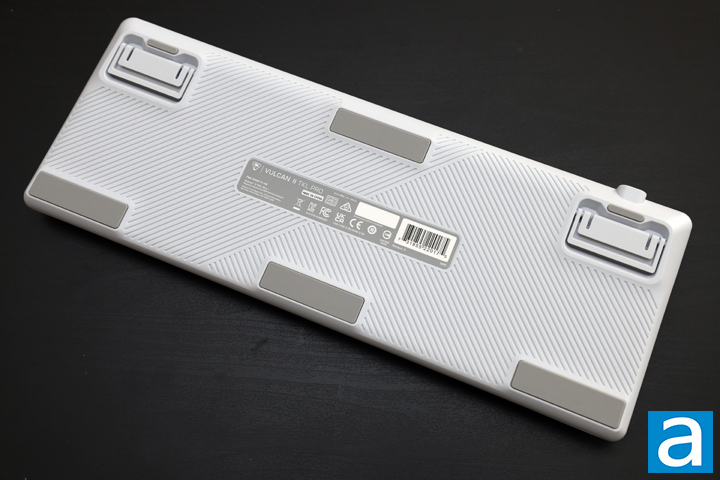
Flipping to the back side, you can see the label with some certification information and a serial number to identify your Turtle Beach Vulcan II TKL Pro. On the left at the back of the keyboard is where the detachable cable would come out of. This end is terminated with a USB Type-C plug. This cable measures approximately 1.8m in length and is decently flexible. Otherwise, you can see we have rectangular rubber pads on each corner to keep the keyboard in place. The rectangular rubber pads at back are on the extending feet that raise this keyboard. There are a pair of feet on each side so you can raise the back to two different levels. All of the feet are capped with rubber to ensure the keyboard stays in place regardless of whether the keyboard is propped up or not.
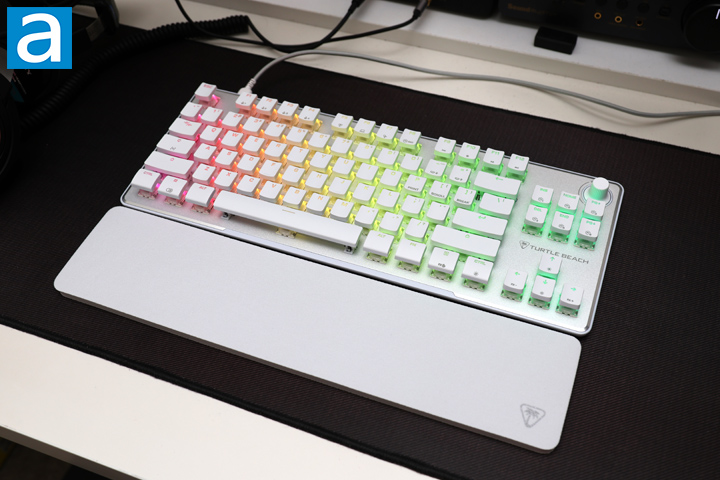
The Turtle Beach Vulcan II TKL Pro on my desk looks clean with its white finish. It stands out over the black mousing surface. In terms of layout, the Turtle Beach Vulcan II TKL Pro was pretty easy to get used to. As I do not often use the number pad, everything else is in place as you might expect. Those who need the side cluster of numbers will notice this omission, but I generally was fine without it. The one minor thing I missed was not having a reset all button, as there were times where my keyboard would be acting funny, but I had no way to hard reset all of the changes. This is quite common on most keyboards with secondary functions, but alas this is not the case here. Instead, you will have to enter into the software utility to reset everything, as you will see shortly. Otherwise, I did appreciate the two heights of kickstands, as I found the middle height to be just right. I also liked the inclusion of the palm rest, even if it does get dirty easily. Unfortunately, mine has started turning a bit gray after a month of use.
On the other hand, the typing experience of the Turtle Beach Vulcan II TKL Pro is not very similar to other keyboards I have tested. For one, its light operating force makes everything feel peppy and quick, especially with the smooth action and the linear travel. The Gateron White Magnetic Hall switches are unique in their sound, as they are not exactly the same as other mechanical switches. Out of the box, keypresses are a bit more subdued and not as loud as others. The sound is medium in pitch, with less of a "thock" and more of a "clack". The top metal plate has a bit of cushioning, although you will hear the occasional ping. There is not too much echo however from each press, which is good to hear. There is some keycap wiggle on each key, which is a less favorable trait. Furthermore, the longer keys have some stabilizer rattle. Personally, the biggest thing I had to get used to is the out-of-the-box actuation point. By default, it is set at 1.2mm, which is a very low travel distance before triggering the key. I ended up increasing this to 1.5mm. While this might not seem like a big difference, it immediately reduced the number of accidental presses. I do appreciate the fact users can adjust this to suit their typing style.
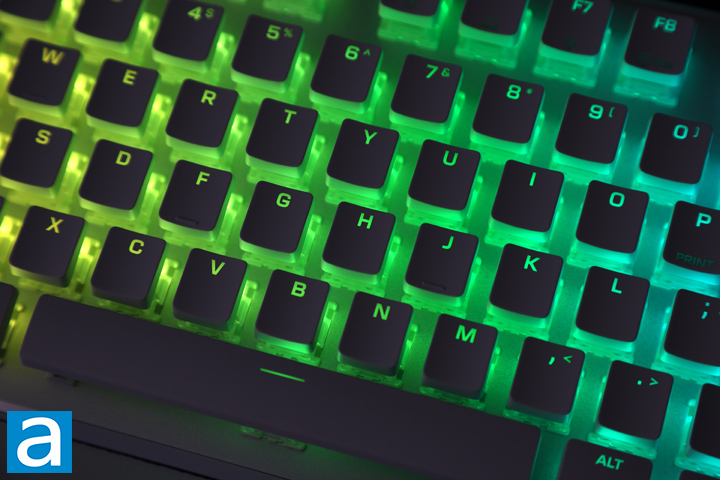
One area that is a mostly good story is the RGB LED lighting on the Turtle Beach Vulcan II TKL Pro. We have had the AIMO effects for a long time and this keyboard displays them quite well. The clear switch housing and shallow keycaps also ensure the lights shine brightly. Combined with the AIMO lighting effects, everything looks absolutely stunning. However, one area that could be improved is the location of the legends on each key. As these are north-facing lights, legends like the secondary functions are not illuminated to the same degree, making them tricky to see in low lighting. In terms of changing the lighting effects, you can use Fn in combination with the arrow keys to cycle through a few different options. Left and Right are used to change between a group of different effects, while Up and Down are used to increase or decrease the brightness. There are ten levels of brightness and you can turn them completely off. The right Ctrl key can also be used to toggle the lighting on or off. Finally, the Menu key cycles through a set of preset colors for single-color lighting modes.

We have reviewed many Turtle Beach products in the past, but this is the first time we have seen their Swarm II software. After our many pleas for an updated software, we finally have a new utility to make adjustments to their peripherals. Swarm II is available from Turtle Beach's website as a 59MB executable installer. The setup process is pretty easy to work through and adding additional peripherals is quite easy. I also received several updates during my review, so I know Turtle Beach is constantly pushing fixes for their users. Otherwise, there are a total of five different profiles to save to the keyboard. 8MB of internal storage is available to save these profiles. From the first page, you will see all of the Turtle Beach products connected and recognized by Swarm II.
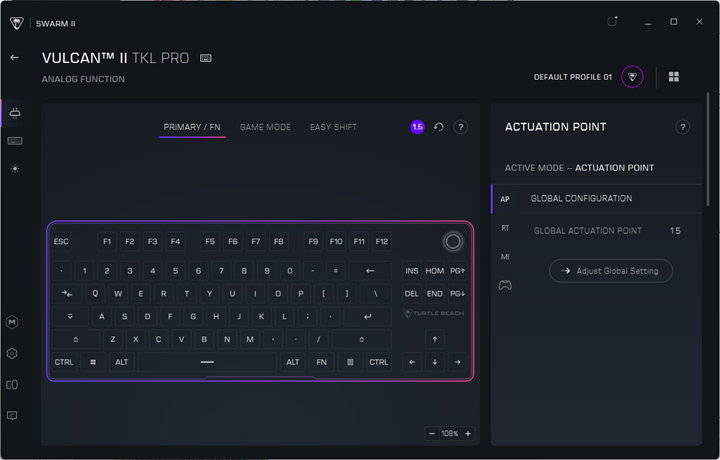
Once you enter the page for the Vulcan II TKL Pro, you will see the entire menu is organized into one long page. On the side, we have three primary sections, which scrolls the main page to the section. The first section is called "Analog Function", which is where you can take advantage of the Hall effect switches included with the Vulcan II TKL Pro. There are three subsections to select even more changes. Under Primary/Fn, you can set the actuation point for all of the keys. Under Game Mode and Easy Shift mode, you can get even more granularity by changing the actuation distance for each key. In these two pages, you can activate three more changes, including rapid trigger, multiple input, and controller. Rapid trigger is used to let you quickly activate keys multiple times without needing to fully lift the key. You can change the actuation point for rapid trigger, as well as the up and down stroke force needed. Multiple input lets you change what the keypress activates based on how far you press the key. Controller input helps you map your keyboard keys to a dual-axis controller.
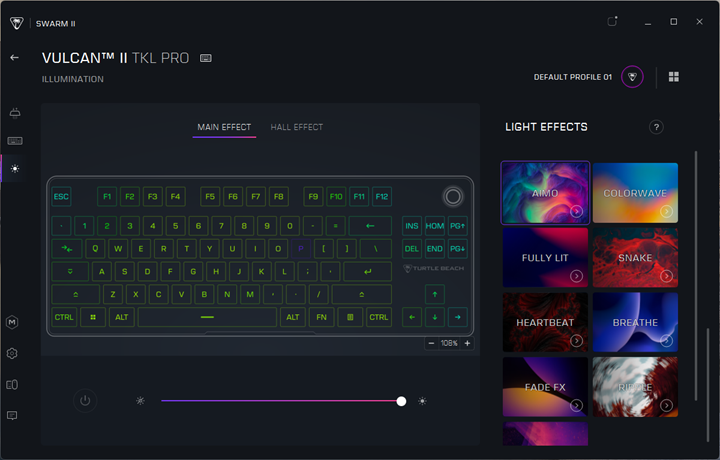
The second page, Assignment, is used to remap the keys. This includes changing the keys for Game Mode, Easy Shift, and even secondary functions. Finally, the third page is called Illumination, and this is used to adjust the lighting effects. We have a pretty typical set of static and dynamic modes, as well as the AIMO mode for a neat gradient pattern that changes over time. You can also activate the Hall Effect, which is a visual indicator of how far you are pressing each keystroke at a time.

At the bottom, we have a separate page to create and manage Macros. Here we have more macros with specific games integrated here. The cogwheel page is used to deal with updates and other application settings. Device Manager shows all of the devices connected and their drivers. Finally, the Help page has a set of frequently asked questions.
On first glance, the visual update of Swarm II is impressive. It looks more modern and cleaner. I am equally pleased with all of the customization options. However, I also found some notable bugs. The most prominent one was that Swarm II reverted my changes randomly during use. In fact, I have had to set my actuation point more than a handful of times throughout the review period. Secondly, the question mark tool tip for the Actuation Point always showed the same content, even when navigating through rapid trigger or multiple input. Finally, we found some miscellaneous errors with legacy ROCCAT products using Swarm II.
My other set of concerns for Swarm II center around user experience. For one, some may not love the scrolling experience, although I am indifferent. However, there needs to be labels or tooltips for the left-side bar menu so you can quickly navigate the menu pages. Next, the profile manager is located on the top corner, rather than being made available on the side menu, which seems out of place. Furthermore, Turtle Beach uses the term "storing" profiles as storing them on your desktop rather than on the keyboard. While none of these issues are catastrophic, I hope Turtle Beach refines the overall usability soon.
Page Index
1. Introduction, Packaging, Specifications
2. A Closer Look - Hardware and Software
3. Conclusion


