Page 5 - Configuration and User Interface, Part II
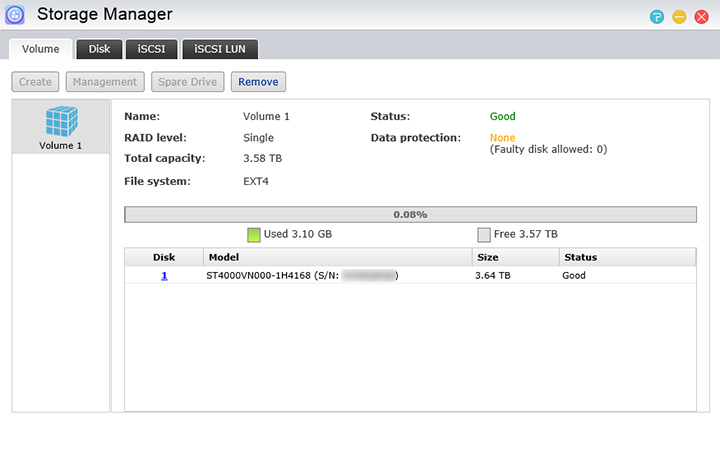
The Storage Manager application is one that is in control of the disks installed on the ASUSTOR AS1002T; as with all other applications, a separate pop-up web window appears. There are four tabs at the top, and these are Volume, Disk, iSCSI, and iSCSI LUN. The options are mostly found in the Volume section though, the number of volumes that are installed are shown on this page. In our case, there is only one drive installed, so we are shown one volume. Under each volume, it lists the number of disks, name of the volume, RAID level, total capacity, status, and if there is any data protection. In our example, we have one disk in single disk configuration with no data protection. However, it is possible to run the disks in JBOD (Linear Disk Volume), RAID 0 (Disk Striping), and RAID 1 (Disk Mirroring).
Under the Disk tab, we are shown the list of disks that are currently installed on the system, their size, their current temperature, their status, and their S.M.A.R.T. status. Here we can select the individual disks and get a better look at their current S.M.A.R.T. status, and to also run Disk Doctor if necessary to try to fix bad blocks or other problems with the disks. Under the iSCSI tab, we are able to create iSCSI targets and connect them using an initiator. This is mainly used for networking that requires the storage to be external, but allows the initiator or client to see the disk as if it were attached internally to their computer. The iSCSI LUN tab does exactly what its name suggests; you can use it to target logical iSCSI devices.
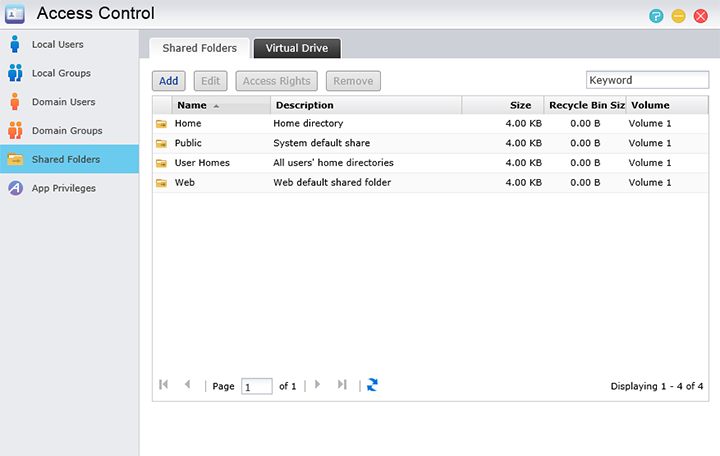
When it comes to permission settings, the Access Control application is what you would want to open up. There are six sections here; starting from top to bottom they are Local Users, Local Groups, Domain Users, Domain Groups, Shared Folders, and App Privileges. Starting with Local Users, we are shown a list of users that are currently created and allowed to create, edit, or remove users. Local Groups is used to create permission settings for different groups of users. Domain Users and Domain Groups is used to do the same thing, but for online AD users and groups. The Shared Folders tab is probably one of the most important ones here, as it is used to set the directories that each account is allowed to use, and where these folders point to specifically on the storage devices. App Privileges is used to determine what user can use which type of application as multiple accounts may be made to access the NAS and the corresponding applications. We will go more in-depth about these applications further on in our review.
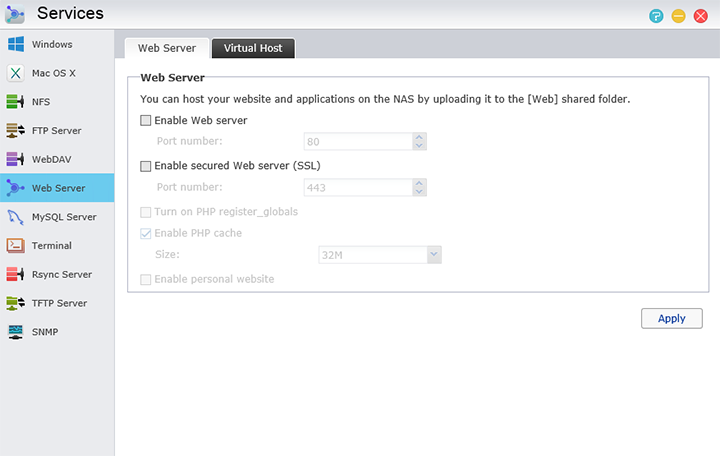
The next feature we will be taking a look at will the found in the Services application. Another important aspect of using a NAS is the ability to start up a web server or some form of networked server to not only share files locally within the network, but also over the internet as well. There are a bunch of settings and options here again, starting from top to bottom they are Windows, Mac OS X, NFS, FTP Server, WebDAV, Web Server, MySQL Server, Terminal, Rsync Server, TFTP Server, and SNMP. Windows options will most likely be used if there is at least one Windows devices on the network; being able to add the NAS to a domain and activating Active Directory is a great feature on any NAS.
Looking at the screenshot above, we can see the Web Server tab, which is of course used to activate the web server functionality of the ASUSTOR AS1002T. By enabling this feature, one can host a website on their NAS by just inserting files into the Web shared folder. Virtual hosts can also be set to create additional websites and have them point to specific folders on the NAS. For most intents and purposes, the Web Server feature is easy to set up and use, a website can quickly be uploaded to the Web shared folder and up for use in a matter of seconds.
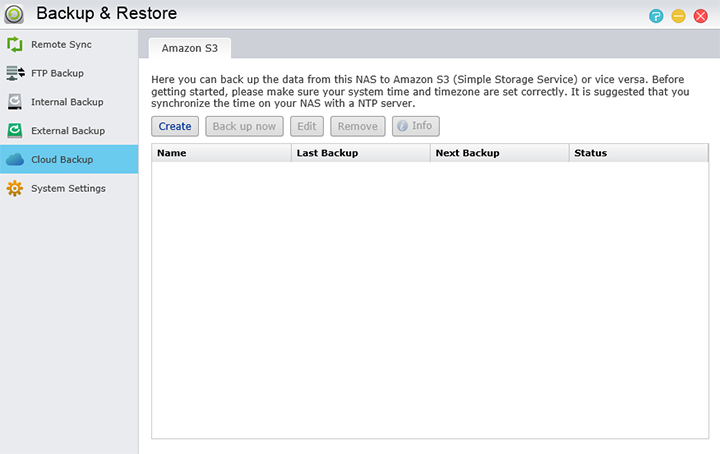
Under the Backup & Restore application is one of the main uses for a NAS other than having network accessible files, and that is the ability to remotely backup your files. There are quite a few options here and they include Remote Sync, FTP Backup, External Backup, One Touch Backup, Cloud Backup, and System Settings. All of these options allow for some form of backup. Most of these are self-explanatory, however one interesting concept is the One Touch Backup. Here the user can set up the default action of the front USB button. It can be set to either copy files from the USB device to the NAS or vice versa. A folder path can also be set as to where to backup to or from as well if needed.
Another important backup type is the usage of Cloud Backup; the movement to the cloud for many people has become a reality when either using cloud services such as Dropbox or Amazon S3 cloud services. Currently, the ASUSTOR AS1002T only supports Amazon S3 cloud services by default, but with the installation of the Dropbox application, back up to this service will be available as well. It is true that Amazon is probably the most popular cloud service at this point for this level of backup, so having S3 support by default makes sense. Anyway, you can set up your Amazon S3 account here and back up your NAS to that server or from the cloud back down to the NAS. In addition, it is also possible to set up multiple accounts with Dropbox to separate your important documents if necessary.
Page Index
1. Introduction, Packaging, Specifications
2. A Closer Look - Hardware (External)
3. A Closer Look - Hardware (Internal)
4. Configuration and User Interface, Part I
5. Configuration and User Interface, Part II
6. Configuration and User Interface, Part III
7. Performance and Power Consumption
8. Conclusion


