Page 2 - Physical Look - Hardware
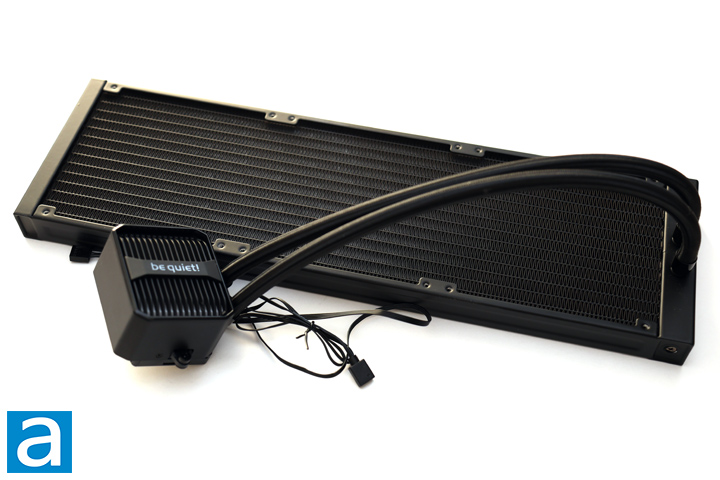
When it comes to the AIO cooler, the be quiet! Silent Loop 3 420mm looks conventional with its black finish for the radiator and tubing. The tubes have a braided sleeve for a cleaner finish. Furthermore, the branding on the radiator is limited to the logo on the water block, as well as on the sides of the radiator. The top of this water block is black with translucent slits for the RGB LED lights to shine through. These slim parallel lines remind me of micro fins inside a cold plate, which seems like a common inspiration for recent be quiet! closed loop coolers. One thing I appreciate is the fact that this water block looks stylish regardless of whether the lights are illuminated or not, which means users can choose if they want a flashy or a more subdued appearance. Several cables lead out of the combination water block to power and control the lighting and pump.
The radiator has measurements of 457mm in length, 140mm in width, and 27mm in thickness. These are typical numbers for a 420mm closed loop cooler. The size of a radiator plays a crucial role in cooling, as larger surface areas result in better heat dissipation. It is aluminum, which performs satisfactorily in terms of heat transfer. However, the main advantage of this material is its lower mass, which should reduce the strain placed on the case. As you saw from the contents of the box, we do have extra coolant included, which means there is an easily accessible fill port located on the edge of the radiator. I am quite happy they have included this, as it can potentially extend the life of the cooler. Overall, the build quality of the be quiet! Silent Loop 3 420mm is good with no bends or defects to be concerned about. I would still want to see some protection under each mounting hole to ensure screws do not contact the fins underneath. Of course, if you use the screws included, this will not be an issue, as they do not reach far enough to contact the radiator.
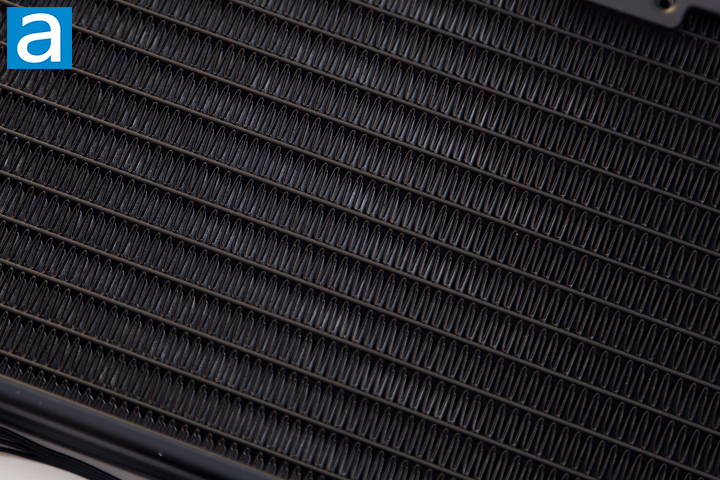
Taking a closer look, we have a standard fin layout on the be quiet! Silent Loop 3 420mm radiator. The fins are placed in this manner, so they contact the liquid running through the top and bottom. The result is a wavy set of fins, which are consistent in pattern and without any defects. Heat from the liquid runs through the radiator and transfers to the fins through the contact points. Fans are attached to the radiator to dissipate the heat. The liquid is transported around the loop via tubing. The tubing is made from rubber and sleeved for a nicer finish. This measures 400mm in length, which I found too short in my build. Unfortunately, I cannot properly mount a 420mm radiator above my system, so I must use the side intake. Ideally, I would mount this with the pipes running to the bottom, but the tubes were not long enough to go all the way to the bottom of my case. As such, I ended up rotating the radiator to a less-than-ideal position with the tubes at the top. I would have appreciated a bit more length. This depends on where you place the radiator in relation to the processor on the motherboard, but it should have been accounted for with a large radiator. Otherwise, the tubes are strong and flexible and should not form any kinks, even in more extreme bends. They pivot on the water block for easier maneuverability.
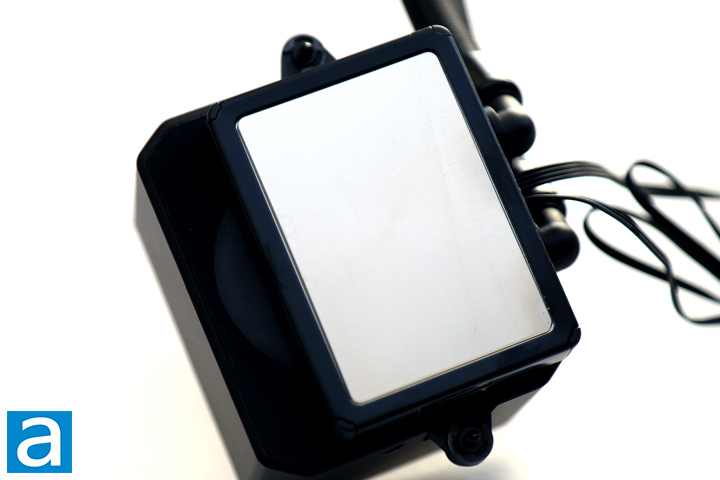
On the other end of the tubes is the combined contact plate, pump, and water block of the be quiet! Silent Loop 3 420mm. This unit measures 93.5mm in height, 80mm in width and 56mm in depth. This is a bit tall for a combination block, but this should not be an issue in most computer cases. The base contacting the processor is copper with nickel plating to increase its durability and resistance to corrosion. The base is flat with a slight circular finish that shows polishing marks. This rectangular shape is designed to sit over the larger integrated heatspreaders like AMD Threadripper without any issues. Two holes with captive screws can be found on opposite edges for mounting purposes. A clear label is placed on this area to prevent any surface scratches, so it is important you remove the label before installing it. Inside, we have a pump operating at an adjustable range of 1700 to 3500 RPM. It is powered and controlled through a 4-pin PWM header.
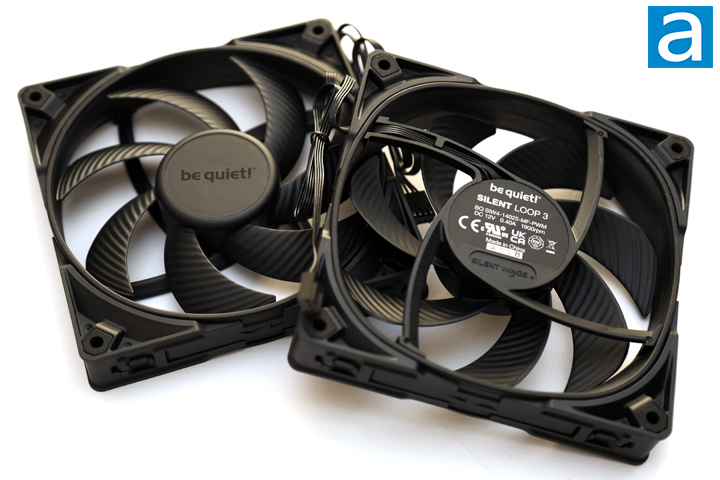
The three fans included with the be quiet! Silent Loop 3 420mm are the Silent Wings 4 140mm PWM. These have a seven-blade impeller. Internally, there is a six-pole motor driving fluid dynamic bearings with a lifespan of 300,000 hours. The rated noise level is a maximum of 29.3dbA, but we will see what this means when we evaluate noise levels. In terms of performance metrics, each fan produces a maximum air pressure of 2.36mm H2O with an airflow rating of 78.4CFM. Rubber dampeners can be found on each corner to reduce vibration. Finally, these are controlled with a 4-pin PWM header. The manufacturer has also included a 3-in-1 Y-adapter, so you only need to occupy one fan header on your motherboard.
Page Index
1. Introduction, Packaging, Specifications
2. Physical Look - Hardware
3. Installation and Test Results
4. Conclusion