Page 2 - Physical Look - Outside
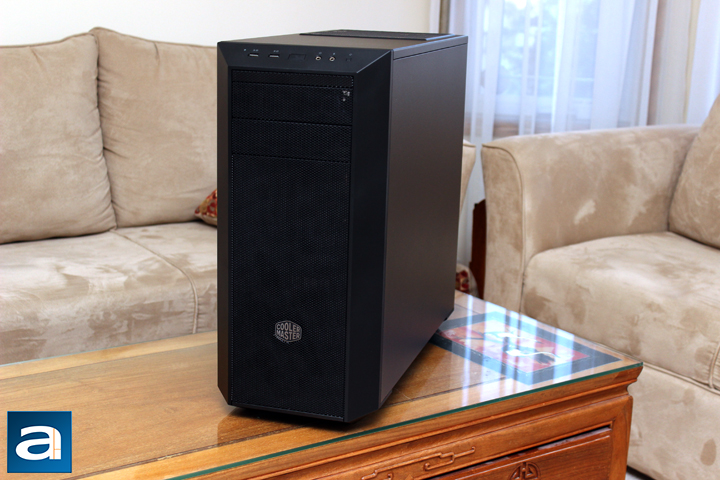
On an external look, the Cooler Master MasterBox 5 is somewhat familiar, especially when comparing to the MasterCase 5, but there are also some differences too. Both of these cases feature simple and clean lines with a symmetrical design. Rather than a flat front, we have a protruding area with a mesh finish. In addition, we have a similar matte black finish overall, and a prominent Cooler Master logo printed right on the front. Both of the cases are also made primarily out of steel, with some plastic parts throughout. Otherwise, the MasterBox 5 loses the handles on the top of the case, which is a bit of a bummer, but is understandable for a case of this price range. Overall the case is decent, and while it is not eye-catching for any aesthetic reason, I think the neutrality of the look makes it suitable for any sort of build. Build quality is quite good here too, as the case feels very sturdy and well-constructed.
In terms of dimensions, the Cooler Master MasterBox 5 stands tall at 475mm, with a length of 500mm and a width of 220mm. These measurements are standard for any sort of mid-tower ATX case. For a comparison, my main computer's chassis, the Phanteks Enthoo EVOLV ATX is larger in all dimensions, at a height of 495mm, length of 510mm, and width of 235mm. However the EVOLV ATX is on the bigger end of the mid-tower. With these dimensions, the MasterBox 5 should have no issues in holding different components, but we will see when we take an internal look later. In terms of weight, the Cooler Master MasterBox 5 comes in a rather light 7.64kg. This is quite a bit lighter than the Enthoo EVOLV ATX, which was a much heftier 10.2kg. This can explained by the differing material choices between the two chassis.

The first place we go to is the front input and outputs on the Cooler Master MasterBox 5. From left to right we have an HDD activity light, two USB 3.0 ports, power button, two 3.5mm audio jacks, and a reset button. This is pretty standard from most computers, although the location is a bit different. Rather than being on the front or the top of the case, it is on a slanted part of the case that sticks out from the front and the top. Either way, this is probably the compromise between the two locations, accommodating for computers being placed either on or above the floor. Otherwise, at the top of the case, there is another ventilated area near the back to allow users to add extra cooling hardware, but I will see more about this later.
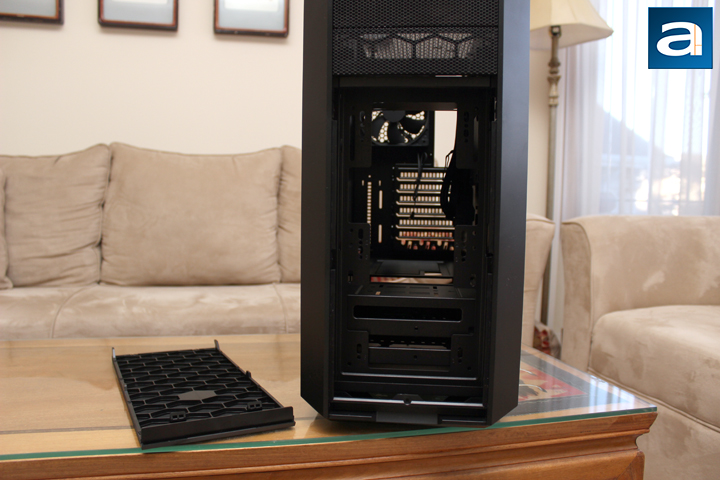
The front panel is similar and different from most cases at the same time. In the similarities, we see a mesh front, which allows for air to pass through. The mesh also holds a finer filter, used to prevent dust from entering the Cooler Master MasterBox 5. Cases nowadays are either filled with many holes as we see today, or a solid panel with side vents. While the solid panel may be more aesthetically pleasing, it does make the front facing fans work a bit harder to drive the same airflow into the case. In either situation, a front facing fan with a higher static pressure would be preferred here. What is different is how the front panel is removed. Rather than pulling off the entire front panel, only the mesh part is removable. This means the case fans can be installed by just removing this mesh filter area. It should make installing fans faster, since less work is required to access the fan brackets. Speaking of which, the front can hold two 120mm or 140mm fans, or a front mounted radiator of up to 280mm. With some additional fan brackets, you can add an extra 120mm fan, or use a radiator of up to 360mm. Doing so does require modifying the case a little bit from its default configuration, as there are not one, but two optical drive bays above the removable filter. It is a bit odd to see optical drive bays as they are a dying breed, but the support for them is still nice.
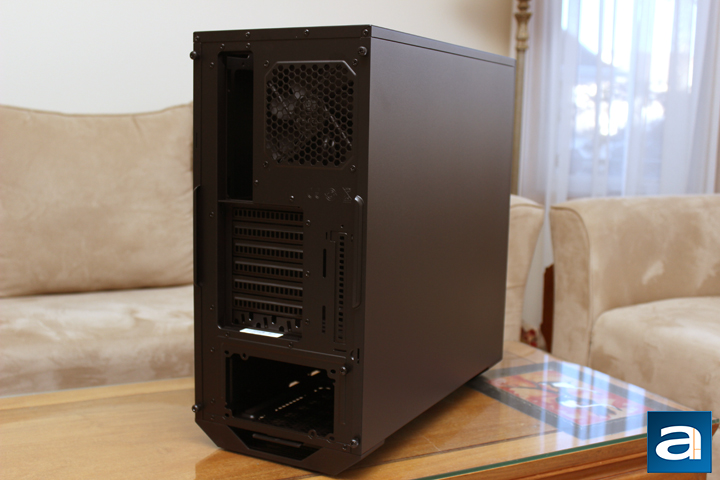
Moving to the back, the Cooler Master MasterBox 5 shows a pretty standard layout. At the bottom we have the power supply area. Above this are seven expansion slots, standard for a mid-tower ATX case. You might notice the bottom expansion slot cover looks a bit different than the others. This is what Cooler Master has dubbed their StormGuard system, and it is used to tie peripherals into place. While it is not a permanent solution, it does provide some resistance to prevent people from taking your hardware. Above the expansion bays is the motherboard cutout area. Finally, next to this is a ventilation for the rear exhaust of the MasterBox 5. A single 120mm fan can be placed here, and Cooler Master has done so with a generic 3-pin Cooler Master fan. It has a model number of DF120251-SELN, with a rated maximum rotational speed of approximately 1200RPM.

At the bottom of the case, we see Cooler Master have stuck with a two leg protrusion, rather than the other option of four feet. These two plastic legs come out of the front and the back of the case, and have four additional rubber pads in the corners. This should help in reducing the vibration between the floor and the case, softening any unnecessary sounds from the case vibrations. Also, at the bottom, you can see a back removable filter, used to prevent any dust from traveling into the power supply. Otherwise, there are also quite a few extra mounting holes, and you will see what they are as we take a look inside the Cooler Master MasterBox 5.
Page Index
1. Introduction, Packaging, Specifications
2. Physical Look - Outside
3. Physical Look - Inside
4. Installation and Conclusion


