Page 2 - A Closer Look - Hardware and Software

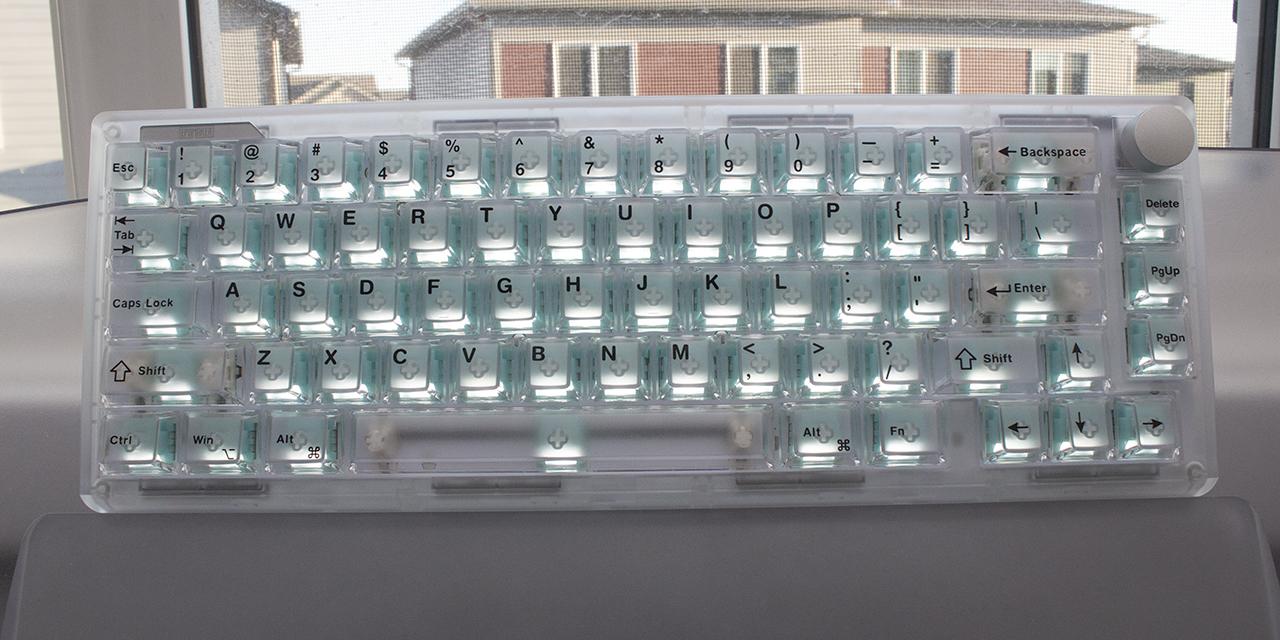
The Epomaker HE65 V2 TMR is a compact 65% layout keyboard when it comes to appearance. This layout is becoming more common among users looking for a smaller and more compact design. It is important to note this keyboard comes in two different variations, White and Black. In terms of finish, both models are ABS plastic builds. Our particular model is the White variant. Epomaker opted to use a plastic case with silk printed PC keycaps, which has a good consistent appearance across the board. The keycap design fits well with the case, matching the frosted appearance of the case. The HE65 V2 TMR features a standard high-bezel design, keeping the keycaps almost level with the frame of the keyboard. Epomaker chose to place minimal branding on the top left corner of the keyboard. There is very little branding on the back of the keyboard, only having it on the label. As someone who prefers less branding, this is perfect for me. The HE65 V2 TMR does not come with a wrist rest.
The HE65 V2 TMR measures in at 324mm length, 117mm width, and 43mm height according to Epomaker’s product page. This measurement seems to factor all parts of the keyboard. Given this design, this is quite standard. This size makes sense given the layout. In terms of mass, this weighs in at 745g, not including the detachable cord. This weight feels quite light, but given the plastic build of the keyboard, this makes sense. Going into the build quality, the top deck shows very little flex when pushing between the small gaps, as you may expect from such a small keyboard. When pushing into the keys, there is a small amount of flex from the gasket mount structure. There was only a reasonable amount of bending when attempting to twist the keyboard, being nothing to worry about. The case is quite sturdy for a plastic housing. As someone who has used aluminum keyboards for quite some time, I was still satisfied with the plastic build of the HE65 V2 TMR.

The Epomaker HE65 V2 TMR comes in a 65% QWERTY ANSI layout. The standard 65% layout typically has about sixty-six to sixty-eight keys, depending on if there is a split beside the arrow cluster or any added features. In this case we find sixty-six keys given the use of a split and a knob. The ANSI layout is the standard American layout, which uses the single row Enter key, as seen in some of the earlier images. The keyboard does use a standard bottom row. For those who do not know, 1U standard for a single unit, meaning a 1.25U keycap is 1.25 times wider than a regular one. As such, all of the bottom row keys aside from the space bar and arrow keys are 1.25U for a standard bottom row. For the average user, the typing experience will feel relatively the same, as the only difference is the smaller right shift and some missing right modifier keys.
The Epomaker HE65 V2 TMR has full N-key rollover, meaning every single key pressed will register even if they are all pressed simultaneously. This means there will be no ghosting issues, where some keys may not be registered. Gamers and fast typists who have fast actions per minute or words per minute will benefit from this, as it will allow more keys to be recognized at the same time. In reality, people usually only need 6-key rollover, so the addition of N-key rollover is nice for extremely fast typists who can reach about 250 words per minute. The inclusion of N-key rollover has become quite standard among keyboards, so this should not come as a surprise that the HE65 V2 TMR has it as well.

Taking a look at the secondary functions on the F-row, arrow, and a few extra keys, the user will have some memorizing to do. None of the secondary functions are labeled on the keycaps, thus the manual will be of use. These can be accessed by holding down the Fn key on the bottom right side before pressing the indicated key. We will break this down into shortcuts, media, extraneous keys, connectivity, and keyboard controls. I will only be testing the Windows functions, as I am on a Windows device. Thankfully, Epomaker has updated the manual for the HE65 V2 TMR and did not reuse an old manual for the secondary functions.
Starting with some basic combination keys, we have Esc, which resets the keyboard if you hold it down, otherwise it will write a tilde. The Q, W, and E keys will change between Bluetooth devices. R will reconnect to the 2.4GHz dongle. A and S can be used to swap to Windows or Mac mode, respectively. Left Windows will perform a Windows lock. Left Ctrl will toggle the number row to a function row.
When it comes to lighting, the up and down arrows control the brightness. Left and right control speed. Backspace toggles between backlighting on and off. Backslash will cycle through nine different effects. Enter will toggle through nine different colors as well. I appreciate that the commands are much simpler compared to some of Epomaker's other keyboards.

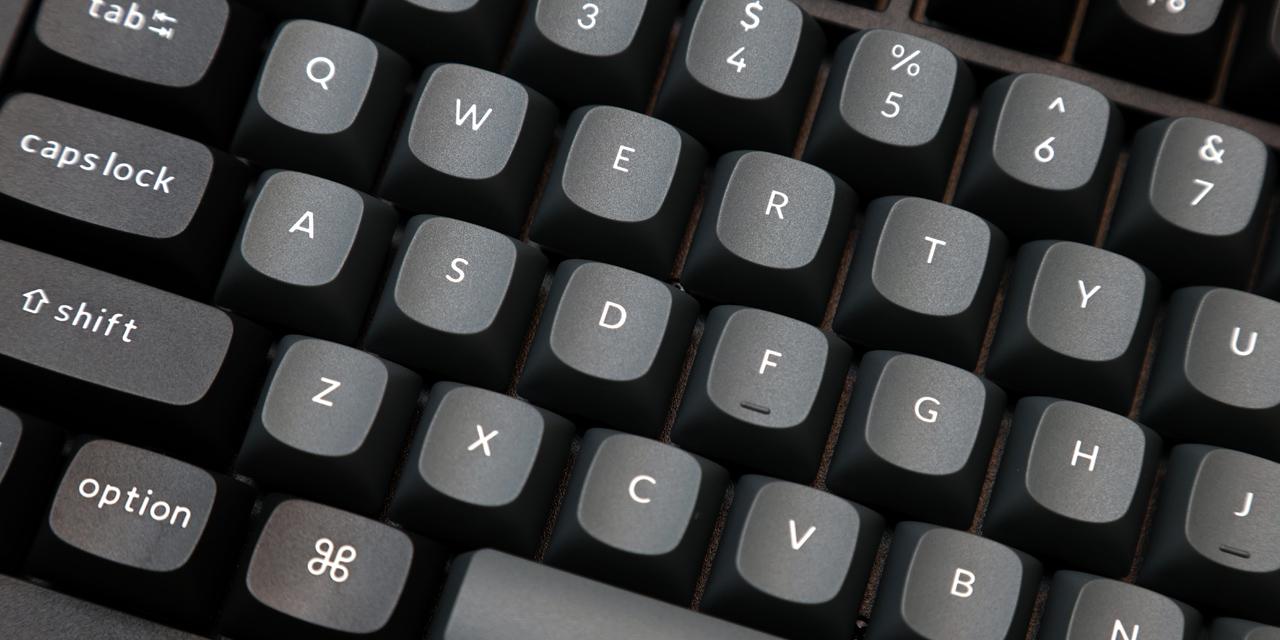
As for the keycaps, these are made out of PC plastic or polycarbonate. The use of PC plastic is mainly an aesthetic choice, as Epomaker opted for a transparent keyboard. The lettering is printed out on the top of the keycaps using a silk print, where ink is pushed through a stencil directly onto the surface. This method is considered cheaper and will wear over time more easily. The coloring and legending are sharp. In terms of warp and shine, PC is actually quite good when it comes to warp. In terms of shine, PC is quite susceptible. The font used is quite sharp and consistent with the rest of the board, which is something I find nice. A small detail is noticed is that the alphabet keys font thicknesses are quite consistent, but when it comes to the modifiers, there is some variation.
Underneath the keycaps, you can see the typical MX stem. This means you can replace the keycaps with another set. This keyboard uses south-facing lights, which is good, as there will be no interference problems using Cherry profile keycaps. I should note the space bar is oddly north-facing, but this should not affect any popular profile of keycaps. In regard to thickness, they are about 1.5mm thick, which is really good, being quite even across the keycap. The significance of the thickness of a keycap is important for the feel and pitch. To keep things simple, thicker ones have more depth and produce a deeper thock, while thinner ones produce a higher pitch sound.
The Epomaker HE65 V2 TMR features their own Creamy Jade magnetic switches. These switches are magnetic switches that can be used in both Hall effect and TMR keyboards, which use magnets to gauge whether the switch is actuated or not. TMR stands for Tunnel Magnetoresistance. Rather than measuring travel by detecting voltage created by moving the magnetic field like Hall effect keyboards do, TMR keyboards detect changes in electrical resistance. These switches are linear by nature, having a smooth travel from beginning to end for the most part. The Creamy Jade switches have a travel of 3.5mm, being quite standard. This is a slight alteration to the standard travel specifications for many mechanical switches opting for a slightly shorter total travel. The total force required to actuate is roughly 55g for operating. These switches have a rated lifespan of 100 million keystrokes, which is incredibly long compared to regular mechanical switches. The HE65 V2 TMR is also hot-swappable, meaning you can swap these at any time if they begin to fail. Something important to note is that this is a TMR keyboard, meaning it uses magnetic switches and cannot be swapped to use a typical mechanical switch. The design of the switch is slightly altered, and I will expand on this on the next page.
Even with these specifications, it is quite hard to picture what these switches actually feel like, so I will try my best to explain. For a stock switch, the Epomaker Creamy Jade magnetic switches are more than acceptable. The linear characteristic gives a smooth travel. If you have used a standard mechanical keyboard before, it will feel quite normal aside from the early bottom out. With that said, the Creamy Jade magnetic switches are good if you are looking for a shorter travel switch.
Moving on to stabilizers, we have plate-mount Cherry stabilizers. If you are unfamiliar, there are two main designs of stabilizers, which are Cherry and Costar. In both cases, these are used to maintain balance in the longer keys and stabilize them, as the name implies. Cherry ones will have stems matching the bottom of most keycaps, while Costar has a wire hooked into a hoop on the keycaps. The main issue with Costar stabilizers is how they are a rattly mess, and there is practically nothing you can do about it. Cherry stabilizers also rattle, but there are ways to reduce the sound, making it the superior choice.
There is also a large difference between plate mount and PCB mount stabilizers. Generally, there are three types of mounting method, including plate mounting, screw-in, and clip-in. The latter two are PCB-mounted. I personally prefer screw-in stabilizers, as they stay in place the best out of the three options, followed by clip-in. Given the keyboard’s design, plate mount stabilizers make a lot of sense, as they are the easiest to maintain and remove. The ease has a caveat that can also easily fall out. With a small bit of knowledge, anyone should be able to fit them back into place rather easily. With that being said, the included stabilizers are tuned quite well with no apparent rattle.

Taking a peek at the bottom of the keyboard, we have four rubber feet. The feet on the bottom side are average in size, doing a great job of keeping the keyboard in place. This keyboard has adjustable feet that can be changed to three different levels including flat. There should be no noticeable unintentional sliding. There is no cable raceway to manage cables, as the Epomaker HE65 V2 TMR uses a detachable cable design. This is my personal preference, as it makes swapping between keyboards easier. The included braided 1.8m USB Type-C cable is greatly appreciated.
Inside the HE65 V2 TMR, we have two 2000mAh batteries for a total of 4000mAh. TMR keyboards require less power in comparison to Hall effect keyboards. The HE65 V2 TMR lasts about 30 hours with RGB on at 1000Hz polling rate. If you increase the polling rate to 8000Hz, the battery life diminishes much faster, only lasting about 5 hours while running on the battery.

After doing my thorough inspection, I put the Epomaker HE65 V2 TMR to use. As these Creamy Jade switches are linear in nature, I made sure to account for this in the typing test. A sound test of the Epomaker HE65 V2 TMR can be found above. My first observation was a deeper pitch clack upon bottoming out with no ping. I should note I am typing on top of a desk mat, which dampens higher pitched sounds. However, the lack of pinging is more due to the dampening within the keyboard. Epomaker has provided a good use of foam to prevent unwanted noise. The smooth linear feel was good. As someone who generally enjoys linear switches, I had a good experience, as these switches are pre-lubricated, making for a smoother experience. The travel distance and actuation point were both good, and I had no issues whatsoever. I found the sound profile to be quite thocky. Something great about magnetic switches is their ability to be customized when it comes to the actuation point. The travel distance was good, and I had no issues whatsoever.

I would say the Epomaker HE65 V2 TMR definitely has good lighting effect potential. This is because of the lighter tones that reflect light better and the clear keycaps. Having a partially transparent plate, combined with switches with diffusers, allows for light to better reflect around the keyboard. With everything put together, the keyboard quite literally glows. I appreciate how consistent the lighting appears. I personally found the lighting to be fine, as I had no problem with configuring it using software or the screen. I do not think any users will have any issues in regard to lighting. There are twenty-one different lighting modes and nine different preset lighting colors.

The software utility to control the Epomaker HE65 V2 TMR is a standalone application available through Epomaker’s website. The software is called Epomaker Driver 4.0, and it feels fairly well polished. I will say, I was a little confused upon opening the software, as it opens in Chinese, and I am quite illiterate. I will point it out and say there is a drop-down menu near the top where you can change it to English, but it will default to be set to Chinese, written in Chinese. Without playing around, I would not have found this drop-down menu.
As for the functionality of the software, it does exactly what you would want it to do. All the menus can be found on the left side. These tabs allow you to customize keyboard settings, change Fn layers, edit macros, change lighting effects, share effects, view your profile, and finally update drivers and firmware. In terms of the quality of the software, I found it quite complete. The Keyboard Settings tab allows you to customize the functionality of each key and focus more on the magnetic switches inside. This is essential for all magnetic-based keyboards, as adjusting the switch settings will give a competitive edge. These settings include changing the actuation point, activating snap key, changing polling rate, and much more. Generally speaking, there are a lot more in-depth settings that can be adjusted, but having these core features is essential to a quality magnetic keyboard. Snap key is a feature more often referred to as rapid trigger, where when pressing two keys, the key pressed the latest will take priority. The functionality in this would be best used in competitive shooters with a focus on strafing from side to side. This will aid in making sure you never stop by negating the possibility of actuating both keys at the same time.
Page Index
1. Introduction, Packaging, Specifications
2. A Closer Look - Hardware and Software
3. A Closer Look - Disassembly and Internals
4. Conclusion