Page 3 - A Closer Look - Disassembly and Internals
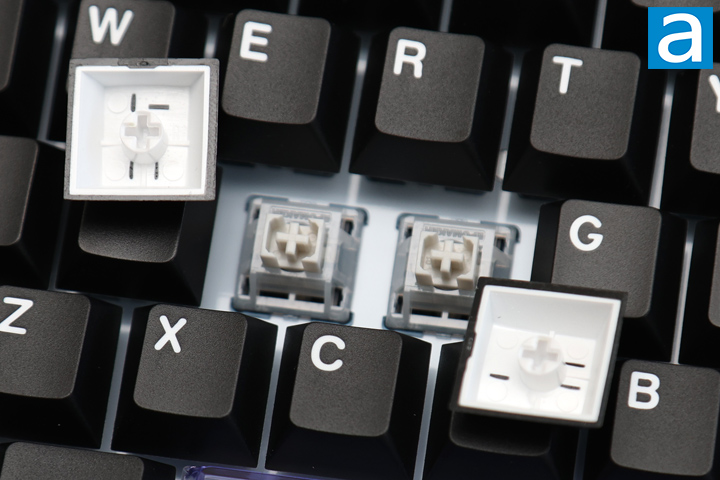
As part of our disassembly, we can start by first inspecting the keycaps. These are PBT or polybutylene terephthalate plastic with a double-shot injection. I like PBT as a material choice, as it is more durable and does not shine or fade over time compared to other commonly used plastics like ABS. The thicker wall adds to a deeper sound when pressed. The legends are inserted with a second layer of plastic, which is why it is called double shot. This is also why you see a black outer and white inner plastic. As such, the legends will not fade or wear over time, but it is a costly option for making keycaps. The choice of font is clear and legible with OEM-like writing.
The translucent keycaps, on the other hand, are polycarbonate with UV printing on top. They did not shine or fade while I was using it for my testing, but this can happen with UV printing over time. The keycaps use standard MX stems with a Cherry profile. The Epomaker HE80 offers full NKRO over USB. NKRO stands for N-key rollover, which refers to the number of keys scanned independently by the hardware. The keycaps have an OEM profile as well with the keys slightly concave, so users know where to rest their fingers.
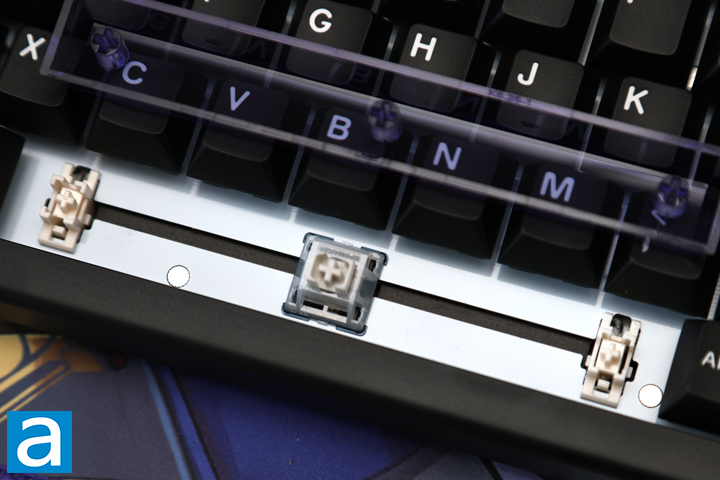
The longer keys of the Epomaker HE80, like the space bar and Enter, have Cherry stabilizers on each side to ensure an even actuation and to prevent wobbling. These are factory lubricated, as it has a smooth travel and does not rattle or squeak when the longer keys are pressed. The stabilizers are plate-mounted rather than screwed into the PCB. This is usually a cheaper alternative, as plate-mounted stabilizers can cause a bit more rattling. Thankfully, the stabilizers do not make much noise. The plate is aluminum and does not flex under pressure. This also affects how each keystroke sound with its higher pitched click.
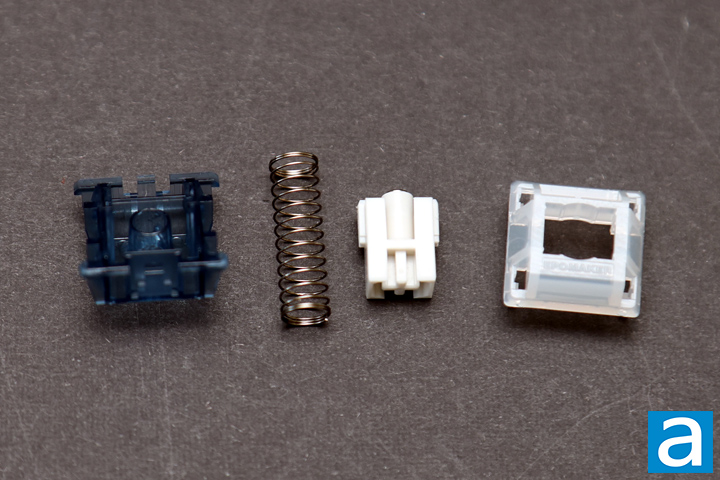
One key selling point of the Epomaker HE80 is its switch technology. Mechanical switches consist of a housing base, stem, and spring, offering varying levels of tactile and audible feedback. However, you already know the HE80 does not use typical mechanical switches, but rather Hall effect magnetic switches. In addition to the previously mentioned parts, each stem has a small magnet at the bottom of the stem. This is detected up by the Hall effect sensor on the PCB. More specifically, these are Epomaker MagneX switches. They have an initial actuation force of 37g and a bottoming out force of 45g. They are linear switches with a total travel distance of 3.4mm and an expected lifespan of one billion keystrokes. These connect with hot swap sockets, but the Epomaker HE80 only supports other Hall effect switches and not mechanical ones.
As for physical differences, the Epomaker MagneX switch has a translucent white top and clear dark blue bottom enclosure. They are both made of polycarbonate. A stem with a magnet in the bottom is made of polyoxymethylene or POM. This straddles over an 18mm spring that keeps the magnet away from the bottom until it is intentionally pressed. The switch stem has minimal lateral movement inside the enclosure, which makes the actuation feel stable and the keys have minimal wobble. The switches are also factory lubricated for a smoother typing feel and sound.
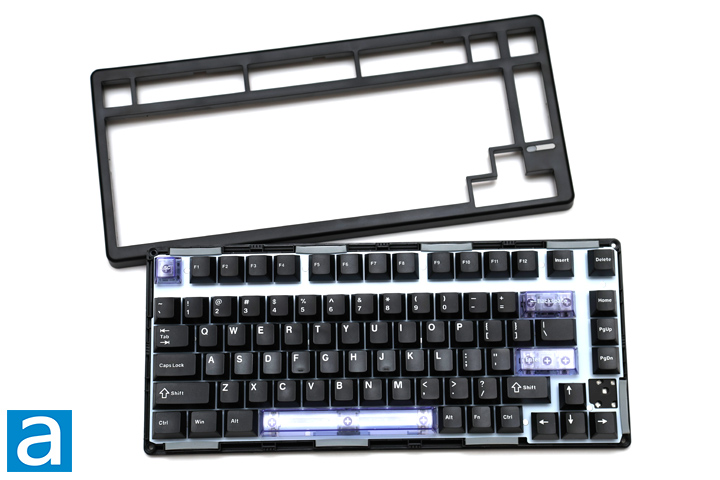
Taking apart the Epomaker HE80 is a straightforward process. It starts by removing the screws in the corners. Once you do so, you still need a pry tool to dislodge the clips holding the rest of the shell in place. After, you can pull the top plastic frame away from the rest of the HE80. From this angle, there are a couple important things to note. First, the switches sit on top of a white FR4 plate. This material is the same thing that printed circuit boards are made from, and it provides a feel that is between plastic and aluminum in terms of flex and hardness. The whole keyboard deck is not fixed in place, but sits in grooves with gray gasket mounts. The deck then sits in place between the top and bottom plastic enclosures. These gaskets reduce vibration or unwanted movement transferring from the deck to the rest of the enclosure.
In between the plate and the PCB, there are several layers of sound damping material, including a latex sandwich foam and a thinner IXPE switch pad. This helps by providing a deeper tone to the sound and reducing unwanted noise. They also contribute to a softer bottoming out sound and feel. Otherwise, you can see the cluster of LED lights above the right arrow key.
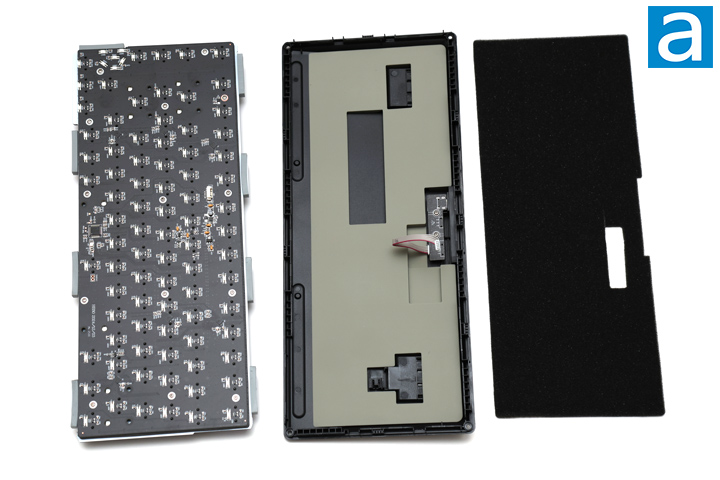
Lifting the keyboard deck up, you can see the bottom layers of the Epomaker HE80. There are several layers in between the exposed PCB and the rest of the bottom shell. This includes a thin sheet of plastic and a more porous bottom foam. Underneath, there is a large silicone bottom that fills in quite a bit of space in the bottom shell. This ensures we do not have a hollow sound when pressing. In the middle, there is a smaller daughterboard with a USB Type-C connection exposed to the back. It connects to the primary PCB with a JST header. This ensures the plug stays stationary while the rest of the keyboard may move about in regular use.
Page Index
1. Introduction, Packaging, Specifications
2. A Closer Look - Hardware and Software
3. A Closer Look - Disassembly and Internals
4. Conclusion


