Page 3 - Physical Look - Inside
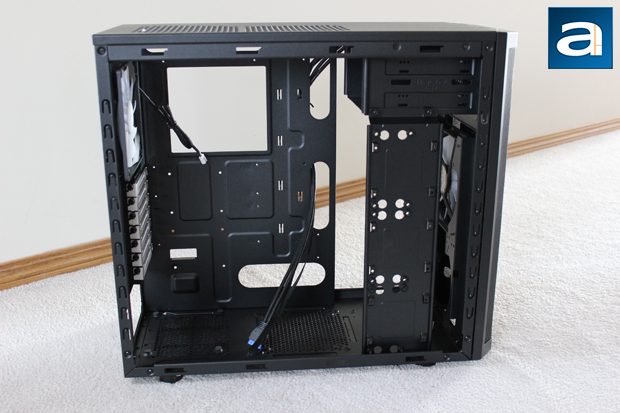
As is generally the case (No pun intended), four thumbscrews hold the side panels from the back, and it is a tool-free job to remove both of the sidings. A quick and easy slide off, and we can finally see what is inside. Gone are the old days of having an unfinished inside with unpainted silver sides all over the place. This relic quality can only be found in OEM cases. Inside is an all-black finish, with the exception of two things: The fans and the expansion slot covers, both of which are finished in a polar white. The first thing you might notice is how large the hole is behind the motherboard. This is found on many cases, from budget to high-end. It allows users to install an aftermarket CPU cooler much easier, as they can access both sides without having to remove the motherboard from the chassis. The Fractal Design Core 3300 is a mid-tower ATX case, but it can support ATX, E-ATX (Up to 295mm), mATX and Mini ITX motherboards too. The riser mounting holes are also labeled with an A or an M, depending on which motherboard you wish to install. The power supply area is bottom mounted, while the motherboard sits on top. Otherwise, the rest of the layout is as you would expect from any mid-tower ATX case...
Except for one caveat: The drive cage, or in this case, the lack of a 3.5"/2.5" drive cage. Gone are the standard sliding holders you would install your drives into. Instead for the Core X3 series (I.e. the Core 1300, 2300 and 3300), Fractal Design has a new vertical HDD bracket. This means you will be putting your 3.5" HDDs on the back of the vertical bracket, while the smaller drives will go on the front. The whole contraption can fit up to three of each size, for a total of six drives. The holes to mount the larger 3.5" drives are also rubberized to reduce the vibration found in traditional spinning disk drives. I like this implementation, as there will be less things in the way to block the airflow from the front-facing fan to the back. Additionally, if you do not actually have any 3.5" drives, and instead only have 2.5" drives, you can actually remove this vertical HDD bracket. Then you can mount the smaller disks on the back of the case, but I will delve into this later. Just to note though, this bracket requires you to install your 2.5" drives first, because the larger HDDs will block the screw holes. The lack of a traditional hard drive bay also means larger graphics cards will not be hindered by permanent tray, and you can intuitively place your drives away from the expansion slot area. With the bracket, Fractal Design specifies anything less than 255mm GPUs will not be affected. It would have been nice if Fractal Design allowed users to install the vertical bracket on either side of the case, as there is more than enough room on both sides. This would free up more space for the graphics card, but this is just my opinion.
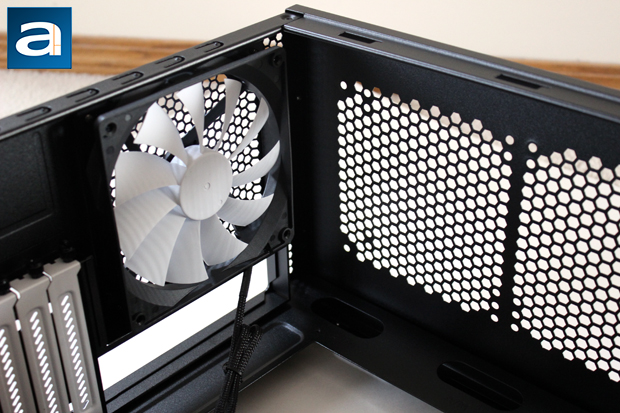
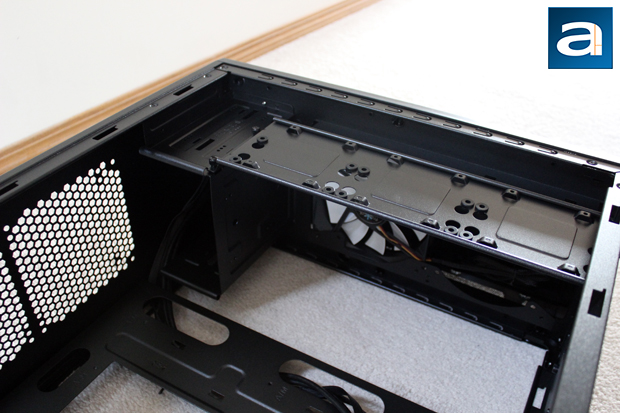
Moving on, we come to the top of the case, where the back facing 140mm Silent Series R2 fan is located. Upon further research, I actually found out these are the exact same fans that come with the Fractal Design Define R4, which is a nice thing to see. These fans are 1000 rpm fans equipped with hydraulic bearings, and features a 3-pin motherboard header. As I have mentioned before, the top vent also supports two 120/140mm or a 240/280mm radiator. Beneath the fan are the expansion card slots, with a standard seven in total, in its Arctic White glory.
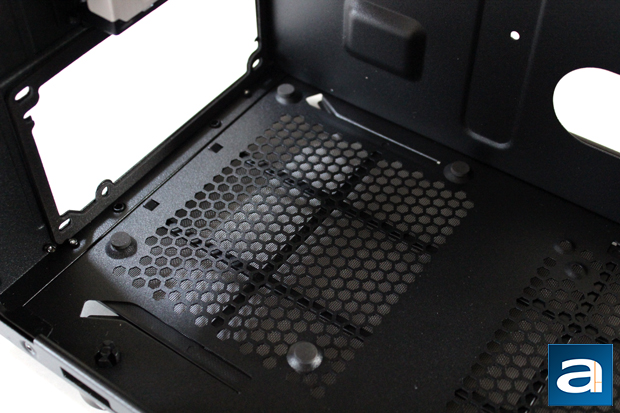
Moving to the bottom, we can see the area where the power supply will be mounted. There are four mounts on the bottom to lift the power supply from the bottom of the case, and they are all foam padded. This helps to reduce the vibration transfer between the power supply and the case, and in turn will reduce noise. After not seeing these foam coverings in past products I have reviewed, this was pleasant surprise, and once again highlights Fractal Design's attention to detail. There is also a foam lining around the mounting hole, which dampens the vibrations caused by your power supply against the back panel. Not a lot of case manufacturers have this, but this is a feature that is borrowed from the Define R4. In terms of spacing for the power supply, there is quite a bit of room, both width and lengthwise. I do not think there is going to be any problem fitting a power supply of any size, but Fractal Design recommends an ATX power supply that is shorter than 170mm if you install a bottom mounted fan. Without this, you can easily put in a larger power supply.
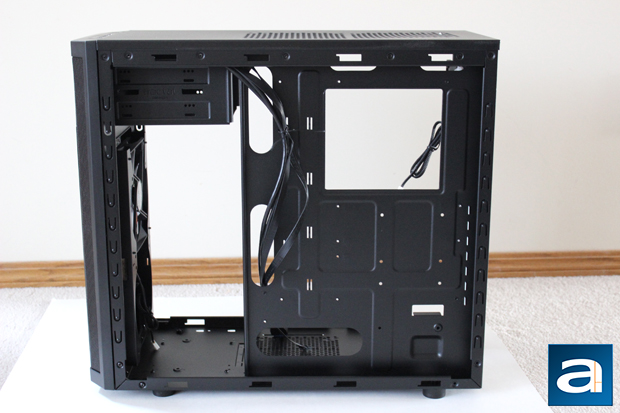
Turning the Fractal Design Core 3300 to the other side, and we can see the back of the motherboard tray. Generally, the back is used for hiding cables and wires just to keep the front area cleaner. While the Fractal Design Define R4 boasted a 26mm gap between the back and the panel, this Core 3300 is a not too shabby 22mm. Of course, the more space the easier it is to wire, but this is already quite generous at more than two centimeters of wiggle room. Just for your information, the photo above was taken with the vertical hard drive bay removed, so it does look quite a bit more open. I have mentioned before there are actually two sets of screw mounts for your SSDs to sit at the back of the case, and these mounts are located on the right side of the photo, right underneath the motherboard opening. This really is an interesting idea, as there is more than enough room to fit two SSDs while not needing to compromise on wiring space. I should warn you if you do utilize this feature, you will have to install the drive first before you place the motherboard, as there will be no other way to access the screw holes afterwards. You can also see there are a lot of wiring holes in all places imaginable, which is good to see. However, none of these openings are fitted with rubber grommets, and so there might be more bend and stress on the wires. Rubber grommets also help clean up the look of the installation, as it only opens as wide as it needs to be to hide the cables behind the case better. While this is unfortunate, this is also normal when compared with other cases of the same price range.
Page Index
1. Introduction, Packaging, Specifications
2. Physical Look - Outside
3. Physical Look - Inside
4. Installation and Conclusion


