Page 3 - Physical Look - Inside
To get inside the SilverStone FLP02, you will need to loosen the captive thumbscrews on the back and slide off the two sides. Unfortunately, due to the impact damage during shipping, the right side panel would not come loose, as the back corner was slightly folded. After a bit of yanking and pulling, I was able to get it off. I hammered down the corner to remove the fold. The other side also had slightly bent thumbscrews, which would have been prevented if the FLP02 was packed with better materials.
Moving on, the panels slot in at the front with three peg holes. Both sides are solid panels and painted in the same color inside and out. There is a small bit of foam to soften the contact between the two steel surfaces, but there is no noise damping material here.
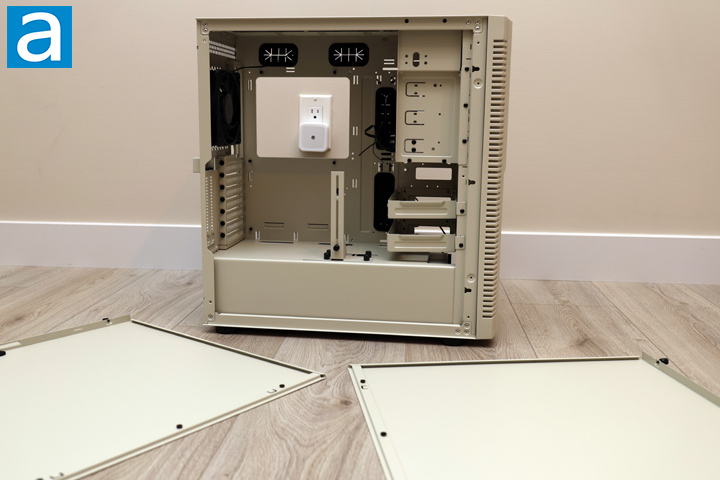
With both panels off, you can see the interior layout of the SilverStone FLP02. The case is not really an open concept. Instead, it mirrors an older layout through its support of various drives at the front. There are fans near the bottom and one more for exhaust to provide a channel of air to flow through from front to back. At the bottom, there is a permanent power supply shroud that divides the basement from the rest of the chassis. In the main area of the FLP02, you can mount up to an SSI-CEB or ATX motherboard, but smaller micro ATX and mini ITX form factors are also compatible. Internally, everything is a consistent tan color. It does not scratch off easily in day-to-day use.
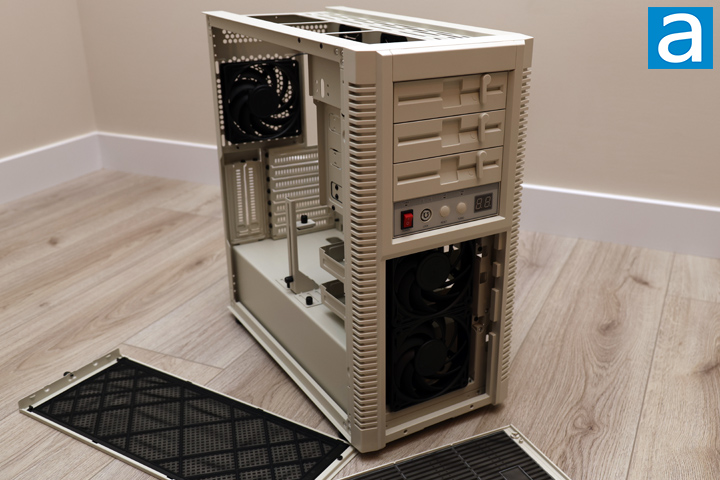
The other panels you can remove include the front and top area. The front is held on with magnets at the bottom. This exposes two SilverStone 120mm fans. All the fans in the SilverStone FLP02 are marked with the model number of CC12025M12S, which is the represents the retail-grade VISTA 120 fans. They are all 4-pin PWM controlled and connected to a fan hub inside. Based on the VISTA 120 specifications, these are hydraulic bearing fans with a 0 to 2000RPM fan speed. They have maximum values of 30.6dbA noise, 66CFM airflow, and 2.22mmH2O static pressure. There are nine blades on each fan impeller. There are also rubber pads on the corners to dampen any vibrations between the fan and the rest of the case. The rest of the front frame can be removed, but you should be careful, since there are cables running from here and into the rest of the body. As mentioned previously, the top panel slides off from the back and is secured with a captive thumbscrew.
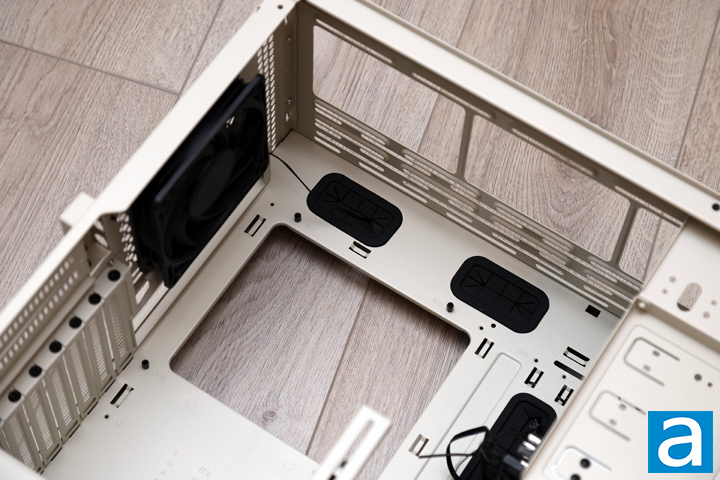
At the back corner of the SilverStone FLP02, the first thing I would point out is the large opening under the motherboard area. This is useful when installing third-party coolers, as you can change the mounting mechanism while keeping the motherboard installed. There are multiple openings above the motherboard to route cables here with rubber grommets. There are no holes to support back connectors. At the top, there are rails to install cooling options. According to SilverStone, you can mount up to three 120mm, two 140mm, or two 160mm fans. Alternatively, you can also install up to a single 280mm or 360mm radiator. At the back, there is a spot to mount a 120mm or 140mm fan or radiator, but a VISTA 120 fan is pre-installed.
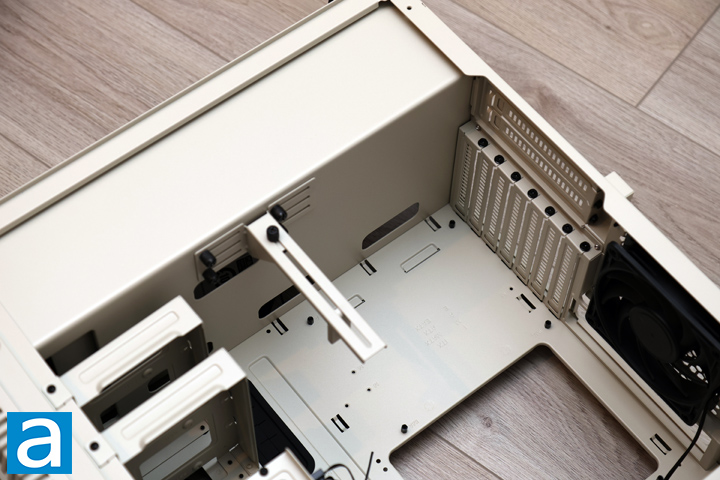
Down the back to the bottom, there is a total of seven expansion slot covers, which is typical for a mid-tower enclosure. There are an additional two vertical slots closer to the side panel, which is a bit confusing given the lack of a clear side panel. At the bottom, there is a division between the power supply basement and the rest of the case. There are no ventilation holes, but there are some routing holes around the shroud to pass cables through, such as the front I/O or power cables. Closer to the front, there is an integrated GPU bracket, which can support a hefty graphics card. It can clip on both sides of your video card, which is nice in providing a firm hold. The bracket is held to the shroud with thumbscrews on a rail, which means it can be re-positioned as you need.
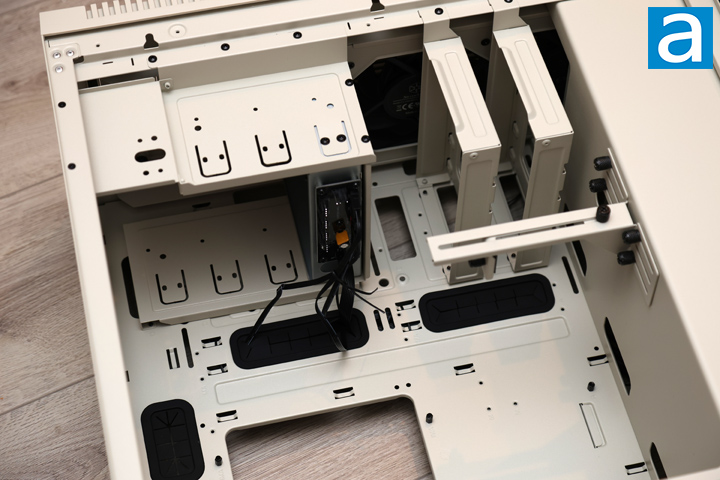
The front interior of the SilverStone FLP02 is a throwback to early 2000s cases, especially with the support of 5.25" drives. In fact, you can install up to three of these larger format options. However, if you put one at the top, you will interfere with a 360mm radiator. Underneath, the front supports two 120mm fans, which are already occupied. Nearby, there is a pair of drive sleds to hold two 3.5" or 2.5" storage options. These can be removed if you so desire, especially if you have a longer video card.
Behind the front I/O slot, you can see the integrated PWM fan hub. It can control up to eight fans. It is powered with a SATA power plug and synchronizes to your motherboard with another fan header. My only distaste for this controller is its location, as I wish it were hidden behind the motherboard. In its present location, a lot of fan cables pass through the routing holes, which will be filled by thicker cables when you install your system. Otherwise, the routing holes are lined with more rubber grommets to hide some clutter.
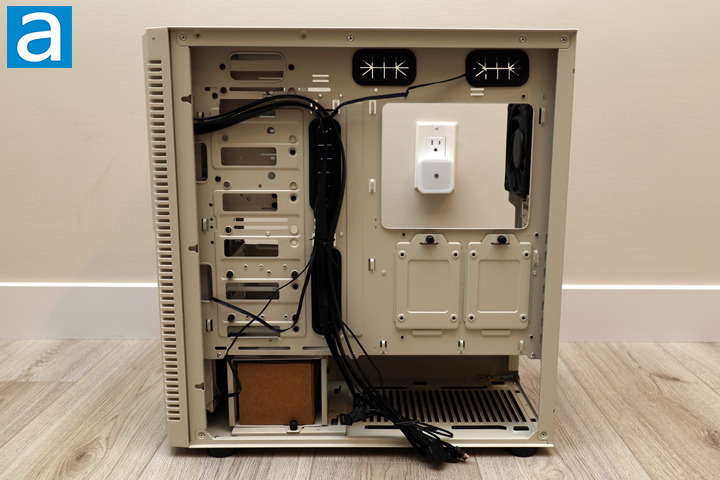
At the back, we have all the cables for the SilverStone FLP02. This includes headers for front I/O, USB Type-C, USB 3.0, and front panel audio. These are flexible and easy to lead into place. The rest of the back tray has many tiedown points, but it feels a bit lacking otherwise. There are no vertical channels or Velcro straps, and I do not love how SilverStone has led all the cables right behind the rubber grommets. In terms of cabling space, there is approximately 30mm between the back and the panel, which is adequate even for thicker cables.
More storage locations can be found on this side of the SilverStone FLP02. First, there are two drive sleds under the motherboard backplate opening. Each sled is attached to the FLP02 with a thumbscrew and can hold a 2.5" option. Next, there is a larger drive cage in the basement for two 3.5" drives, but it takes away some space for your power supply. In total, the SilverStone FLP02 can hold up to six drives at a time, with locations for up to four 2.5" or four 3.5" options. Finally, the power supply area can be found in this basement area with some foam pads to reduce vibrations between the power supply and the case.
Page Index
1. Introduction, Packaging, Specifications
2. Physical Look - Outside
3. Physical Look - Inside
4. Installation and Conclusion


