Page 4 - Installation and Conclusion
Unlike my normal process, Cooler Master recommends installing the motherboard first. I mounted an ITX motherboard into this system, which obviously should fit in this mammoth case. This is the Gigabyte GA-Z170N-Gaming 5, with an Intel Core i7-6700K and a pair of Corsair Vengeance LPX DDR4-3200 memory modules. To note, this is not actually the same motherboard I reviewed back in 2016, but I bought this secondhand recently. Otherwise, I did not have a graphics card for this, so I left the vertical slots empty. Cooler Master specifies a maximum video card length of 430mm. Due to the vertical orientation, you should also consider the card's thickness. There are three slots and approximately 70mm of space from the innermost slot to the outer panel. Afterwards, I routed all the necessary power cables and plugged them in as needed.
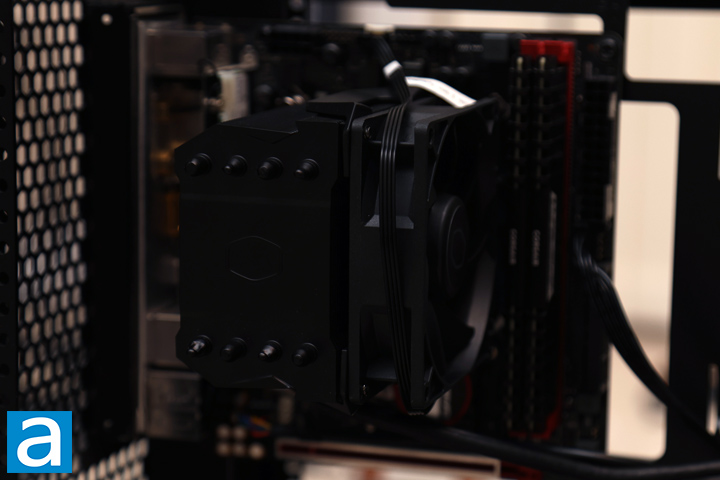
As I installed my air cooler, I found two issues. I was about to install a standard air cooler in it when I realized it did not fit. According to the manufacturer, the maximum height of a CPU cooler that can fit inside the MasterFrame 360 Panorama is 145mm, which is insufficient for most air coolers. Even my shorter Noctua NH-D12L, which is actually 145mm tall, does not fit without touching the tempered glass panel. This seems strange to me, especially with how large the case is. It is clear the manufacturer only expected users to employ liquid cooling, but I do not like this design compromise. As I did not have an AIO unit lying around, I ended up using a 136mm tall Cooler Master Hyper 411 Nano.
The second issue I ran into was regarding the cutout behind the motherboard tray. Normally, users can mount the motherboard first and then install a cooler because the back is exposed. However, I was unable to install the cooler's backplate, because the hole behind was not large enough. I have never seen this issue before with this motherboard. While it is possible the smaller form factor plays a role in a more compact layout, Cooler Master should do a better job of ensuring compatibility. As such, I had to mount the cooler outside before installing the motherboard.
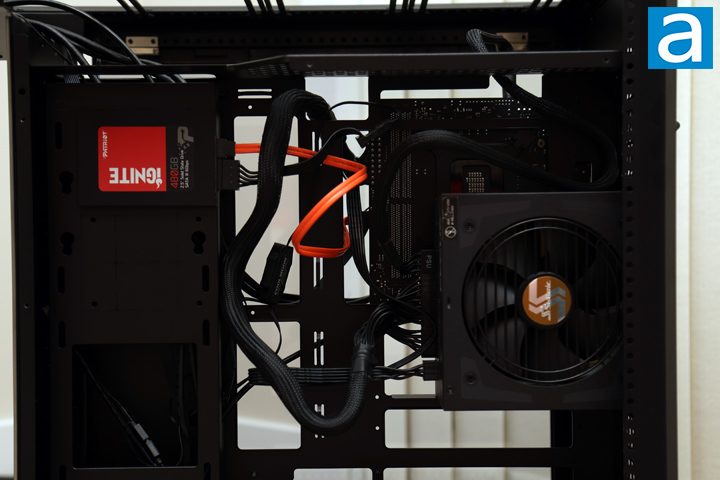
On the backside, I installed a single Patriot Ignite 480GB on the front. This was also a finicky process, as I needed to put the SSD on one side and screw it in from the opposite side. Cooler Master does provide tool-free options to mount the SSD, but this is not secure, as the solution is a metal standoff sitting in a metal hole, which will slide out easily. Finally, I installed my power supply, a Seasonic FOCUS Plus 850 Gold 850W in place. With the power supply right behind the motherboard opening, you do need to install this last. The manufacturer recommends a maximum power supply length of 210mm. From here, you can see the slight cable mess since the power supply is in the middle rather than at the bottom or the top. Thankfully, I took full advantage of the metal shrouds on this side to hide off all the cables. There are also multiple cable anchor points in the middle for further tidying up.
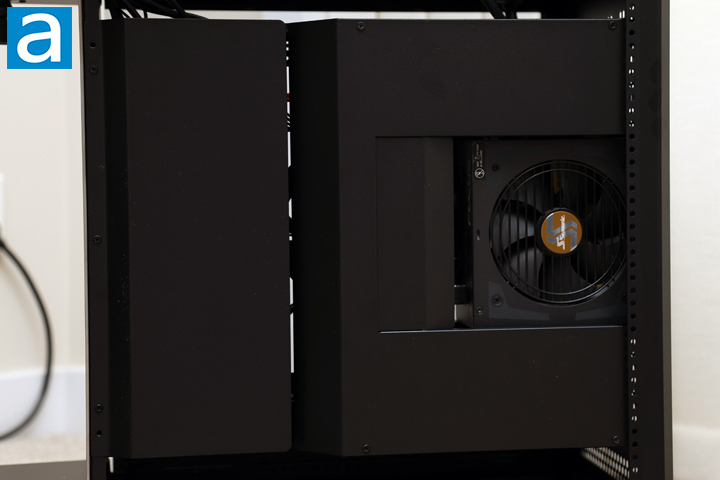
With the two metal covers slotted back in and installed, the back of the Cooler Master MasterFrame 360 Panorama is once again clean. Overall, I found the building process to be cumbersome and more frustrating than normal. All the different clearance issues above and the strict adherence to a specific order meant I often had to go back to a previous step to progress further. It shows more that the MasterFrame 360 Panorama is not meant for a new builder or someone who has less experience in assembling a computer. Rather, it is made for someone who knows specifically what they want as a visual piece and has the understanding to execute the plan.
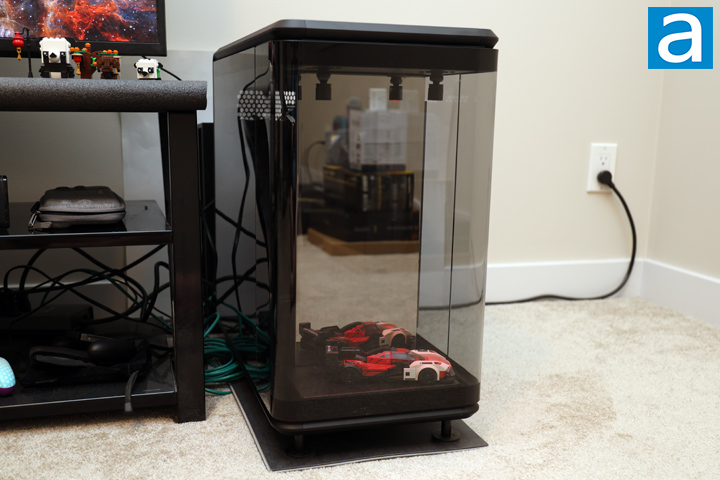
With everything plugged in, I popped the side panels on and booted up the system. I also put a Lego model of a Porsche car in the display. I do not really have any figurines or anything large enough to fill the area. According to Cooler Master, you can put something up to 360mm in height, 220mm in width, and 118mm in depth. The lights above the stage are a nice touch, but I think it will look better if you have something more vertical.
The Cooler Master MasterFrame 360 Panorama does not come with any fans, so the noise output from the case itself is a 0/10. The enclosure does not do much to keep noise in, but my system is quiet enough that it is not a problem. This will then vary on your components and the parts chosen.
-----------------------------------------
Cooler Master's mantra of giving users more ways to customize is shown here, as the MasterFrame 360 Panorama combines its functionality with an empty canvas of an illuminated stage. With tempered glass wrapping all around, the MasterFrame 360 Panorama encourages onlookers to take multiple glances at the system and its stage. This visual focus continues as we see interior aspects like a vertical-only orientation of a graphics card, many metal panels to hide cables, and an expansive amount of support for fans and radiators. However, while there is personalization in its appearance, the MasterFrame 360 Panorama is more restrictive in component compatibility. This starts with a sparse number of places for internal storage, but this is not too surprising. Installation of 2.5" or 3.5" drives is tricky, and the alternate tool-free method is not secure. Next, only one expansion card is supported, and you need to make sure it is not much thicker than a triple slot, although this should be sufficient for most computers. CPU cooling is also limited to liquid cooling or shorter air options, as there is not enough height clearance for even typical 120mm tower coolers. Combined with a slightly too small motherboard cutout and a specific order to install everything, the installation process is not as straightforward as it would seem. I also would have liked to see some fans, as none are included. From all this, the Cooler Master MasterFrame 360 Panorama is definitely not intended for novice PC builders. At the time of the review, the Cooler Master MasterFrame 360 Panorama will be released in the coming months of 2026 with a MSRP of $200. Cooler Master has high aspirations for the MasterFrame 360 Panorama, but they should fix up the details to make this enclosure an enticing experience, both during and after the build.
Cooler Master provided this product to APH Networks for the purposes of evaluation.
APH Networks Review Focus Summary:
7/10 means Great product with many advantages and certain insignificant drawbacks, but should be considered before purchasing.
6/10 means A product with its advantages, but drawbacks should not be ignored before purchasing.
-- Final APH Networks Numeric Rating is 6.5/10
Please note that the APH Networks Numeric Rating system is based off our proprietary guidelines in the Review Focus, and should not be compared to other publications.
The Cooler Master MasterFrame 360 Panorama is a big and beautiful computer case that prioritizes form over function.
Page Index
1. Introduction, Packaging, Specifications
2. Physical Look - Outside
3. Physical Look - Inside
4. Installation and Conclusion


