Page 4 - Installation and Conclusion
As you can see from previous pages, you can make changes to the Cooler Master MasterFrame 600 layout, including swapping the position of the power supply to the top or removing the front side drive bays for more cooling. I built my system with the MasterFrame 600 in its factory configuration, as this should be sufficient for most users. However, the manual shows how users can make internal changes for mounting different elements or different layouts. You cannot rotate or invert the motherboard as other modular enclosures often allow. The major thing that stood out to me was the number of steps and the general difficulty in making these adjustments. The problem is that many parts are involved with even the simplest adjustments. While building in the Cooler Master MasterFrame 600 is straightforward in its standard layout, any minor changes you make will require more time and effort.
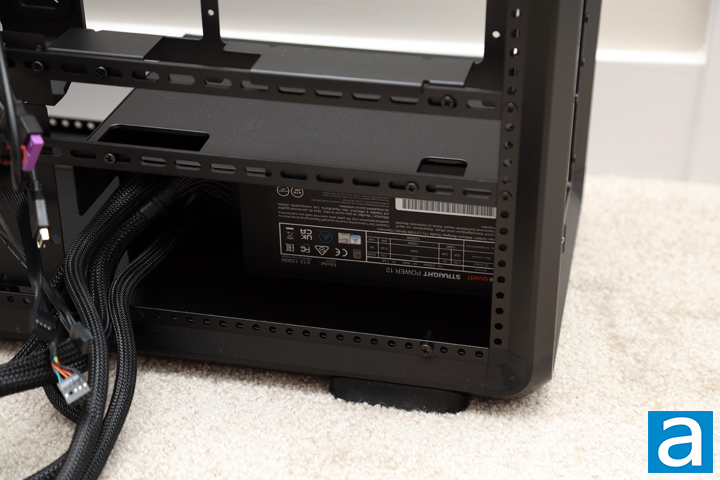
As always, the first step in my building process is to install the power supply, which I fitted into the basement. I installed the be quiet! Straight Power 12 1200W with the necessary cables attached and held it up for mounting at the back. Once again, I feel like the lack of support here is very strange. I would also have liked the power supply to install from the back with a removable bracket. The Straight Power 12 1200W measures 18.0cm in length, which is well within the maximum clearance of 23.5cm. I would not get too close to the limit length, as you will still need space for the cables and hiding any excess length. I continued my building process by leading the required cables into place.
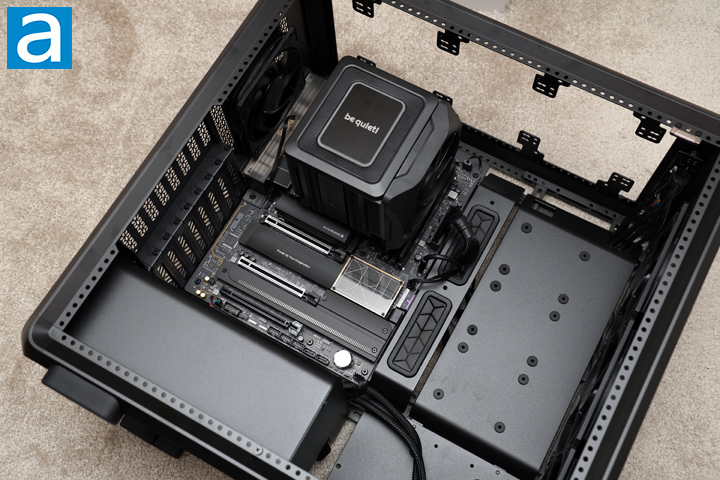
In the main compartment of the Cooler Master MasterFrame 600, I mounted my ASUS ProArt X870E-Creator Wi-Fi motherboard with an AMD Ryzen 7 9700X mounted inside. Beside it is a set of Crucial Pro Overclocking DDR5-6400 2x16GB memory. The cooler on top of the processor is the be quiet! Dark Rock Elite. Cooler Master states a maximum air cooler height of 190mm, which is more than enough space for tall CPU coolers.
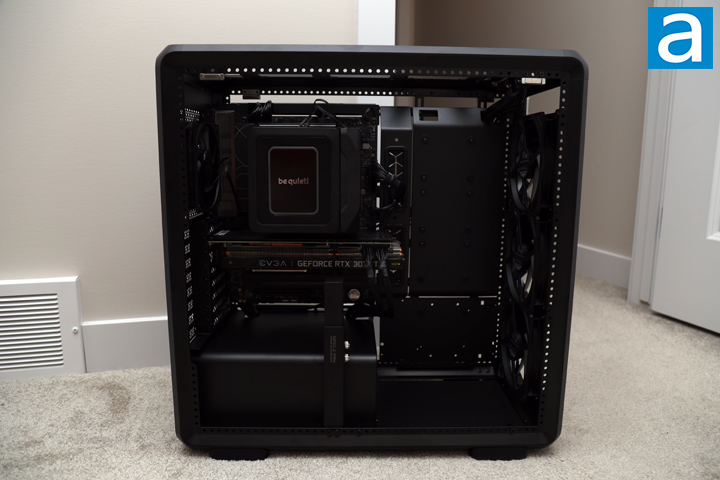
Afterwards, I mounted my EVGA GeForce RTX 3070 Ti XC3 ULTRA GAMING into the top PCIe slot of my motherboard. This card measures 285.37mm in length, and Cooler Master states the limit is 485mm length and 190mm width. I also installed the included GPU support bracket to keep this card propped up. In the picture above, I have the bracket mounted near the middle of the MasterFrame 600, but you need to make sure it is away from this area. Otherwise, this interferes with the glass side panel. With this moved to the proper place, I was able to put back the tempered glass side panel. The lack of vertical GPU mounting support is still a bit strange to me, especially in 2025.
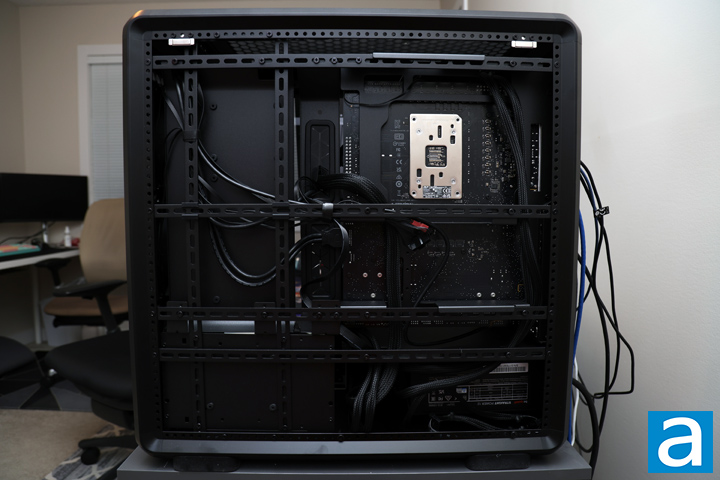
On the other side, you can see my cabling job in the Cooler Master MasterFrame 600. I was able to keep everything in place with the Velcro straps included. I also used the many different routing holes to keep the cables separate from each other. Otherwise, there was more than enough room at the back to contain all these cables, both thick and thin.
After finishing building my system, I can point out two areas with which I was not impressed. For one, the MasterFrame 600 is not friendly with any headers mounted on a 90-degree angle down the right side of the motherboard. This is because the routing hole bar partially blocks these headers. I had to slot the USB cable very uncomfortably in place, but I could not attach any SATA cables on the side here. Thankfully, my motherboard has a few more SATA headers on the bottom edge if I need them. The other annoyance is how disorganized it looks here. I could have spent a bit more time cleaning this up, but I also think Cooler Master does not do much to enable these efforts. We do not have any cable valleys in convenient spaces, and everything is exposed and made messy with the horizontal and vertical rails. There is enough space back here for all your thin and thick cables, but the whole implementation back here feels unusual.
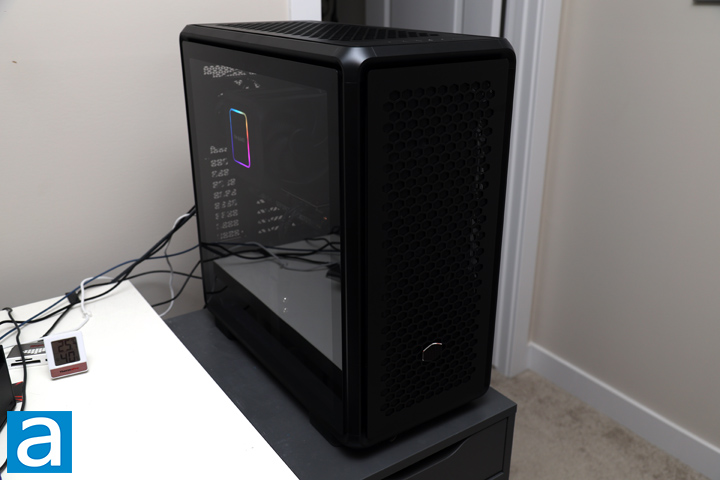
With both side panels installed, I connected everything and hit the power button on the Cooler Master MasterFrame 600. Everything whirred to life, which is a good sign. The MasterFrame 600 looks like any other unassuming black case with everything installed inside. We do not have any included lighting elements out of the box, so the only lights I saw were on my CPU cooler. The tinted window also hides any messiness, which is appreciated in the MasterFrame 600. Using our standard APH Networks sound scale, where 0 represents silence and 10 indicates loudness, the Cooler Master MasterFrame 600 is a 5.5/10 at full speed, and a 4.0/10 in regular operation. The Cooler Master Mobius fans are not quiet, but they can move air through the MasterFrame 600. As for noise suppression, there are no damping materials for this purpose.
-----------------------------------------
In many ways, Cooler Master has made notable efforts to combine a successful building process along with a spiffy design. From the exterior, the MasterFrame 600 has a truly distinct design. The defining feature is the exoskeleton FreeForm 2.0 frame that holds the rest of the chassis. All panes have ventilation areas to provide filtered airflow to the MasterFrame 600. The panels are sturdy and hold well to the rest of the case with strong magnets and foam-lined edges. Inside, we can see the modular principles. The rail system around the edges and at the back ensures users can make changes like installing the power supply at the top or swapping out drive bays for extra ventilation. There is more than enough room for a long graphics card, tall CPU cooler, large power supply, and multiple spots for radiator mounting. It can also seat five drives, including two 3.5" options. Building in the MasterFrame 600 is easy if you stick with the pre-configured layout. However, in pursuit of the modular goal, Cooler Master has had several miscues. For one, its modular implementation uses many screws and is a time-consuming process to make modifications. Every small adjustment requires multiple steps with increasing difficulty when you must move interfering parts. It also lacks support for some layout options, like inverting the motherboard or vertical GPU mounting. Other design elements with flaws include the power supply mount that imposes excess strain on the case, a cable routing bar that blocks side headers, and a cluttered cabling side. I also want easier removal of the intake filters for cleaning purposes. Finally, if your mind is set on this case, you need to decide on the color of your MasterFrame 600. Both silver and black variants are priced at $200, but the black has better quality fans on paper, while the silver ones come with addressable RGB lights. I think Cooler Master should have used the same fans between the two colors. Even with all this in mind, I am happy to see Cooler Master's overall approach at modularity. If they can refine these issues, we could have a winner in our hands, and I look forward to these improvements.
Cooler Master provided this product to APH Networks for the purposes of evaluation.
APH Networks Review Focus Summary:
7/10 means Great product with many advantages and certain insignificant drawbacks, but should be considered before purchasing.
6/10 means A product with its advantages, but drawbacks should not be ignored before purchasing.
-- Final APH Networks Numeric Rating is 6.2/10
Please note that the APH Networks Numeric Rating system is based off our proprietary guidelines in the Review Focus, and should not be compared to other publications.
The MasterFrame 600 is Cooler Master's first modern attempt of a modular computer case, but it comes with several growing pains for the designers to improve upon.
Page Index
1. Introduction, Packaging, Specifications
2. Physical Look - Outside
3. Physical Look - Inside
4. Installation and Conclusion


