Page 2 - A Closer Look - Hardware and Software
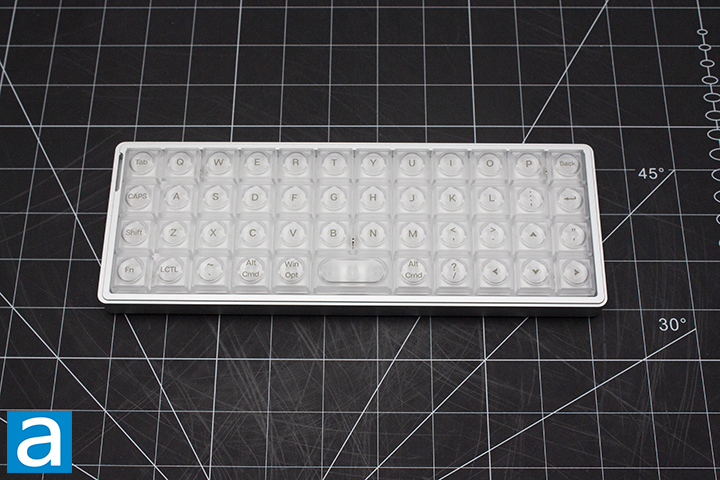
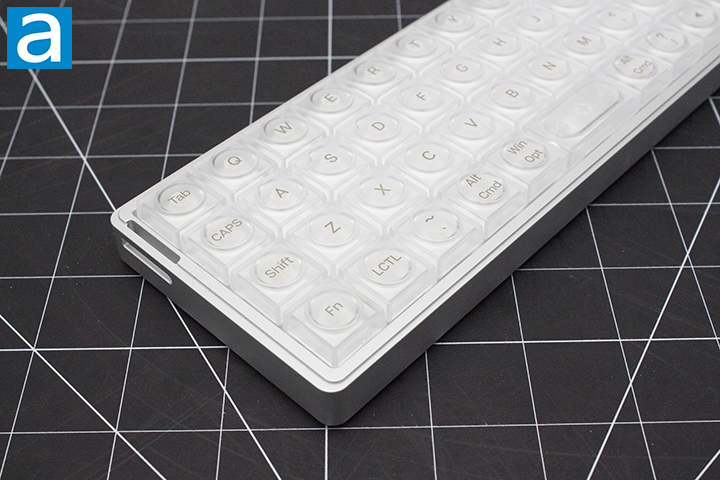
The Epomaker Luma40 is a 40% ortholinear layout keyboard. It only comes in one option, being the silver frame with clear keycaps. In terms of the finish, we have a CNC aluminum case. Epomaker opted to use an aluminum case with polycarbonate keycaps, which has a consistent appearance across the board. The keycap design fits well with the case, being incredibly minimal. The Luma40 features a standard high-bezel design, keeping the keycaps almost level with the frame of the keyboard. The company chose to place minimal branding on this keyboard, with it only on the underside of the keyboard. I personally appreciate this as someone who likes minimal branding. The Luma40 does not come with a wrist rest or adjustable feet, so you will have to adapt to the flat typing angle, but I feel as though this is the least of your worries when it comes to this keyboard. Truth be told, I am not entirely sure what demographic this keyboard fits. The 40% keyboard community is quite small, and the ortholinear community is even smaller. This is quite a niche product to say the least.
The Epomaker Luma40 measures in at 280mm length, 87mm width, and 20.8mm height according to the manufacturer page. I believe these measurements do not factor in keycaps and only measure the front of the case. Given the flat nature of the keyboard and low-profile keycaps, it is not too far off. This size also makes sense, given the layout. In terms of mass, this weighs in at 410g, not including the detachable cord. This might seem light for such an aluminum keyboard, but when we consider this less than half a regular keyboard in terms of size, everything makes sense. Going into the build quality, it is hard to complain given how small it is and the aluminum build. When pushing into the keys, there is no flex, as this keyboard is tray mounted. I did not have to try to bend the keyboard, as there was no possible way for me to bend this case with my bare hands. I was quite satisfied with the build quality, as aluminum is something I have been accustomed to, and I am glad to see more keyboards moving in this direction.
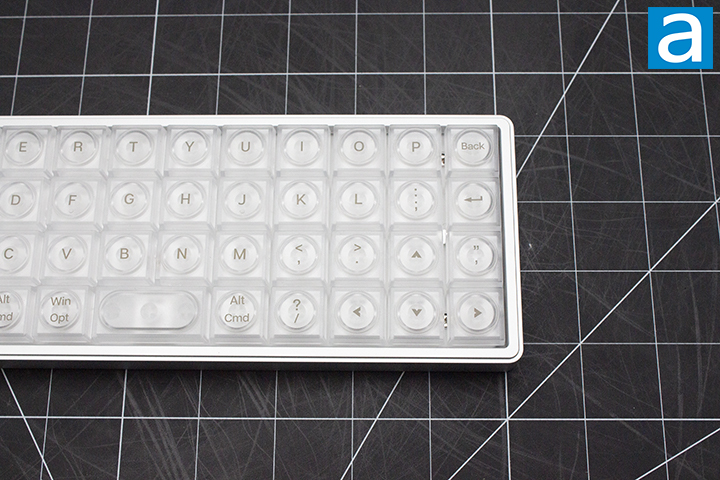
The Epomaker Luma40 comes in a 40% ortholinear layout. It is hard to compare it to anything, as 40% keyboards are not very standard in any way, most having between 40 to 50 keys. Many 40% keyboards are quite unique, but typically offer the standard staggered keys. The Luma40 takes this a step further, opting to be ortholinear, meaning all the keys will line up perfectly. If you are curious how typing on this would feel compared to a regular keyboard you would normally use, I will simply comment that it feels wrong on so many levels. I will say the benefit of this layout is it makes the longer keys like the space bar shorter, meaning they do not require the use of stabilizers anymore. This means you will never have to deal with stabilizer rattle.
The Epomaker Luma40 has full N-key rollover, meaning every single key pressed will register even if they are all pressed simultaneously. There will be no ghosting issues, where some keys may not be registered. Gamers and fast typists who have fast actions per minute or words per minute will benefit from this, as it will allow more keys to be recognized at the same time. In reality, people usually only need 6-key rollover, so the addition of N-key rollover is nice for extremely fast typists who can reach about 250 words per minute. The inclusion of N-key rollover has become quite standard among keyboards, so this should not come as a surprise the Luma40 has it as well. I am not entirely who would be able to type fast on a 40% keyboard, but I am sure there is someone in this world who can make use of N-key rollover on the Luma40.
The secondary functions can be accessed by holding down the Fn key on the bottom left side before pressing the indicated key. We will start with regular key combinations, then move to lighting controls.
Starting with key combinations, space bar will reset the keyboard. Q, W, and E will pair with Bluetooth. R will pair with the 2.4GHz dongle. Y and U will swap to Mac and Windows mode, in that respective order. The quotation marks will check the battery. The Windows key will activate Windows lock. A through colon will act as 1 through 0, including symbols such as the dollar sign on a typical keyboard. Enter will act as a minus or underscore. Question mark will act as equals and plus. I and O will be the open and close square brackets, in that respective order. P will act as backslash. Caps will double as Escape. Z through M will act as the homing keys in the order of Insert, Delete, Home, End, Page Up, and Page Down.
Moving to lighting controls, T will toggle the backlight effects. Comma and period will change the hue. Backspace will turn on and off the backlights completely. Up and down arrows control brightness. M and right Alt will control saturation. Lastly, left and right arrows will control speed.
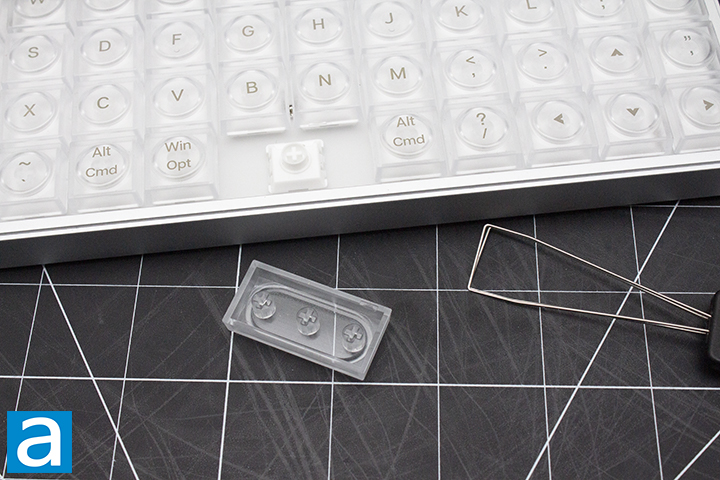
As for the keycaps, these are made out of PC plastic or polycarbonate, as previously mentioned. I personally prefer PBT, as the material is harder and resists shining better, but given this keyboard wants clear keycaps, PC makes sense. The lettering is printed out on the top of the keycaps using a silkscreen printing, which is created by pushing ink through a fine mesh screen directly onto the keycap surface. Generally speaking, silkscreen printing will not be as durable as double shot or dye sublimation. The font used is quite sharp and consistent with the rest of the board, which is something I find nice. Underneath the keycaps, you can see the low-profile MX stem. This means you can replace the keycaps with another set. This keyboard uses north-facing lights, which does not actually matter, as you will not be able to put Cherry keycaps on this keyboard. In regard to thickness, they are about 1.5mm thick, which is really good. The significance of the thickness of a keycap is important for the feel and pitch. To keep things simple, thicker ones have more depth and produce a deeper thock, while thinner ones produce a higher pitch sound.
The Epomaker Luma40 features the Kailh White Rain switches. These switches are linear by nature with a smooth travel from beginning to end. They have a travel of 2.8mm due to the lower profile. The total force required to actuate is roughly 50g for operating. These switches have a rated lifespan of 50 million keystrokes, which is quite long. The Luma40 is also hot-swappable, meaning you can swap these at any time if they start failing.
Even with these specifications, it is quite hard to picture what these switches actually feel like, so I will try my best to explain. For a stock switch, the Kailh White Rain switches are more than acceptable. The linear characteristic gives a very smooth travel. If you have used a standard mechanical keyboard before, it will feel quite normal aside from it being a lower profile. With that said, the White Rain switches are good to use and offer a good value.
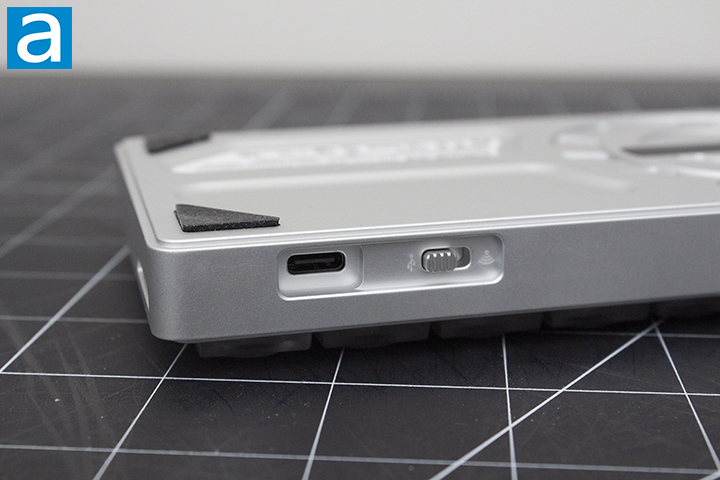
Taking a peek at the bottom of the keyboard, we have four rubber feet surrounding a metal weight. The feet on the bottom side are average in size and keep the keyboard in place. There should be no noticeable unintentional sliding. There is no cable raceway to manage cables, as the Epomaker Luma40 uses a detachable cable design. This is my personal preference, as it makes swapping between keyboards easier. The included 1.8m USB Type-C cable is greatly appreciated. It is quite amazing that keyboards have progressed this far as in the past few years, as wireless aluminum frame keyboards used to have poor connection due to the metal causing interference. This is not the case for the Luma40, as the connectivity of the dongle is quite good, and I never experienced any delays.
As for the battery, we have a rather small 1450mAh battery, which lasts for about 7 hours with lights on and 75 hours with lights off. In other words, it will not even last you a day with the lights on, so keep this in mind. Do note that your mileage may vary based on how active your keyboard usage is, as Epomaker has implemented an automatic sleep function, which will turn off all lights until any key is actuated. The implementation of automatic sleep is quite good, as I personally would not notice the keyboard going to sleep if it was not for the lights.
After doing my thorough inspection, I put the Epomaker Luma40 to use. As these Kailh White Rain switches are linear in nature, I made sure to account for this in the typing test. My first observation was medium pitched bottoming out sound with no ping. I should note I am typing on top of a desk mat, which dampens higher pitched sounds. However, the lack of pinging is more due to the dampening within the keyboard. Epomaker has provided a good use of foam to prevent unwanted noise. The smooth linear feel was consistent throughout all the keys, which was nice. As someone who generally enjoys linear switches, I found the lower profile removes a significant portion of the travel, making any potential roughness not noticeable. The travel distance and actuation point were both good, and I had no issues whatsoever. A sound test of the Epomaker Luma40 can be found above. Please enjoy my 30 wpm typing test, as I cannot type any faster given this monstrous layout. I found the sound profile to be quite flat.
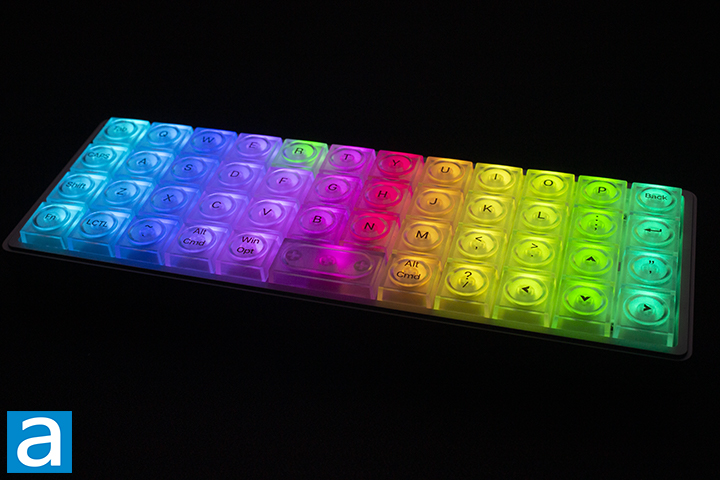
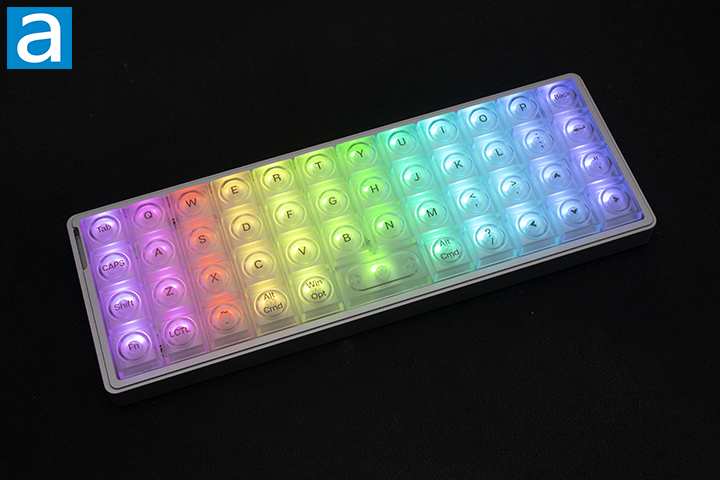
I would say the Epomaker Luma40 has beautiful lighting effects, as the translucent keycaps let the lights go free. The lighting effects are bright and vivid across the board. The glow radiates extremely well to a point where I find this keyboard is more of an art piece than a keyboard. I had no issue with configuring it using software, and I highly recommend doing so to maximize the functionality. I do not think any users will have any issues in regard to this. Forty-five different lighting variations can be toggled through by using the software I will talk about in a moment.

In terms of software, we have VIA, which is probably the best open-source keyboard software you could possibly use. I am personally a long-time user of VIA, so I have become quite accustomed to its interface. For those who are not familiar with it, VIA has four primary tabs, being Configure, Key Tester, Design, and Settings.
Starting with Configure, under the Keymap category, you are able to adjust what each key does to any particular setup you want and also adjust any secondary functions you may want to use. If you want to use a weird layout like Colemak, Dvorak, or Carpalx, you can go right ahead and do it. The Macros category will allow you to record macros as you may expect. Save + Load will allow you to save your current keyboard setup. This is useful, as I personally have experienced my keyboard resetting to its standard setup, so being able to reload all my settings is quite nice. Lastly, we have Lighting, which controls your keyboard backlighting. You can select a pattern and the color you wish to use.
Moving on, the Key Tester tab is a great place for diagnosis. I often find myself using this tab when building a keyboard, as it is good for testing your PCB as well as double checking if any of your switches have bent pins. Design is a tab you must use for the Luma40, as you will need to upload the correct JSON file for VIA to recognize the Luma40. As of writing this review, I will say that the JSON file provided on the product page does not actually work, but the one I found in Epomaker's downloads page did. Do not worry about uploading the wrong JSON, as you can simply just upload another one if the first one does not work.
Finally, we have the Settings tab where you will actually need to go to enable the Design tab. Aside from being able to enable the Design tab, you can also toggle Fast Key Mapping and Light Mode. Keycap Theme will just change the theme of VIA to a few popular keycap sets, while Render Mode will allow you to change between 2D and 3D rendering of your keyboard. You can also see Diagnostic Information, which most people probably will not use.
Page Index
1. Introduction, Packaging, Specifications
2. A Closer Look - Hardware and Software
3. A Closer Look - Disassembly and Internals
4. Conclusion


