Page 4 - Installation and Conclusion
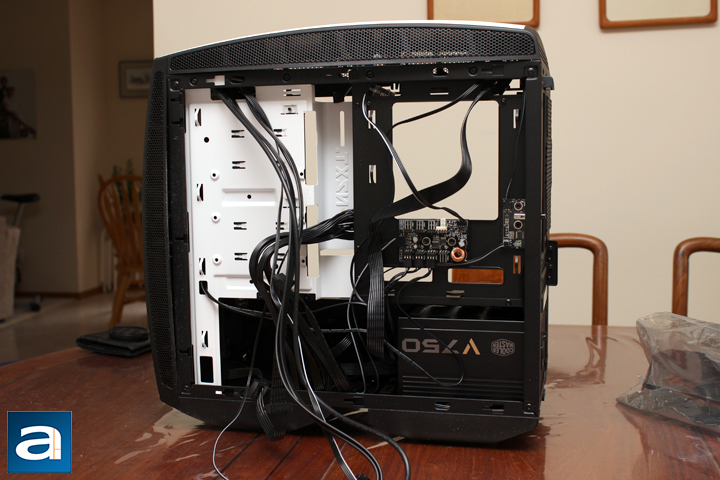
As with every installation I do, the first thing I take is the power supply and slot it into place. In this case, it is the Cooler Master V750 750W. Just to note, NZXT states a maximum length of 363mm for the power supply clearance, but I doubt anyone has such a long computer power supply for anything other than a server. In fact, if you do have one, feel free to post it in the forums, and I will personally congratulate you. In addition, while there is such clearance, you probably want it to be a bit shorter to allow for cables to route to the motherboard and other components. I slid it into the Manta, took the needed cables, and wired them from the power supply into the predicted areas in my case. As this is the first ITX build I have done, not everything was placed where I predicted, so I ended up having to do a few extra rewiring later on. I also routed all the case cables, including the USB 3.0 header, the front panel pins, and the fan hub connectors. As some mITX have different layouts for their connectors, the suitability of the Manta's routing holes may vary. Personally, I think NZXT has provided an adequate number of holes for all sorts of mITX layouts. Next, I installed the Patriot Ignite 480GB into one of the front sleds, and mounted it into place. Thankfully, with the way it was placed, the wording on the SSD was upright. However, some drives will be oriented upside down, which may probably bother some.
Afterwards, I installed the I/O shield and the most recently reviewed mITX motherboard, the Gigabyte GA-Z170N-Gaming 5. On the motherboard, I have the Patriot Viper Elite PC4-24000 2x8GB DDR4 RAM modules installed, along with the Noctua NH-L9x65. While this is a small cooler, the NZXT Manta can definitely fit a larger heatsink, with a maximum height capacity of 160mm. For your reference, the Cooler Master GeminII S524 Ver.2 is approximately 105mm, which should fit comfortably in the NZXT Manta. My next step would have been to install a graphics card, but I do not have one. A maximum clearance of 363mm in length is available for the video card.
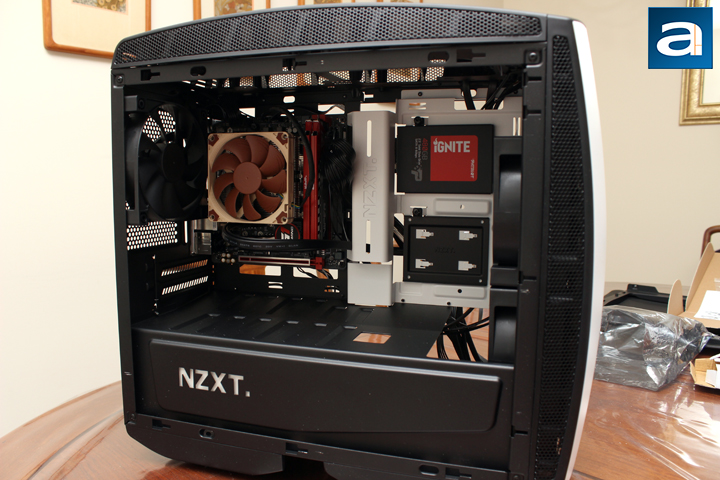
Above is a more or less finished shot of the inside. I finished up by tidying the cables at the back with the included cable ties. Thankfully, there were quite a few cable tie points, making routing relatively simple. Combining this with the bulges at the back and the huge power supply shroud, I was able to easily tuck away all my cables. From this photo, you can see the issue with not having rubber grommets, as you can see a lot of cables going in and out. It looks messy, and I think the rubber flaps would definitely help in cleaning it up. The other thing I would have appreciated are some Velcro straps. A lot of cases have these to help with organizing cables at the back, and it would have been useful. Overall, installation was okay, and NZXT has done a pretty good job at making the process easy. With these larger mITX cases, they are much roomier to work in, and thus I have no issues with installing parts. In addition, the ability to remove all the panels makes installing other parts like radiators a cinch. With all that said and done, I slid the two panels on, plugged the computer in, and fired it up.
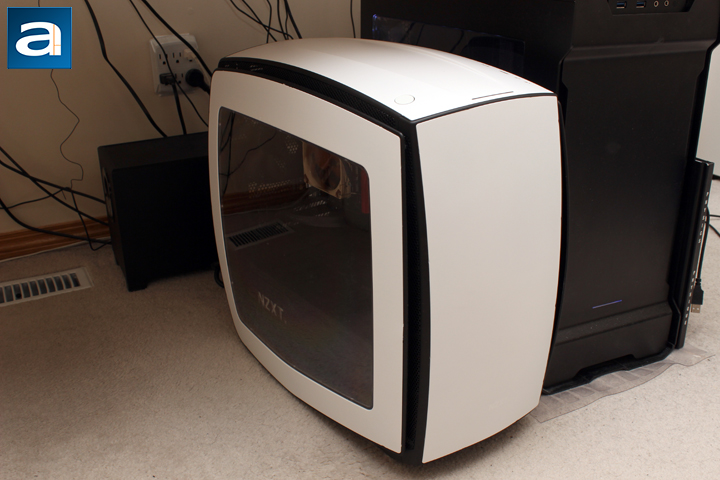
Plugging my monitor and peripherals into the back ports, I clicked the power button, and the system started up without any cause for concern. The front panel LED strip glows nicely, and after all the building, I have to say the NZXT Manta definitely has a unique look sitting beside my main computer. The large viewing window also makes showing off your components easy. You can also add some extra pizzazz with some LED strips. I really liked the I/O lighting I referred to previously, as it was quite helpful in seeing all the ports and their orientation. The white NZXT logo inside the Manta shines brightly when illuminated, but as it is white, it should be able to blend in with the rest of your build. According to the standard APH Networks sound scale, where 0 is silence and 10 is loud, the NZXT Manta is a 4/10 on everyday usage in my personal opinion. It definitely is not the quietest of cases, and sound dampening material would have helped the Manta.
-----------------------------------------
After breaking 100mph in a Ferrari F430 F1 at the press event, I was lost for words. I know it was not even close to the top speed of the car, but it was probably the maximum I could go with the space allowed on the race track, and it was exhilarating. While there were some things I did not necessarily love about the car, such as the small visibility inside, and its somewhat cramped interior, it is still a supercar, and it blows everything else I have tried out of the water. In a similar way, the NZXT Manta follows this sentiment. Externally, it is quite a looker, and has a lot of styling not usually akin to a case. Build quality is excellent, and we can see some real innovation in its design. Curved steel is definitely a first, and NZXT should be commended in this regard. Not only does it serve an aesthetic purpose, but also a functional purpose in providing more cable management room. Internally, we have quite a lot of good to speak of. The power supply shroud helps in dividing the power supply air from the rest of the computer. The included three fans is also nice to see, especially with the PWM fan hub, since most mITX motherboards do not have many fan headers. Routing holes and placement is great too, with a sufficient amount of openings to get your wires through. Finally, the ability to hold a whole variety of cooling options is great. Whether you want an all in one or a custom loop water cooler, there are many mounting options at the top or the front for up to 280mm radiators. Installation was a breeze for this sort of case, with ample room to work with a small PC. While you may think this is a tradeoff for a larger footprint, I think it just serves a different purpose to allow for better cooling and ease of use. However, there are some things I wish could be improved upon. First, NZXT should include some sound dampening material. With the number of fans, NZXT should have thought of a way to dampen the noise coming from the inside. Second, I think NZXT should have just thrown some rubber grommets into their routing holes for a cleaner look. They could also remove the raised metal portion and rubber grommet this area instead, solving the compatibility issue we ran into when trying to install taller 2.5" accessories into the front sleds. Even with these drawbacks, I think NZXT has made a compelling case -- no pun intended -- for the Manta. I should say one more thing, and this refers to the price of the chassis. At $140 USD, this is a pricey small form factor case, and at this price point, NZXT should be able to accommodate the recommendations I listed above into their next iteration. Either way, this Manta has styling and pizzazz mixed with a pretty good feature set of a case, even if it costs a pretty penny.
NZXT provided this product to APH Networks for the purposes of evaluation.
APH Review Focus Summary:
8/10 means Definitely a very good product with drawbacks that are not likely going to matter to the end user.
7/10 means Great product with many advantages and certain insignificant drawbacks; but should be considered before purchasing.
-- Final APH Numeric Rating is 7.5/10
Please note that the APH Numeric Rating system is based off our proprietary guidelines in the Review Focus, and should not be compared to other sites.
I have said this before: Beauty and innovation never come cheap, but the NZXT Manta is worth taking the dive for a roomy and non-restricting chassis.
Do you have any comments or questions about the NZXT Manta? Drop by our Forums. Registration is free, and it only takes a minute!
Page Index
1. Introduction, Packaging, Specifications
2. Physical Look - Outside
3. Physical Look - Inside
4. Installation and Conclusion


