Page 3 - Physical Look - Inside
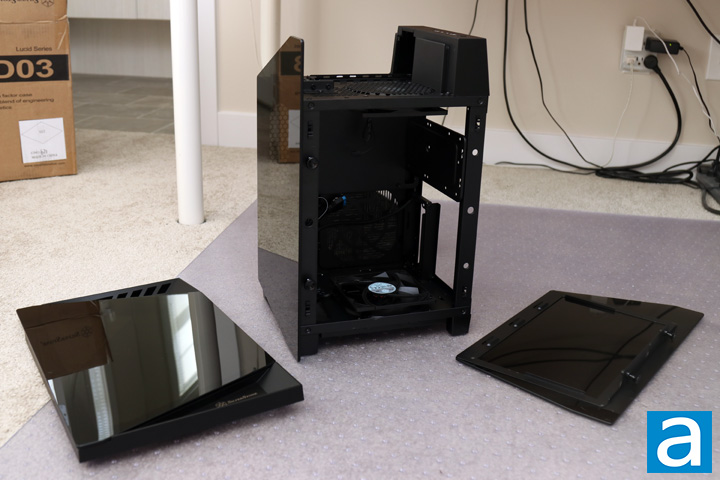
Taking off the side panels on the SilverStone Lucid LD03 was pretty straightforward, but you do need to follow the steps in order to actually remove the panels properly. The first step is to pop off the front facing panel that is held on by plastic tabs. The tabs do not necessarily hold the front too tight, but it is snug enough to not pop off accidentally. Next, you can see each side panel is held on by two button tabs. Pulling them off will release the tempered glass sides. Each tempered glass side has a metal frame attached to where the push-pull plastic buttons exist. I was a bit surprised to see how easy yet well-built the mechanism was. Without popping up the buttons, you really cannot yank the side open. Once released, the rest of the frame slides off, but do take care since this is still a glass panel. I really enjoy this tool-less implementation for its simplicity and hidden nature behind the front panel. As for the panes, the tempered glass is heavily tinted, so it should conceal your components unless you have some RGB components or light strips.
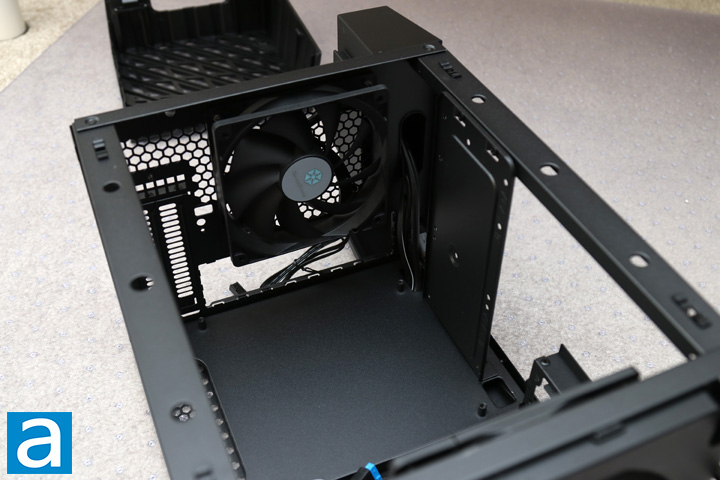
While the original Lucid LD01 utilized an inverse layout with the motherboard flipped upside down, the SilverStone Lucid LD03 has a rotated internal to let air rise in a chimney like effect. This means air comes in at the bottom of the case, moves through the components, and is exhausted out the top. As you can see here, the case still employs an open area design with all of the components located in this area. This is not too surprising considering the size of the case. From this vantage point, we are actually looking at the top of the case. A mini ITX motherboard would mount near the top too with the expansion card being screwed in at the top of the case as well. Four motherboard standoffs are also already installed, so you should not need to worry about missing these holders. A single SilverStone-branded 120mm HA1225L fan is included here for exhaust. On closer inspection, this case fan is a 3-pin voltage-controlled fan made by Hong Hua and rebranded. This runs at 1200RPM under normal operation.
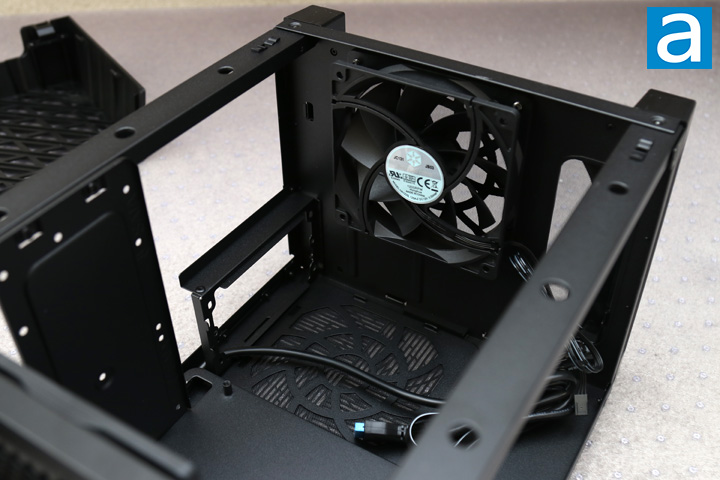
At the bottom of the SilverStone Lucid LD03, we have a second case fan of the same model previously mentioned. Next to the intake fan, there is a rounded off rectangular opening. You may not think much about it, but this increases the support for longer graphics cards in this case, since it can extend into this hole. Under the intake fan, we have the mounting bracket for your power supply. This bracket is screwed into the case walls, but will let you install either an SFX or SFX-L power supply unit while providing ample spacing for extra cables. Even with the extended SFX-L unit and a larger graphics card, you should still have room for both of these components and the excess cabling. However, I think with the spacing, SilverStone could have expanded this area slightly for the larger ATX power supply, if only for greater compatibility. While smaller SFX units are becoming increasingly popular, I still would have preferred both sizes being able to fit here. Finally, you can see SilverStone's internal cables, including a power cable, to reach from the top of the case to this area for your installed power supply. This includes the USB 3.0 header, the HD Audio plug, and the front panel pins.
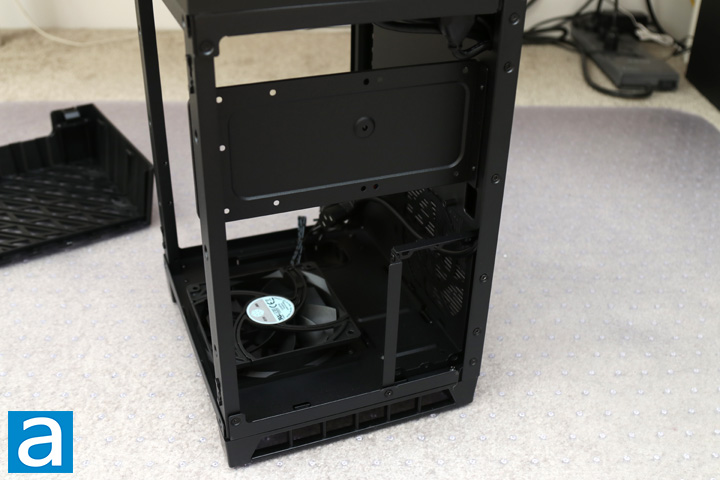
On this side of the SilverStone Lucid LD03, you can mount your choice of storage options. Above the power supply is a single horizontal bracket where you can install up to two drives here. This spacing translates to either two 2.5" drives or one 3.5" and one 2.5" drive installed. While it may have been nice to see more spacing included for even more drives, I think two is pretty adequate for most users. In addition, this spacing could be used for some cabling, as there is a bit of a gap between the side wall and the vertical bracket here. Working in a small case means using your given space wisely, so this is what we will be doing next as I install my small form factor media PC into the Lucid LD03 on the next page.
Page Index
1. Introduction, Packaging, Specifications
2. Physical Look - Outside
3. Physical Look - Inside
4. Installation and Conclusion


