Page 2 - A Closer Look - Hardware and Software
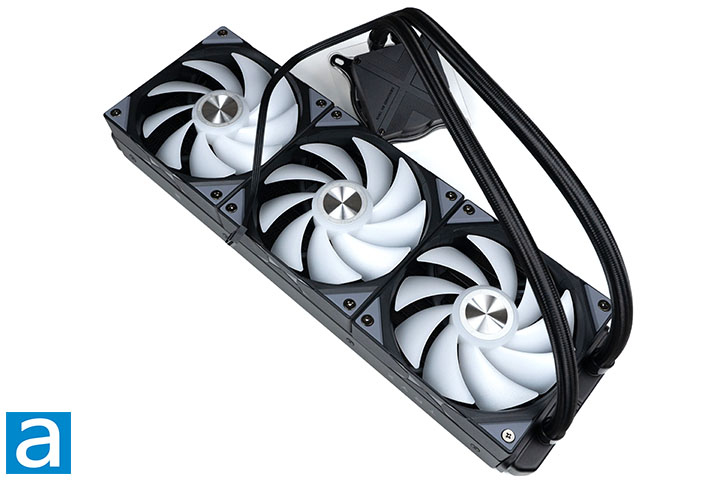
The TRYX STAGE ARGB 360mm we have is black, but there is also the option of a white one. The cooler's design without the display mounted looks very standard. Two tubes braided with a black fabric run from the radiator to the pump block. The pump block is thin and has an "X" separating the surface into four sections. The left and right sides have a grooved pattern, while the top and bottom are smooth. The bottom side is also branded with "DESIGNED BY TRYX". I am quite surprised by this pump block design, because TRYX can easily disregard it, as it will be completely covered by the display. If I did not know the product and someone told me this raw pump block was the full design, I would believe them. I appreciate this attention to detail from TRYX. The display will be covered later on this page.
The radiator measures 394mm in length, 120mm in width, and 27mm in height, which are standard dimensions for closed-loop 360mm AIO coolers. The two important design considerations for thermal performance of the radiator are the material used and the effective surface area. The TRYX STAGE ARGB 360mm radiator is made using aluminum, which is standard and does not conduct heat as well as materials like copper. However, it has the advantage of being lighter and cheaper. Looking only at the radiator and the pump block, the TRYX STAGE ARGB is solid, but with no apparent advantages over other AIO coolers just yet.
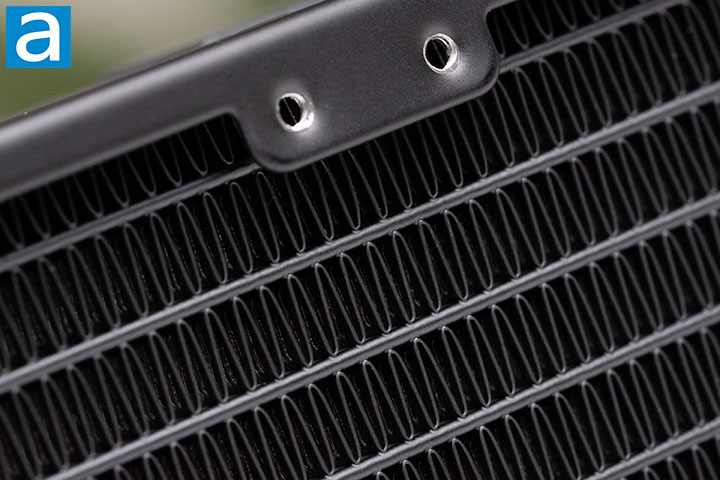
The fins on the radiator for the TRYX STAGE ARGB 360mm have a standard layout. The fins are bent in a wavy pattern to maximize the total area available for the air to contact and transfer heat by convection. Radiators are usually split into two, down the long end, to form a sideways "U" path for the liquid. The liquid enters and exits the radiator through two 420mm long EPDM, or ethylene propylene diene monomer, tubes. This length should be adequate for most mid-sized cases. EPDM allows the tubes to be very flexible, while providing great heat and mild acid and alkali resistance. However, EPDM tubes are usually made with additives and plasticizers that can leak over time to cause issues for both the tube and its surroundings. Luckily, this does not usually happen for multiple years under typical PC use.
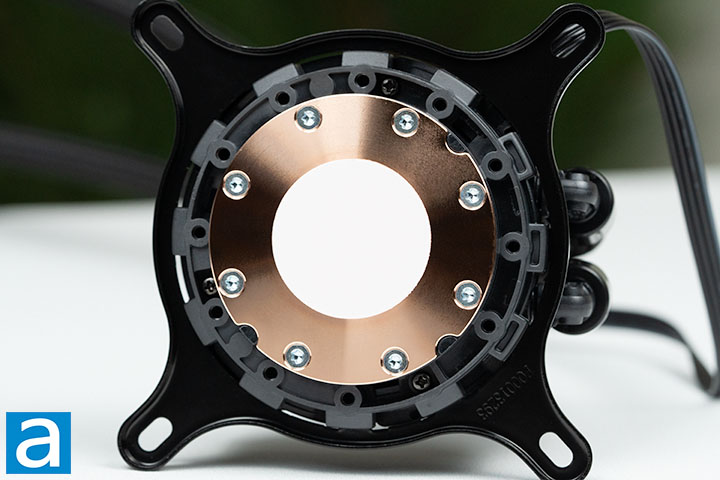
I measured the pump block on the TRYX STAGE ARGB 360mm to be 66.0mm in length, 65.5mm in width, and 33.6mm in height without the display. With the display, TRYX reports it to be 125mm in length, 104mm in width, and 91mm in height. The contact plate is made of copper and has a smooth finish. The mounting arms for Intel sockets are preinstalled onto the pump block, while the AMD ones are located in the accessory and user manual box. The pump operates at 500RPM to 1850RPM with a rated noise of 25.3dBA through a 12V 4-pin PWM connector. The mean time to failure is not listed on the TRYX website.
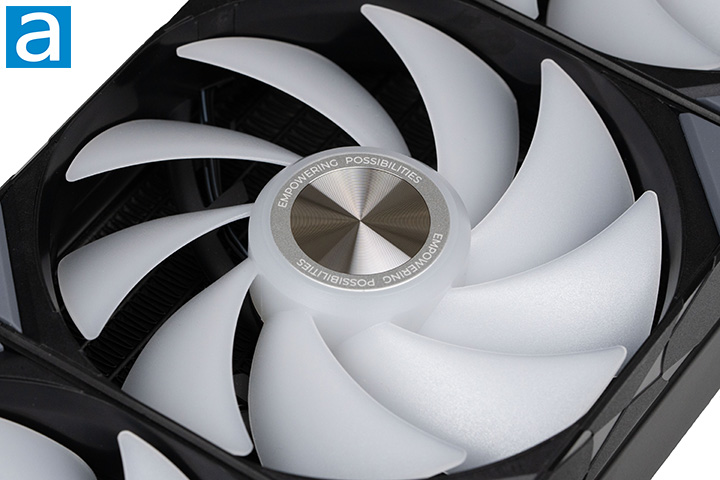
The TRYX STAGE ARGB 360mm comes with three of TRYX's ROTA SL ARGB fans installed on the radiator, which are connected to each other using pogo pins to make contact with metal plates. The cables are connected to the pogo pins on the last fan using magnets. The other end of the cable has a 4-pin PWM connector to connect to the motherboard. The three 120mm fans can operate at a maximum speed of 1850RPM with a noise level of 28.89dBA. It produces a maximum airflow of 65.64CFM and air pressure of 2.49mmH₂O. The fans utilize fluid dynamic bearings, which tend to have a long life span. However, the approximate mean time to failure for the fans is not listed in the specifications either. The overall visual design of the fans is simple and clean. The TRYX slogan is printed at the center on a two-section textured metallic plate. There are four gray anti-vibration pads on the corners, which also enhance the overall loop. As for the ARGB LEDs on the fans, the LEDs shine brightly with a great amount of vibrancy to the colors.
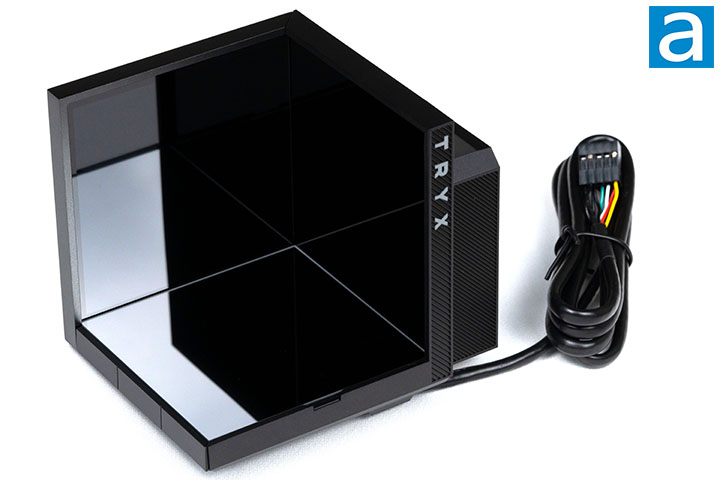
The customizable IPS screen on the TRYX STAGE ARGB 360mm is what gives the cooler its competitive advantage over the majority of the AIO coolers in the market. The display unit is an open cube shape with a 4-inch IPS screen on both the left and right faces of the cube. Each screen has a resolution of 720 x 720 pixels and a refresh rate of 60Hz. The display is controlled by TRYX's KANALI software through a 9-pin USB 2.0 header connected to the motherboard. The panel on the bottom of the cube utilizes a mirror rather than a display, which is attached with magnets and can be removed. Patterns and texts are found throughout the other sides of the display unit to create a stealthy but appealing aesthetic.
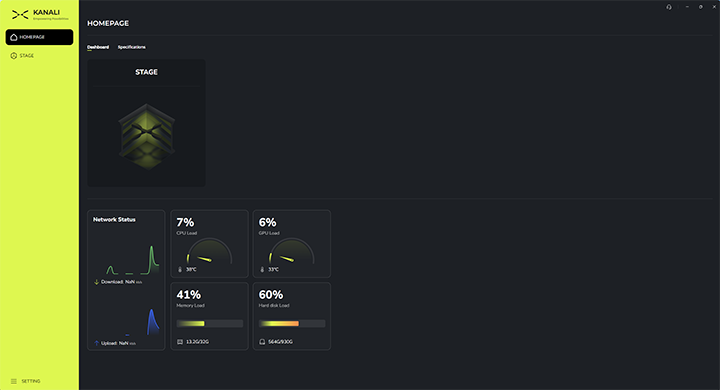
On the homepage of the KANALI software, under the "Dashboard" tab, it shows all the compatible hardware installed on the PC. Right below, there is some hardware monitoring information with nice visualizations of the data. Under the "Specifications" tab, there is a list of your PC specifications.
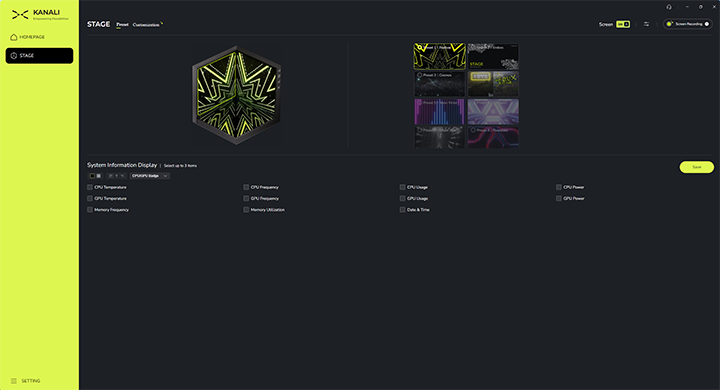
Moving into the STAGE page, this is where all the customizations happen. In the "Preset" tab, you can choose between a few preset animations for the display. KANALI allows you to overlay up to three system information data on the displays from the available options. There is also the option to show the CPU or GPU you have installed in your PC as a badge. These overlays are distributed between the two sections. To the left of the badge option, there is the alignment control, which includes left-alignment, center-alignment, and right-alignment. The text color can be set to either white or black. Unfortunately, the text font and size cannot be adjusted.
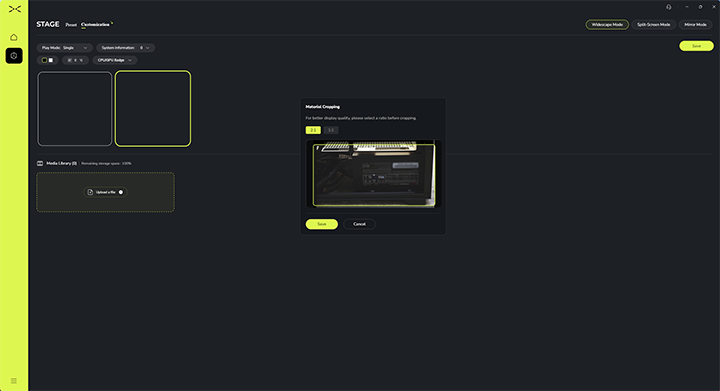
In the "Customization" tab, you can upload your own photos, GIFs, and videos. The storage size is not listed, but after uploading two short videos, I still had more than 96.5% space left. Multiple media of different formats can be uploaded, but they must be done so one at a time, which can require quite a bit of attention when you want to upload multiple files at once. When uploading a file, you must first decide if you want to operate both displays separately or as one. When both displays are used as one, the software will synchronize them and extend the display to become 1440 x 720 pixels. During the upload, the software will also ask you to crop the image.
There are three play modes, which are single, shuffle, and loop. Single will only display the one selected. Shuffle will randomly shuffle between all the uploaded media, while loop will sequentially loop through them. The same overlay options from the "Preset" tab can also be set on this page as well. In the top right corner, there is also a button to record your desktop screen.
Page Index
1. Introduction, Packaging, Specifications
2. A Closer Look - Hardware and Software
3. Installation and Test Results
4. Conclusion