Page 3 - Physical Look - Inside
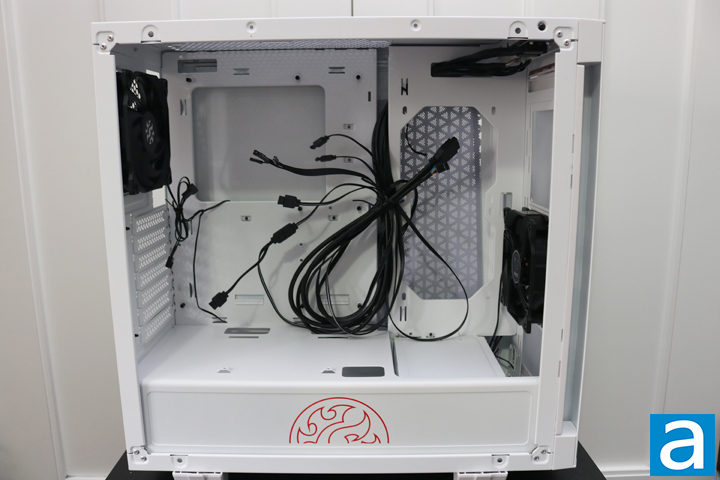
The white color scheme is continued inside the case, ensuring there is no strange contrast with the inside and outside of the case. The XPG Invader has built-in ARGB LEDs, and one thing having ARGB LEDs is the abundance of cables. It takes that much more effort to keep the wiring neat and clean. Among them are the standard USB 3.1 Type-A connector, audio block, and the small ones for power and reset buttons. There are also a few cables for the ARGB capabilities of this case, one of which is a LED light under the front intake. Otherwise, as you can see above, only two 120 mm fans are included.
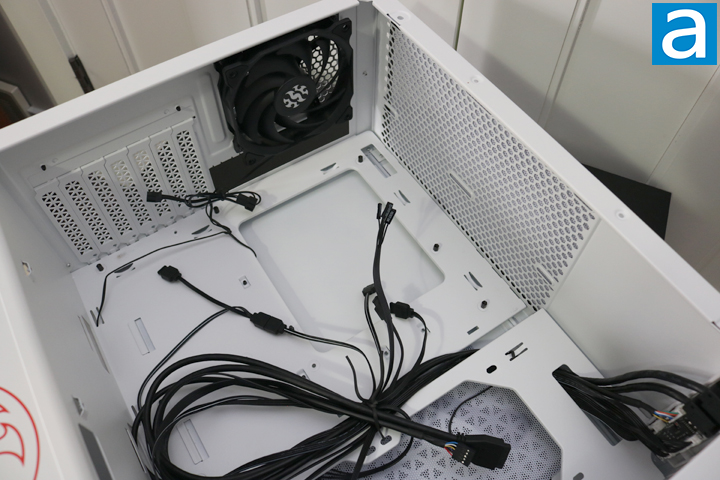
On this end, we see the motherboard tray, 120 mm exhaust fan, and the expansion slots. Also seen above is room for two 120 mm fans or a radiator along the top. The cooling capabilities of the XPG Invader are comprehensive. The motherboard tray can accommodate ATX, mITX, or mATX motherboards, making it a flexible option no matter what motherboard you have. As well, all the standoffs for an ATX motherboard are already pre-installed. The XPG Invader has a cutout in the motherboard tray to make changing the cooler an easy process. When it comes to coolers, the XPG Invader has clearance for a heatsink up to 170 mm tall, which is a good amount of space.
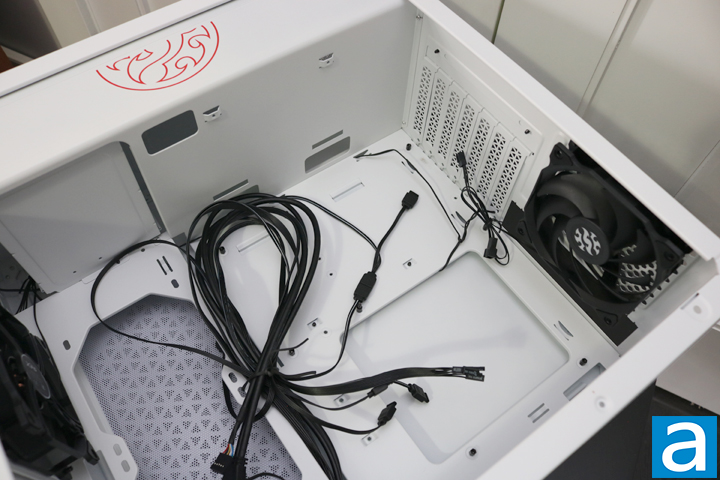
It has become commonplace for cases to feature a power supply shroud, which improves organizing cables tenfold. The XPG Invader is no different with a solid white shroud. On top of the shroud is room for two 2.5'' SSDs. There are three cutouts in the shroud for cable management. The one closest to the side panel is for the GPU power cable, while the two closer to the motherboard tray is for all of the small connectors. Having two is a welcome addition, since not all cables go to the same place. The more options a case provides for cable management, the better. Not only does the shroud keep the case neat, but it also separates the case into two temperature zones: The first being the main area with most of the components, and the second being the power supply and any hard drives installed on the bottom.
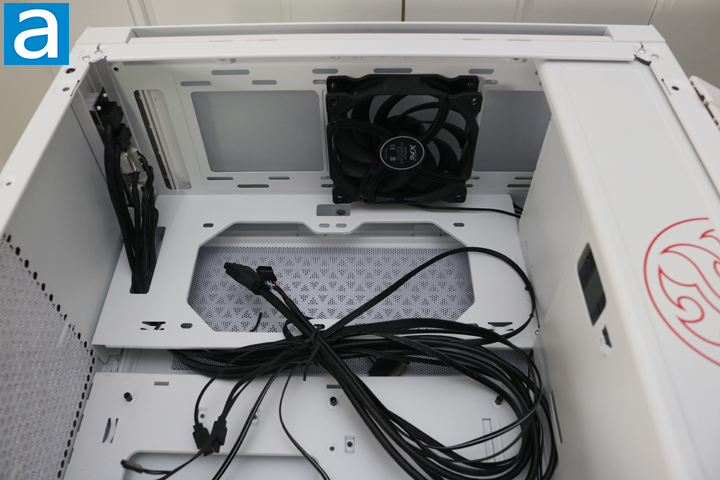
The front of the XPG Invader is different than usual. Closer to the motherboard tray are the two fan cutouts. This is an option for a 240 mm radiator or two 120 mm fans. It means you can properly see the RGB fans on a radiator instead of those lights being blocked by the front of the case or the radiator itself. Along with the tempered glass side panel, the XPG Invader can look really good. There is a dust filter on the side panel as well to ensure as little dust enters the case as possible. Otherwise, the front of the case has room for three 120 mm fans, 360 mm radiator, or two 140 mm fans -- even more options. There is a rigid dust filter on the front of the case as well. XPG also thought of the cable management along the front, leaving a small cutout for all the fans cables.

We get a better understanding of what this case is capable of by looking at the back of the XPG Invader. There are two more 2.5'' mounts for more SSDs, while under the shroud, there is room for two 3.5'' hard drives or two more 2.5'' drives. For any standard consumer, this is plenty of room for storage. The case is moderately wide, but there is still plenty of gap on the back, about 2.5 cm, for cable routing. As well, there are plenty of hooks to tie the cables down. The ARGB LEDs of the case is powered by a SATA power cable, which is excellent. Since the area between the motherboard tray and the radiator mount is rather large, it means it is a bit harder to hide the cables behind it, but it means the cables will easily move through. Overall, I am impressed with the internals of the XPG Invader. There is plenty of room, plenty of options, and adequate cable routing design.
Page Index
1. Introduction, Packaging, Specifications
2. Physical Look - Outside
3. Physical Look - Inside
4. Installation and Conclusion


