Page 2 - Physical Look - Outside
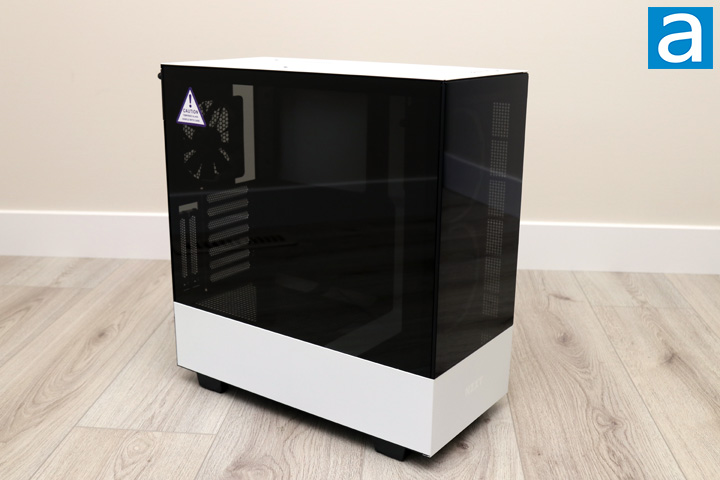
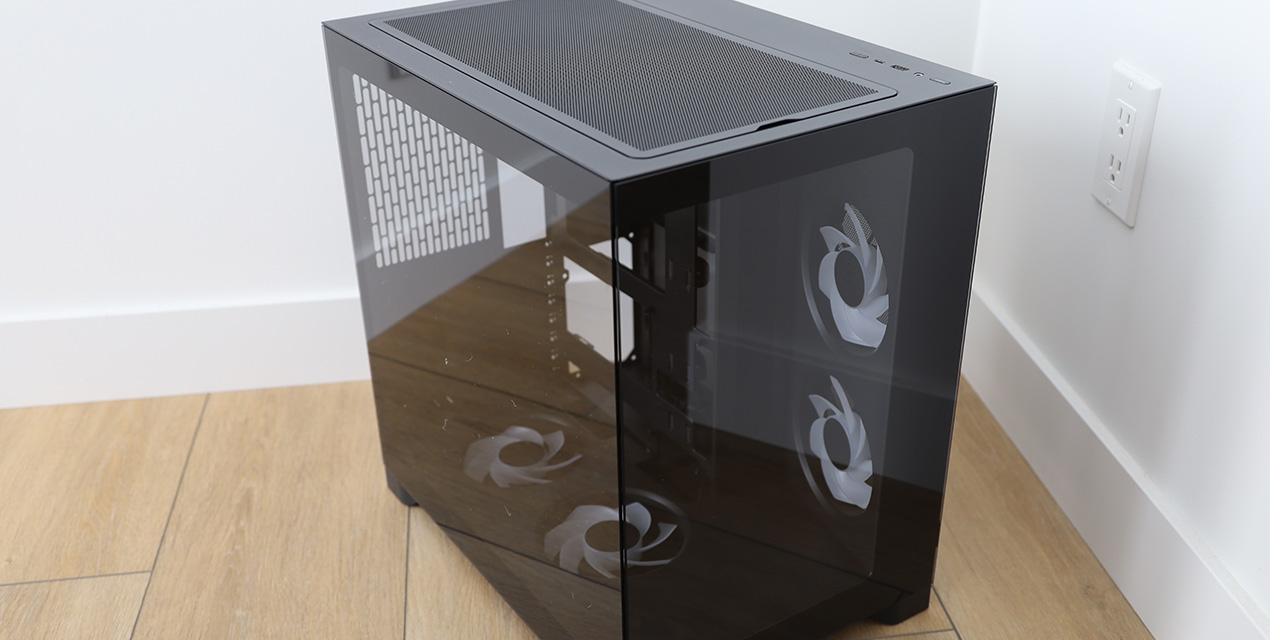
If we look at the H-series from NZXT, they all follow a similar formula. Unlike the other cases I have recently reviewed, the whole lineup is designed with rulers and right angles in mind, making for some very boxy cases. Furthermore, the newest revision of the H510 Elite is not too far off from the H500, at least in terms of shape. As such, the NZXT H510 Elite maintains the same rectangular prism, tempered glass side panel, and overall layout. I really like this white and black theme personally, especially as it adds a bit more contrast to the elements that make the glass panels more apparent. Otherwise, we still have the premium material choices here, including the tempered glass and steel shell. In terms of mass, the NZXT H510 Elite is a bit heavier than its predecessor at 7.5kg, representing a half kilogram more. This is not too surprising, considering they swapped the flat steel front for this glass side, which is thicker and heavier. As for dimensions, we have the same 210mm width, 460mm height with the feet installed, and 428mm depth.
As I have mentioned previously, the front panel utilizes a tinted tempered glass panel, which allow the front fans to shine through. As you saw in the specifications, NZXT has placed two of their Aer RGB fans behind this panel, which should make for some nice effects. The left side still has the three-quarters glass panel with a steel bottom. The glass panel is similarly tinted and conceals the inside, unless you have internal lighting setup. The bottom white steel part actually integrates with the inner power supply shroud, which again is a similar design to the original H500. This way, NZXT can employ less tempered glass while still serving the same effect of exposing the interior while employing glass. I think NZXT could have still improved the airflow by having ventilation on both side panels, similar to how they did it on the H200i. This may cut into the glass side panel area, but I think this compromise is worth in providing more air supply at the front. The other option might be to make this front panel a mesh design, which would allow the same translucency effect.
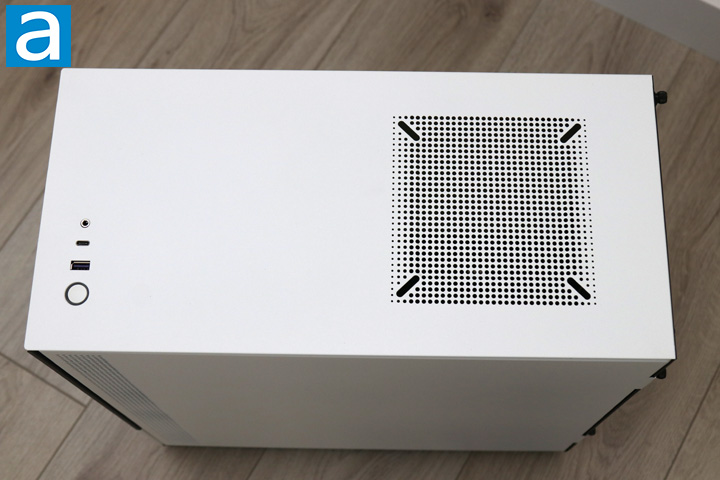
As for front facing input and output, we have a standard set of ports here. NZXT specifically mentioned they took away a USB 3.1 Gen. 1 Type A port in favor of a Gen. 2 Type C port. This means the reversible port uses the newer internal header and therefore supports higher transfer speeds. While I am happy to see this new port, there was no real reason NZXT had to remove the second full-sized USB port either. Otherwise, we have a circular power button on the right-side of the case and a single 3.5mm combination jack for headphones and microphone. I am a bit mixed on this change, as I still think most PC headphones come with the two plugs rather than a single three-pole plug, but we do get a splitter for such situations. The circular power button is surrounded by a clear ring with two white LEDs underneath. One light is used for power, while another one blinks for drive activity. At the back, we have a single opening for a 120mm or 140mm cooling option, whether a fan or a radiator. Just to note, after some early reviews, NZXT decided to add an additional exhaust Aer F140 fan at the top. Since ours was a pre-production model, we did not have this, but even so, NZXT would offer to ship you one should you get your hands on an earlier model.
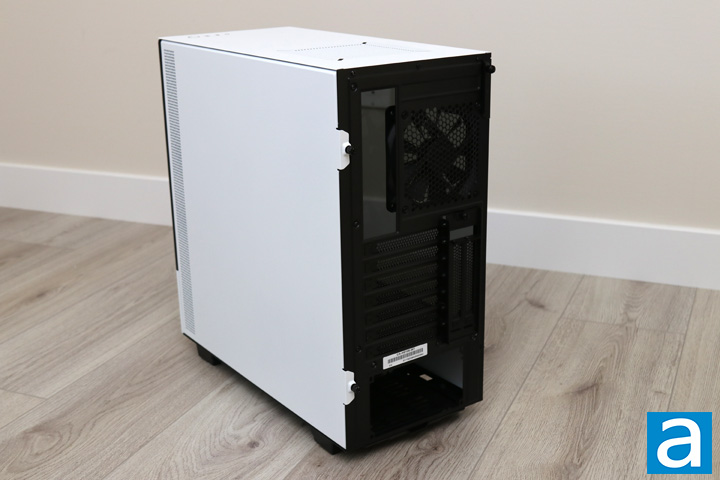
As for the rear of the case, you can see we have a pretty unsurprising area here with nothing changed from the NZXT H500. At the top, we have the motherboard cutout with space for exhaust in a honeycomb pattern beside it. A single 120mm fan is already mounted here and it can only be installed in this position rather than on a rail where it can slide up and down based on your needs. Underneath, we have seven expansion slots for horizontal placement, as well as two more vertical slots for those who desire to place their graphics card in this orientation. Once again, NZXT has not included any mounting equipment for vertical GPU placement, so you will need to use your own riser stand and cable if you want it to work with your gear. From here, you can get a better view of the left side panel, which is made out of steel. As I have mentioned already, this panel has mesh-filtered perforations at the front to provide some air there.
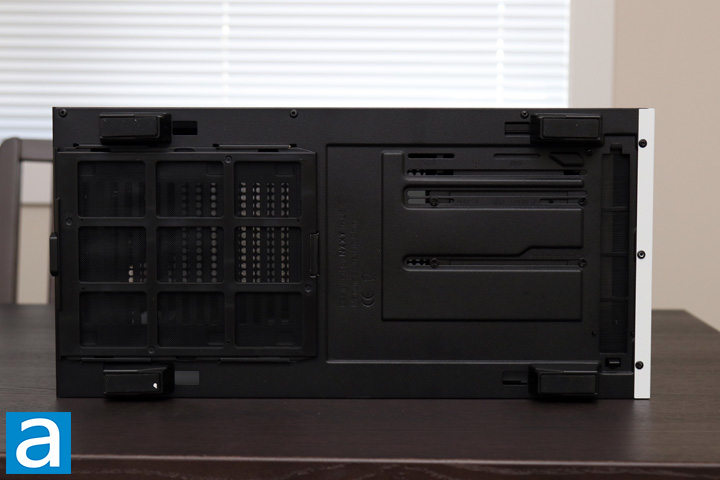
Flipping to the bottom of the NZXT H510 Elite, we can see some pretty standard things. In each of the four corners, we have feet that extend out with rubber soles on the bottom. This creates clearance from the surface the case sits upon and allows air to pass freely. At the back, we have an opening for the power supply along with a plastic-framed mesh to prevent dust from entering into your PSU. At the front, we have an opening to allow air to come in through any front input fans. Like the other front input, this is lined with a mesh finish to stop dust in its track. Finally, you can see some screws that hold the drive cage in place, as you will see later on in our review. The drive cage is held on rails so it can be moved around or fully removed, depending on your needs.
Page Index
1. Introduction, Packaging, Specifications
2. Physical Look - Outside
3. Physical Look - Inside
4. Installation and Conclusion