Page 4 - Installation and Conclusion
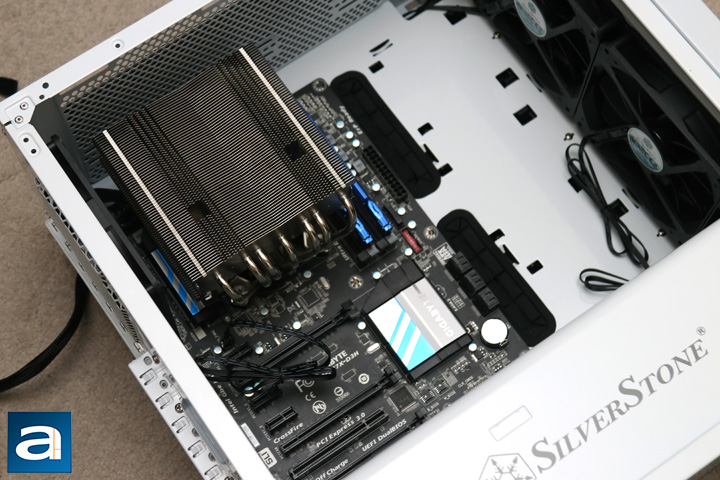
Similar to my installation procedure of the SilverStone Primera PM01-RGB, I decided to place the motherboard in first. I screwed in the motherboard standoffs, installed the I/O shield, and placed my ATX-sized Gigabyte Z87X-D3H in. I screwed it in using the screws provided. I then routed the modular power cables on my Seasonic FOCUS Plus 850 Gold 850W power supply. With some tools, I was actually able to keep my Noctua NH-C14S mounted, though I did have to remove the fans attached to the heatsink. Once again, I could have chosen to use a 280mm radiator at the top, but there was a bit of interference between the radiator and my memory kit, the Kingston HyperX Fury DDR3 2x8GB. It is a bit strange SilverStone would not allocate more room at this top, and I would probably recommend using a 240mm radiator instead, as those mounts are offset a bit more away from the motherboard. Another alternative is to also just mount the radiator on the front, as there is a lot more clearance there. Otherwise, for CPU coolers, SilverStone recommends nothing taller than 167mm. This should be an adequate amount of space, as even the extra-large Noctua NH-D15 should be able to fit here.
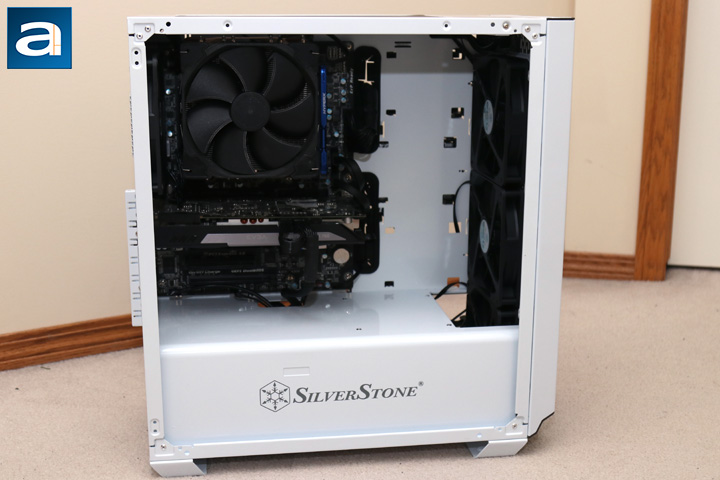
The next steps included installing and plugging in the rest of the power supply and cables in addition to the chassis connectors. I then installed the storage drives, which included my Western Digital Caviar Blue 1TB and OCZ ARC 100 240GB. At first, I wondered if SilverStone did not include enough screws, as I had nothing left after installing the motherboard and the power supply. However, I realized both of the drive sleds and caddies were tool-free, so I slid both of the drives into their respective bays and connected the necessary cables for power and data transfer. The drive cage made installing the larger hard drive easy, and I am really glad they went with this tool-less drive installation. Finally, the last part to install was the graphics card. Using a screwdriver, I flipped open the back white door, slid my EVGA GeForce GTX 760 into place, and secured the door back in place. I have to say, this installation was pretty painless, as everything lined up nicely. For reference, the maximum graphics card length the SilverStone Primera PM02 can handle is up to 415mm, with a width restriction of 174mm.
From the photo above, you can see there actually is not too much wasted space, which is a good thing, as it translated into a smaller footprint. SilverStone could still reduce the front area, though this would obviously affect compatibility with larger parts. Unfortunately, there were a few questionable design aspects. As I mentioned previously, you will see the single hole above the power supply shroud is clustered with many cables going in and out here. Most cases would have more than just one hole on the power supply shroud spread across the motherboard's bottom in order to hide the cables better. This choice seems illogical on SilverStone's part, especially since this was not an issue with the original Primera cases. In addition, as it is missing a hole nearer to the left side of the case, you also have to draw the power cable for the graphics card through this single hole, compounding this problem further.
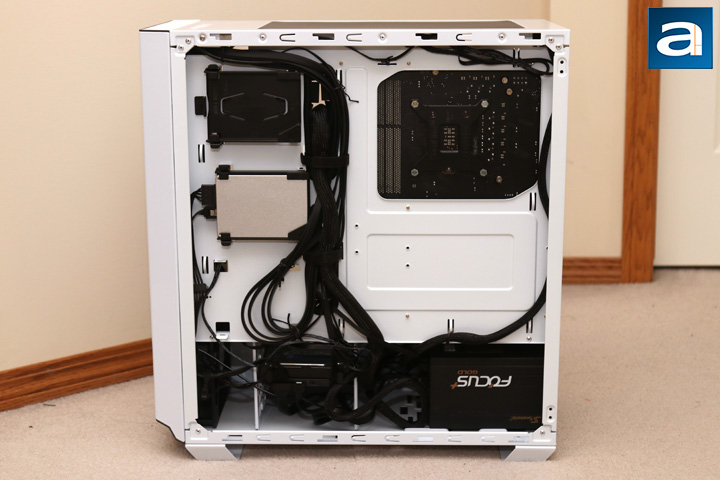
Routing all of the cables through the Primera PM02 required a bit of thinking, as there were less holes to work with. However, I think the final result is an improvement over my previous case installations. I did end up having to remove one of the 2.5 inch drive bays for some cables to rest here. There is a bit of a rat's nest at the bottom near the power supply, though I did try to clean it up as much as possible. SilverStone provided many cable tie points around the case, which is a big plus. The rubber grommets and Velcro straps also helped in removing havoc from the cables. I would have still liked to see a PWM fan hub as they included with the Primera PM01-RGB. Otherwise, installation was quite a breeze. There was ample space to work with and I had no difficulties with getting the side panels back in place. One thing I did like is the fact SilverStone used the same screws for everything that was not a thumbscrew. This meant I did not have to go through the bag and identify which screw was for what purpose. Otherwise, with all the cables plugged in, I slid the two side panels back onto the SilverStone Primera PM02 and booted the system to life.
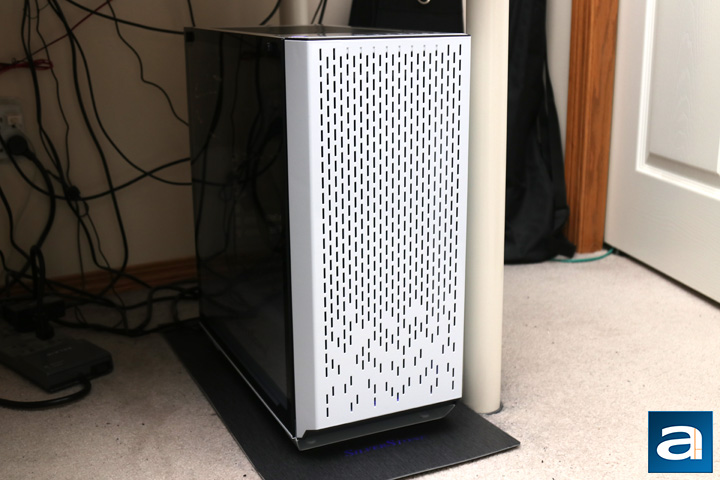
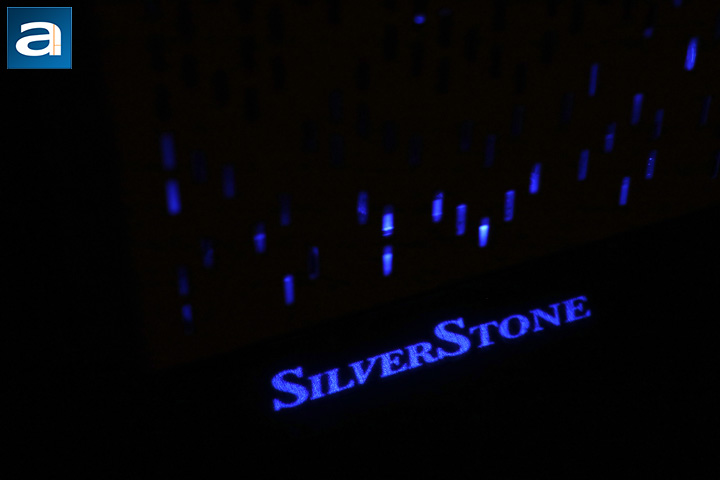
While you may have cases with their blaring RGB lights and loud fans, the SilverStone Primera PM02 takes a clean and subtle approach. Upon coming to life, the power button illuminates blue. Underneath the front panel is the blue LED projection system, which projects the SilverStone logo onto the ground. It definitely stands out and is a fresh way to implement branding, though I still would have liked to see an external on/off switch. This soft blue also illuminates the inside of the case slightly, though I doubt this was an intentional choice. According to the standard APH Networks sound scale, where 0 is silence and 10 is loud, the SilverStone Primera PM02 is a 3.5/10 on everyday usage. At full blast, the fans spin up to a lot more noticeable 6.0/10. Despite the more closed off front panel, air can definitely move freely through the case. Overall, I am still impressed at its sound performance, especially considering this is with four fans installed. The unrestricted airflow from the front panel fans is definitely good to see and the three intake fans do well to cool both the motherboard component and any drives in the cage underneath.
-----------------------------------------
Looking at my checklist of a computer case, I want one that has a nice visual appeal, is easy to build in, and can fit everything I put in it. When evaluating the SilverStone Primera PM02, it definitely checks off all of these requirements and more. This is not to say it is a perfect case, but it answers a lot of my must-haves. For one, the Primera PM02 is a shift to a simpler finish. Build quality is improved many times over, especially as we see a lot of metal and glass on this case. The improved tempered glass panel with the surrounding black border and metal frame makes handling the left panel an ease. The top panel finally includes a USB Type-C port too. Internally, the slightly smaller Primera allows for an open-air design, with ample spacing for extra cooling or larger components. When it comes to the installation, the SilverStone Primera PM02 has all the nice features, such as rubber grommets, cable tie points, and Velcro straps to keep everything in order. The tool-less drive cage and bays, as well as the interchangeable screws, also make for an easier installation. In terms of improvements, there are still some questions, including why they only had one hole on the power supply shroud and why they removed the PWM fan hub. Some users may complain about the lack of RGB lighting on a 2018 case, but I personally am fine with this omission. For $150 USD at press time, SilverStone is targeting users who are Primera-ly looking for a clean case. Do not get me wrong, the PM02 will leave a dent on your wallet. However, considering how many features it brings to the table, the SilverStone Primera PM02 is an excellent choice for an open, mid-tower chassis.
SilverStone provided this product to APH Networks for the purposes of evaluation.
APH Review Focus Summary:
8/10 means Definitely a very good product with drawbacks that are not likely going to matter to the end user.
7/10 means Great product with many advantages and certain insignificant drawbacks; but should be considered before purchasing.
-- Final APH Numeric Rating is 7.7/10
Please note that the APH Numeric Rating system is based off our proprietary guidelines in the Review Focus, and should not be compared to other sites.
The SilverStone Primera PM02 checks off all of my qualifications to make it a great girlfriend computer case.
Do you have any comments or questions about the SilverStone Primera PM02? Drop by our Forums. Registration is free, and it only takes a minute!
Page Index
1. Introduction, Packaging, Specifications
2. Physical Look - Outside
3. Physical Look - Inside
4. Installation and Conclusion


