Page 3 - Installation and Test Results

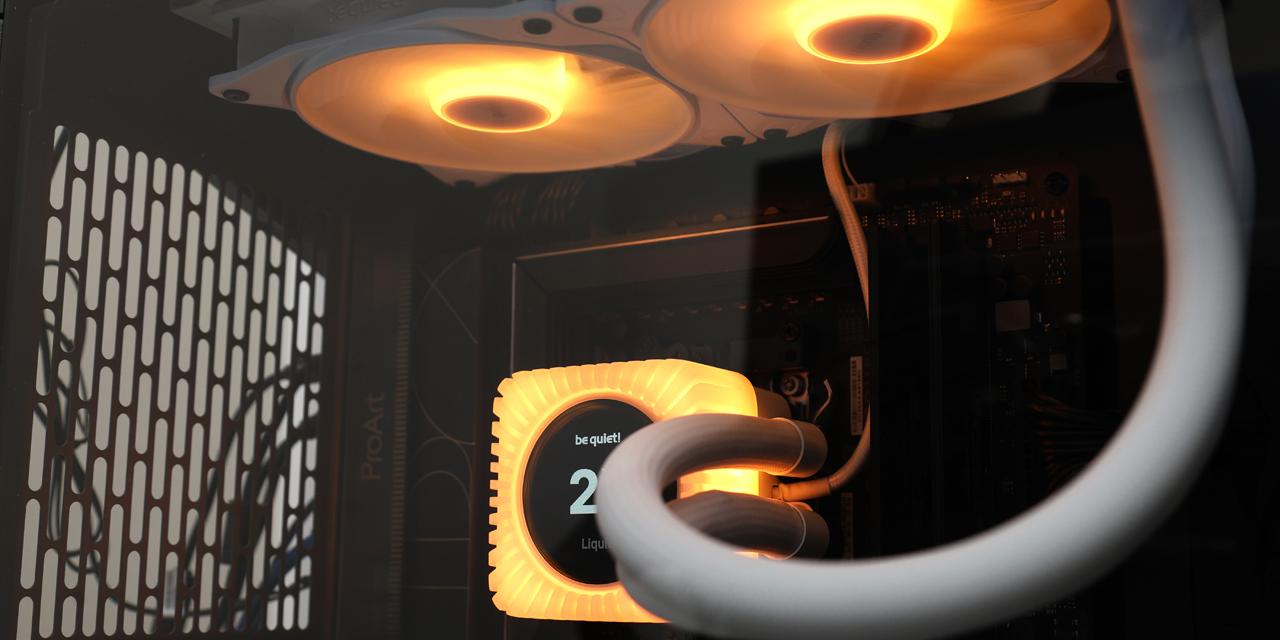
To start, you can either mount the water pump and block first or install the fan and radiator. I started by mounting the fans to the radiator and the radiator to the top of the case. Due to the tube length and material, I had more than enough cabling space in this chassis. With the pivoting connection point on the block, it was easy to reposition the pipes as needed and there was no extreme bending when I finished. It would be nice to see the manufacturer include white screws to fit in the rest of the color scheme, but this is a minor point.

Installation of the water block is simple for both AMD and Intel systems. For Intel, the primary difference is using an included backplate. For installation with an AMD CPU, you can use your backplate provided by your motherboard. Otherwise, you can mount the proper arms in the right location. There are two sets of holes on the mounting arms for AMD systems, with one marked for better cooling on the latest AMD processors. However, in my testing, I found there was only a minimal difference in the results between the two positions. Next, you can apply some of the included thermal paste on your processor, before mounting the water block in place. I would recommend alternating between the top and bottom screws in a stepwise manner so you can evenly attach the block in place.

With everything installed in place, one more thing you will need to do is connect the USB Type-C connector to the IO Controller. This color matching controller sits behind your motherboard and stays in place with internal magnets. Other than the USB Type-C port, there is a PWM header to connect to your motherboard for the PWM signal, a SATA header for power, and a USB 2.0 header for communication with IO Center. Overall, the installation process was straightforward. I appreciate the clean appearance of a single braided cable going to the back, rather than multiple cables coming out of the water block or radiator.

Our test configuration is as follows:
CPU: AMD Ryzen 7 9700X
Motherboard: ASUS ProArt X870E-Creator WiFi
RAM: Crucial Pro Overclocking DDR5-6400 2x16GB
Graphics: EVGA GeForce RTX 3070 Ti XC3 ULTRA GAMING
Chassis: Fractal Design Summit Ambience Blackout TG
Storage: Lexar Professional NM800 PRO 2TB, Kingston NV3 2TB
Power: be quiet! Straight Power 12 1200W
Operating System: Microsoft Windows 11 Pro (26H2)
Compared hardware:
- be quiet! Light Loop IO LCD 240mm White
- be quiet! Dark Rock 6
- be quiet! Dark Rock Elite
- be quiet! Dark Rock Pro 6
- Fractal Design Radius 240 RGB Black
- FSP MP7 Black
All tests were run on our custom-built computer to best reflect real life performance. The computer remained in the same location in the same room throughout all tests. The room temperature in our testing lab was around 23c. Each cooler was used with its stock thermal paste to rate its performance. All thermal pastes were given a proper amount of time for them to fully settle. The fans were connected to the motherboard's CPU 4-pin fan header. The test computer was turned on and left idling for at least one hour for the idling tests. High CPU load results were obtained using Prime95 Small FFT tests for a minimum of 10 minutes or until the temperature was deemed stable. Temperature results were measured with HWiNFO, which reports the CPU's integrated digital thermal sensor for maximum accuracy. Each temperature result was calculated by taking the maximum value of the cores inside the CPU.


After letting my computer idle for a while, I checked the temperature of the processor. From the first graph, you can see the be quiet! Light Loop IO LCD 240mm White idled at a temperature of 44.9c. This was the hottest result among the coolers. While this is not exactly a great starting ground, it still was within a degree of the other be quiet! coolers. It also is not a full representation of the cooler's capabilities. As such, I started up the Prime95 tests to reveal the Light Loop IO LCD 240mm White's abilities.
With sufficient time to load the processor, you can see how this AIO cooler performed with the peak sustained temperature recorded. The be quiet! Light Loop IO LCD 240mm White stabilized at 73.9c. This was the second coolest option, only behind the Dark Rock Pro 6. It was also 2.6c cooler than the other 240mm cooler we tested, the Fractal Design Radius 240 RGB. There was no thermal throttling during our testing, and all cores were able to reach and sustain their boost frequencies.

In addition to the cooling performance tests, we also quantitatively measured the performance of the cooler by measuring the air speed at the outlet. The purpose of these tests is to see the airflow and static pressure of the complete cooling solution. Higher airflow is better, as it indicates the cooler's capability in transferring heat from the metal radiator to the air.
At the output of the be quiet! Light Loop IO LCD 240mm White, located by the two fans, we measured a maximum airspeed of 9.7km/h or 6.0mph. Interestingly, this is tied with the other 240mm cooler at the lowest recorded speed of the bunch, although it is understandable given the other coolers use two fans with one stacked in front of the other. Radiators are generally denser than any of our heatsinks, so this likely affected the measured speed. Even so, the two Light Wings LX fans, at their maximum 2100RPM each, were clearly capable in moving air and providing cooling for the loop.

The noise produced by the be quiet! Light Loop IO LCD 240mm White is fitting for its name, as it produced the lowest noise outputs even at maximum speeds. Measuring from 50cm away, the cooler produced a maximum 41.9dBA of noise, ranking the lowest and quieter than the Fractal Design Radius 240 RGB.
From a subjective standpoint, on a scale of 0 to 10, where 0 is silent and 10 is loud, I would rate the be quiet! Light Loop IO LCD 240mm White at 3.5/10 on full load. The measured noise value is indeed the lowest, but in person, the Light Loop IO LCD also sounds quieter. The pump noise does not emit a high frequency noise, and everything from the fans to the liquid movement is kept to a low volume. I had to check multiple times to make sure everything was operating as expected under full load, and I was always impressed by its noise output. In everyday use, the be quiet! Light Loop IO LCD 240mm is even quieter with the reduced pump and fan speeds, and there are no other noises that are noticeable until it slightly ramps up. All in all, I was very impressed with this quiet operation.
Page Index
1. Introduction, Packaging, Specifications
2. A Closer Look - Hardware and Software
3. Installation and Test Results
4. Conclusion